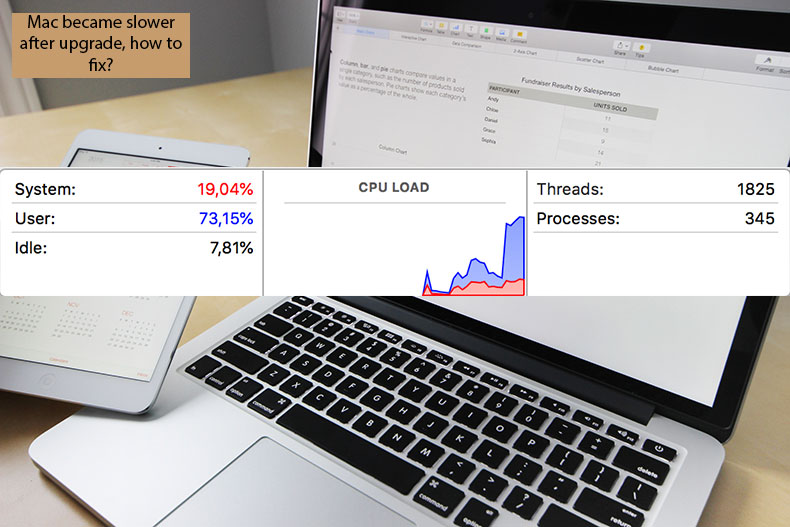
Mac Became Slower After Upgrade, How to Fix?
![]() Written by Karolina Peistariene on
Written by Karolina Peistariene on
Mac's Performance Decreased After Operating System Upgrade, How to Fix?
With macOS 10.13 High Sierra Apple improved video streaming, data management, and compatibility with various video games by increasing graphic performance. These improvements may seem attractive, but many people report problems encountered after the upgrade, most frequently reduced Mac performance.
Computers often become slower after updates since the new operating system requires more resources. To avoid this frustrating situation, you must adjust storage, login items, apps running in the background, etc. There might also be hardware issues: lack of physical memory (RAM) or broken or overheated components.
This article describes the most common situations that cause reduced Mac performance and the easiest solutions to restore computer speed.
Video showing How to Fix Decreased Mac Performance After System Upgrade?
Table of Contents:
- Introduction
- Your Mac compatibility with macOS High Sierra
- Create a hard drive backup via Time Machine
- Use Activity Monitor to diagnose your issues
- Enable macOS Sierra storage management tools
- Boot your Mac into Safe Mode
- Check login items
- Create a temporary administrator account
- Use Reduce Transparency and Reduce Motion
- Reset SMC and PRAM/NVRAM
- Video showing How to Fix Decreased Mac Performance After System Upgrade?
Your Mac compatibility with macOS High Sierra
First, if you are considering upgrading the operating system, ensure that your Mac is compatible with the new macOS High Sierra. Below is a list of minimum requirements for computers that will smoothly work with High Sierra.
- iMac (late 2009 and later)
- MacBook (Late 2009 and later)
- Mac Pro (2010 and later)
- Mac Mini (2010 and later)
- MacBook Air (2010 and later)
- MacBook Pro (2010 and later)
If you consider upgrading your system to High Sierra on a Mac that does not meet these requirements, you may face some issues such as poor performance or incorrectly working features. There is, however, an option for this situation: as well as an operating system upgrade, you might consider improving the hardware.
Physical memory and hard disk storage are crucial. So consider installing more RAM and switching the hard drive from a conventional Hard Disk Drive (HDD) to a Solid State Drive (SSD). Many users report that upgrading both operating systems and hardware resulted in noticeably improved performance.
Create a hard drive backup via Time Machine
Although uncommon, reduced Mac performance can indicate that hardware is not working correctly. Also, we recommend that you create backups regularly, especially if you are considering any adjustments to your system. The Apple operating system has a built-in backup feature called Time Machine, so you do not need third-party software to backup your hard drive.
1. To start creating backups, just plug in the external hard drive to the Mac (or Time Capsule), and it should automatically ask if you wish to backup your system to the connected drive.
2. If you ignore the prompt or do not appear, you can manually set Time Machine to use the connected external storage.
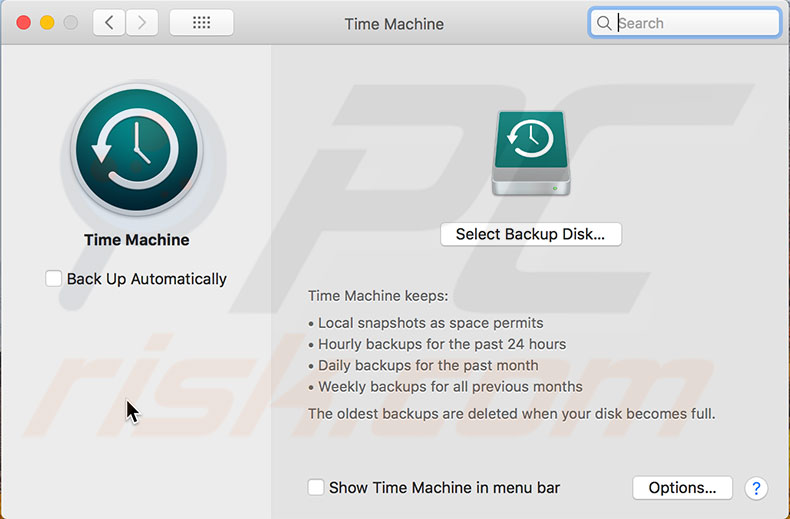
3. Open System Preferences and select Time Machine. Then click on Select Disk.
4. Choose the connected external disk (where the backups of your hard disk will be stored) and enable the option 'Back-Up Automatically'.
Automatic Time Machine Backups are stored hourly for the past 24 hours, daily for the past month, and weekly for all previous months.
If you have just configured Time Machine or wish to create a backup for a specific time, a 'Back Up Now' option immediately starts making a backup.
Use Activity Monitor to diagnose your issues
Activity Monitor is a useful built-in Mac tool that allows you to study the live status of the computer. It also displays information about resource usage for a particular process. Experienced Mac users keep the activity monitor in the dock and check it regularly since it provides all the computer's performance and life status.
1. Launch Activity Monitor via Spotlight by pressing the Command and Spacebar keyboard shortcut or via Finder by going to the Utilities folder under Applications.
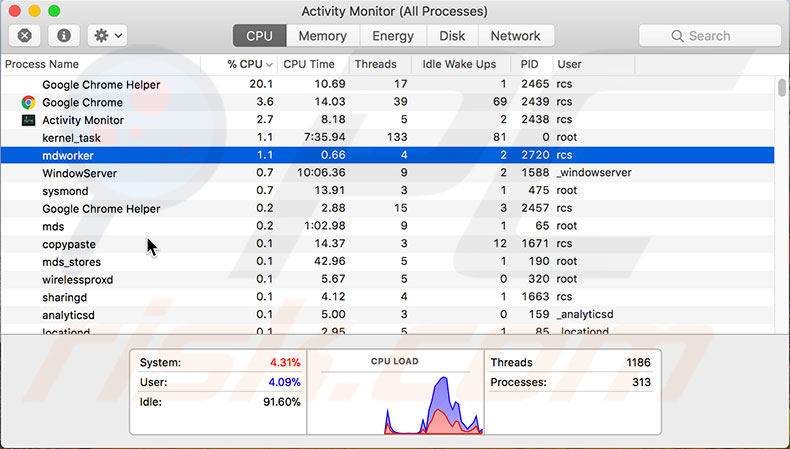
2. Once you see the main Activity Monitor window, click the CPU tab and click the %CPU field to sort processes to use resources.
3. Check the list to see if any apps are using significant CPU resources. If you find any third-party applications using many CPU resources, look for an alternative and compare CPU usage. You could consider using applications with fewer CPU resources or even delete and reinstall ones with high consumption.
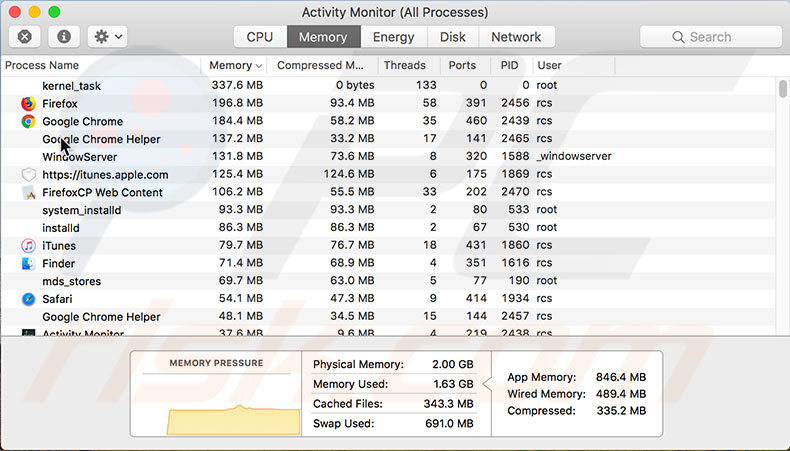
Similarly, you can diagnose applications and processes that consume extensive physical memory.
1. Start by clicking on the Memory tab, and then click the Memory field to sort results by memory utilization.
2. If you find troublesome applications, the solution is the same.
Try using a similar application or reinstall the problem application. Sometimes resetting an application solves resource consumption issues.
Another good indicator that your system has troubles with CPU or RAM usage is idle time, displayed at the bottom of the Activity Monitor. If you see that idle is less than 50%, the processor is struggling and is used most of the time, thus resulting in reduced Mac performance.
Enable macOS Sierra storage managements tools
Apple released many built-in optimizations and diagnostic tools with macOS Sierra.
1. To enable any of these features and click the Apple Logo, choose 'About this Mac..'.
2. Select the Storage tab and click the Manage button.
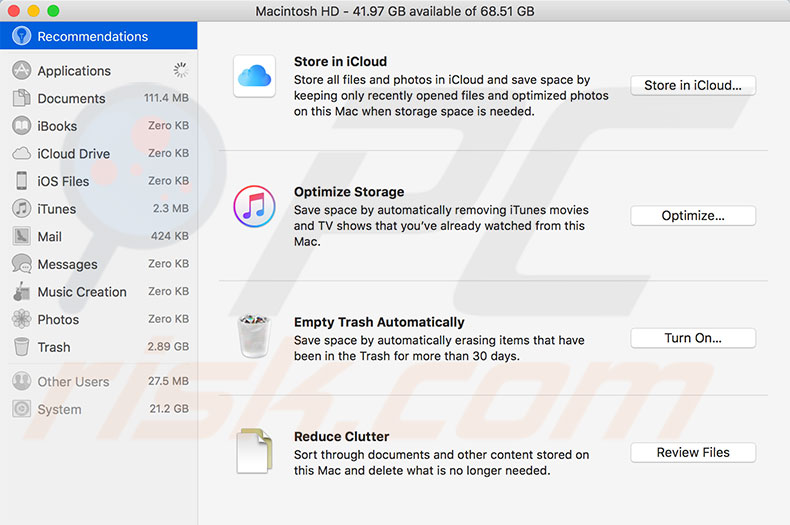
Store in iCloud and Optimize Storage tools
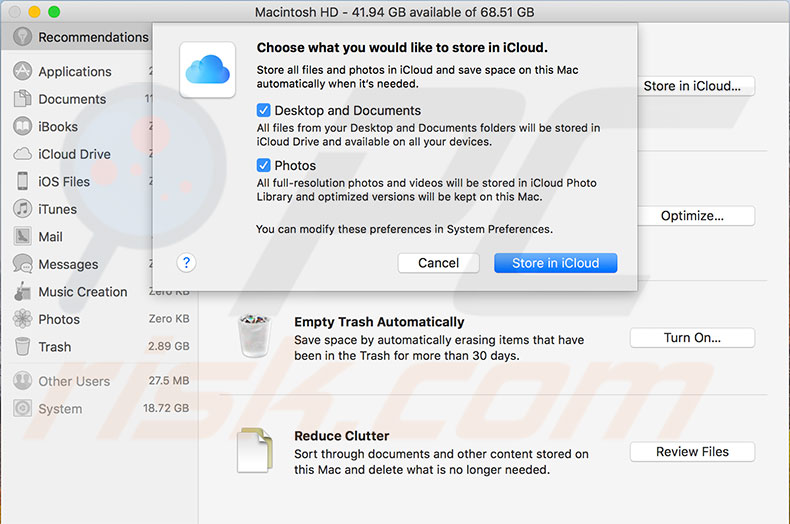
A crucial resource for good computer work is storage management. If the hard disk contains less than 10% of available free space, you might see various warnings and experience reduced performance. The Store (in iCloud) and Optimize Storage features save space by automatically moving files and photos to iCloud and other ways.
Files and media content will not be transferred to iCloud or removed until the hard drive contains more than 10% available free space.
Auto-Empty Trash
The Trash Can can often hide many junk files stored with the intention of deletion but were perhaps forgotten. Important files are not usually kept in Trash, so enabling 'Empty Trash Automatically' is a good solution since it removes files that have been present in the folder for more than 30 days.
If you are not sure if you need to enable this tool, open Trash and press the combination of Command and I. When files are selected (highlighted), check how much space all files within Trash consume.

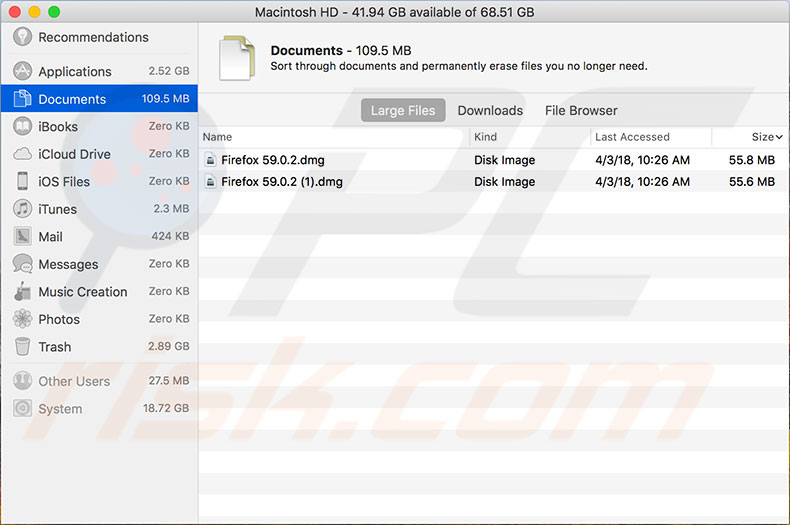
Reduce Clutter
This tool identifies large files - downloads and others - that might be redundant. When you click Review Files, a new window with a list of files and three tabs will appear. Check all categories and consider which files you no longer use and can be erased. You can delete files directly and permanently in some categories by clicking the 'x' beside the file name.
Boot the Mac into Safe Mode
Safe Mode or Safe Boot is an excellent way to test if any installed third-party applications affect the Mac performance. Also, Safe Mode helps when the system struggles to launch. Safe Mode repairs any directory issues, launches only required kernels, prevents startup items from booting automatically, and removes cache files, such as application and font caches.
1. To boot the Mac into Safe Mode, first shut down and then hold down the Shift key and turn it on. Once the Apple logo appears, you can release the shift button.
2. On the sign-in screen, you will see a Safe boot in the top right corner. If you signed in without noticing, you could check by opening System Information - next to Safe boot, Safe will be displayed.
3. You can exit Safe Mode by restarting the Mac in the usual way or press any key while the computer is booting.
Booting into Safe Mode often solves various issues related to reduced performance. If this step helped improve Mac performance, the problem was probably related to directory or cache files.

Check login items
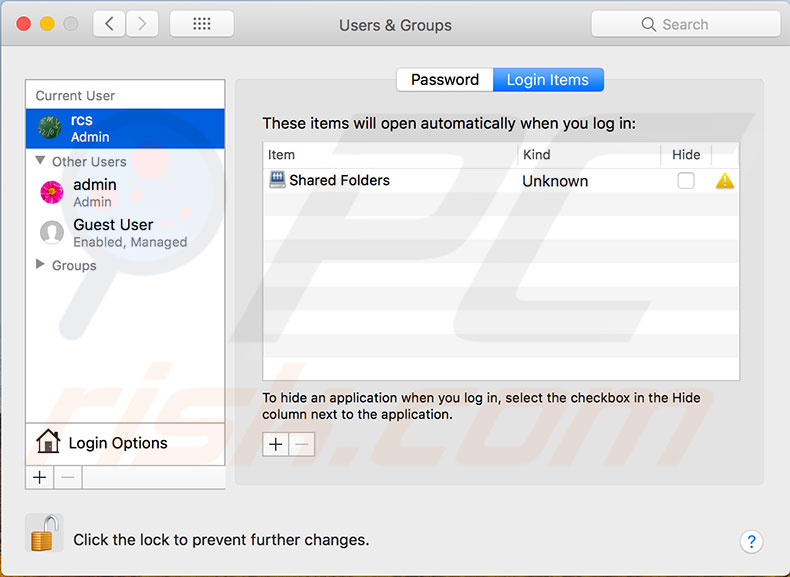
If the step above indicated that the problem might be related to login items, try disabling each of them. First, open System Preferences, and then choose Users & Groups. Select the account name you are using and click on Login Items. You will see a list of apps that will start automatically. In case you need all of them, make a list and save it somewhere before proceeding. Select all and click Remove. Then restart the Mac. If removing login items solved the performance issue, go back to the Users & Groups pane and add them back one by one, restarting the computer after each app is added. In this way, you can diagnose which applications cause performance issues.
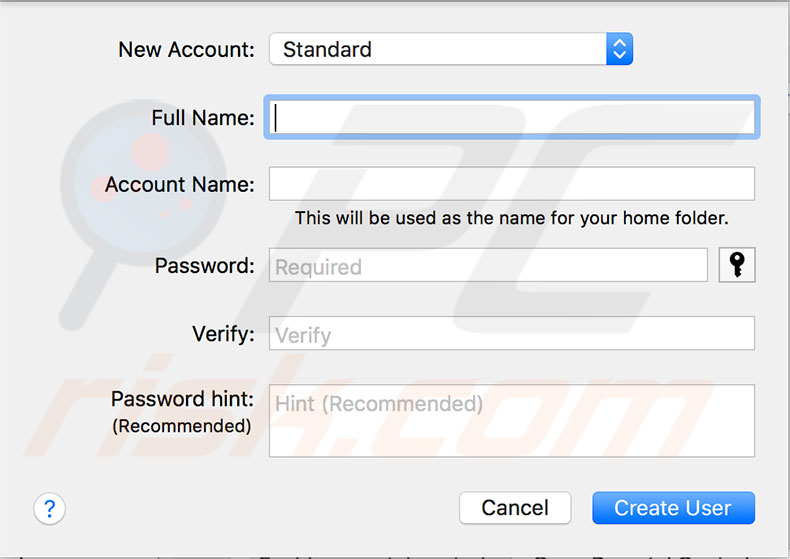
Create temporary administrator account
Creating a new temporary administrator user account is another easy method to troubleshoot performance issues. The new user will indicate if the problem is related to files and software or the hardware and operating system. To create another user account, open System Preferences and choose Users & Groups. Click the lock icon and confirm your permissions by entering the administrator account name and password. Then click the Add (+) button. Select Administrator from the drop-down menu in the new account window, complete the required details, such as name, account name, password, hint, etc., and click OK. Once you have created the new administrator account, log out of the existing account and sign in to the newly created one. Check Mac's performance in daily usage. If it works efficiently, there is a problem with the previous account's files and settings. Diagnostic tools might be able to solve corrupted account issues. If you wish to delete the newly created account, just log out, sign in with the main administrator account, go back to the Users & Groups pane, select the newly created account name, and click Remove.
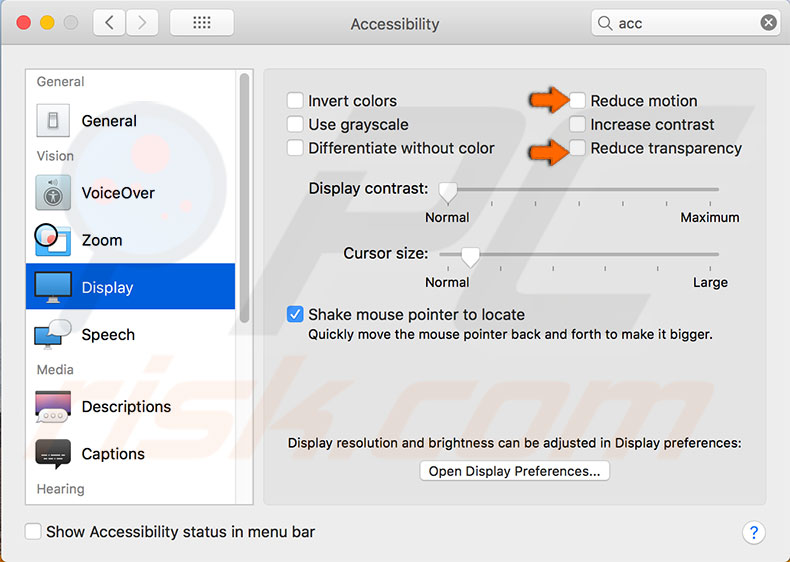
Use Reduce Transparency and Reduce Motion
Graphic effects, such as transparent windows and overlays, may seem attractive but often consume heavy system resources (which increase with each new window). Additionally, macOS includes many motion-type effects within Mission Control and elsewhere. If you are experiencing reduced performance, you can disable these effects and usually work. Open Mac's System Preferences, and then choose Accessibility. Select Display from the list on the left side of the window, look for options named Reduce motion and Reduce transparency, and enable the checkboxes next to them. Finally, check if performance has improved.
Reset SMC and PRAM/NVRAM
System Management Controller (SMC) and parameter RAM are responsible for various low-level functions, such as fans, lights, power, system volume, etc. Overtime (or sometimes after system updates), these might become corrupted. The solution, however, is simple. Reset these controllers, and Mac performance will improve.
Reset SMC on MacBook
Begin with shutting down the computer. Then disconnect the power cord and wait for about 15-20 seconds. Reattach the power cable, hold down the Shift, Option, Control, and Power button together for about 10 seconds. Then, release all keys and turn on the computer in a usual way. Details of how to reset SMC on other Mac computers can be found in this detailed guide.

Reset PRAM/NVRAM
Begin with shutting down the Mac. Turn on the computer. Immediately when you hear the startup chime, press and hold down Option, Command, P, and R together. Hold these buttons until the Mac restarts.


▼ Show Discussion