How to Defragment Mac's Hard Disk?
![]() Written by Karolina Peistariene on
Written by Karolina Peistariene on
How to Defragment Mac Computer's Hard Disk?
You may have experienced a decrease in Mac performance and might have come across a suggestion to 'defrag' the hard disk. You will not be able to find built-in defragmentation software on Mac computers - this is not an oversight by Apple, but simply because this company's operating systems are designed differently from Microsoft Windows and contain built-in protection against fragmentation.

In fact, Mac computer hard disks can have fragmented files. For example, during the update, upgrade, and installation, the uninstalling process can result in fragmentation. Therefore, defragmenting a Mac hard disk might be an option if you have not done this recently (within the past few years).
Note that defragmentation is advisable only with Hard Drive Disks (HDDs) - we strongly recommend that you do not perform this on Solid State Drives (SSDs). Although there is no defragmentation-related software within the Mac operating system, there are some alternatives that you will find in this article.
Table of Contents:
- Introduction
- What is defragmenting process?
- When you should consider defragmenting Mac's hard drive?
- Reduce drive holes manually
- Use third-party software to defrag your Mac's hard drive
What is the defragmenting process?
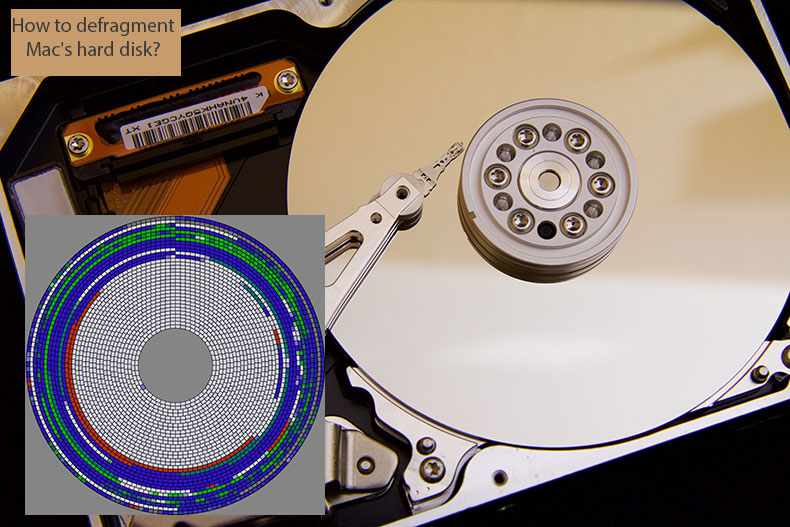
Hard disk drives (HDDs) are usually fast and efficient when information is written to the beginning (the outside edge) of the drive. It's the slowest when files are written to the end. New data is usually written to the beginning of the drive, thus slowly pushing older information toward the end (the inside).
Data does not come back outwards to fill available space, resulting in holes created by extensive read/write activity. Therefore, the read/write heads must move across large drive areas to load files or programs, thus resulting in reduced system performance. The defragmentation process moves data outwards to fill existing holes and reduce the volume of files stored toward the inside of the disk.
When you should consider defragmenting a Mac hard drive?
Macs are usually efficient in protecting the hard drive from fragmented files since Apple created a macOS to automatically perform defragmentation. This process is also known as Hot File Adaptive Clustering. The automatic processes can, however, fail.
This is rare, but in this case, you will need to manually perform defragmentation. This may be necessary when working with video/film, audio, and other media content since the hard drive will contain hundreds of files larger than 1GB.
Perform the defragmentation process only if you use a Hard Drive Disk (HDD), not a Solid State Drive (SSD), since SSDs have a limited number of write/read cycles. Defragmenting SSDs might affect flash memory and shorten disk life spans since, during the defragmentation process, the computer performs thousands of write operations.
Reduce drive holes manually
Rather than using software to perform defragmentation, you can try several simple steps that might have similar results:
1. To start, clean up the boot drive and reduce bulky files, such as movies and other video files.
Ensure that the space taken by these files is less than 50% of the drive size since the first half of drive storage is much faster than the second due to the huge volume of sectors. This, however, is only a question of performance - your computer will still work if the storage fills more than half the disk.
Bear in mind that a boot drive occupying more than 80% of the total disk capacity will work poorly or even not work at all.
2. Next, clone the boot drive onto a clean external drive - you can clone a drive with third-party software such as Carbon Copy Cloner or similar.
3. When you have created a clone of the Mac boot drive, restart the computer while holding down the Option key. This will invoke Startup Manager.
4. Select the external drive with the clone of the hard disk to check if everything is working correctly.
5. When you are confident that your cloned drive works appropriately, boot the Mac from an external drive and erase the internal boot partition or the complete drive using the Disk Utility. This process will clear all hard disk sectors.
If any bad sectors exist, you will be able to map them as unusable. In the future, no data will be written to them. We recommend that you prevent using bad sectors since they take much more time to read.
Note: do not move the hard drive when erasing or installing.
6. Finally, clone the information from the external hard drive back to the internal partition.
7. Once cloning has finished, use Disk Utility and launch First Aid (or Repair Permissions on earlier versions of the operating system) on both partitions. This will clean caches.
Use third-party software to defrag your Mac's hard drive
In rare cases where defragmenting is imperative, you can use third-party (paid) applications. You can also look for free alternatives on the Internet, but be aware that free software often comes with additional malicious software.
iDefrag is paid software that performs the defragmentation process and has recently been updated to be compatible with all versions of the Mac operating system. Download iDefrag from their website.

▼ Show Discussion