How to Fix "Automatic Repair couldn't repair your PC" on Windows 10
![]() Written by Rimvydas Iliavicius on
Written by Rimvydas Iliavicius on
How to Fix "Automatic Repair couldn't repair your PC" on Windows 10
If you receive the "Windows 10 Automatic Repair couldn't repair Your PC" error message in Windows, you are not alone since many other users report this problem and look for a solution. In this article, we show you how to fix it step-by-step.

Automatic Repair is a built-in troubleshooter that should help you fix the most common issues with your computer.
When a system running Windows 10 fails to boot, the Automatic Repair option attempts to repair Windows automatically. In most cases, it fixes various boot failures, but like any other program, it has limitations and often fails to work.
What Causes "Automatic Repair couldn't repair Your PC" Error?
Automatic Repair may fail due to errors, or corrupted/missing files, in your operating system installation that prevent Windows from starting correctly.
How to Fix "Automatic Repair couldn't repair Your PC" Error?
We have compiled a list of potential solutions for fixing the "Automatic Repair couldn't repair Your PC" error and getting Automatic Repair working again.
Video Showing How to Fix "Automatic Repair couldn't repair your PC" Error
Table of Contents:
- Introduction
- Disable Automatic Startup Repair
- Restore Windows Registry
- Rebuild BCD (Boot Configuration Data) and Repair MBR (Master Boot Record)
- Perform DISM Scan
- Disable Early Launch Anti-Malware Protection
- Check Your Hardware
- Video Showing How to Fix "Automatic Repair couldn't repair your PC" Error
Disable Automatic Startup Repair
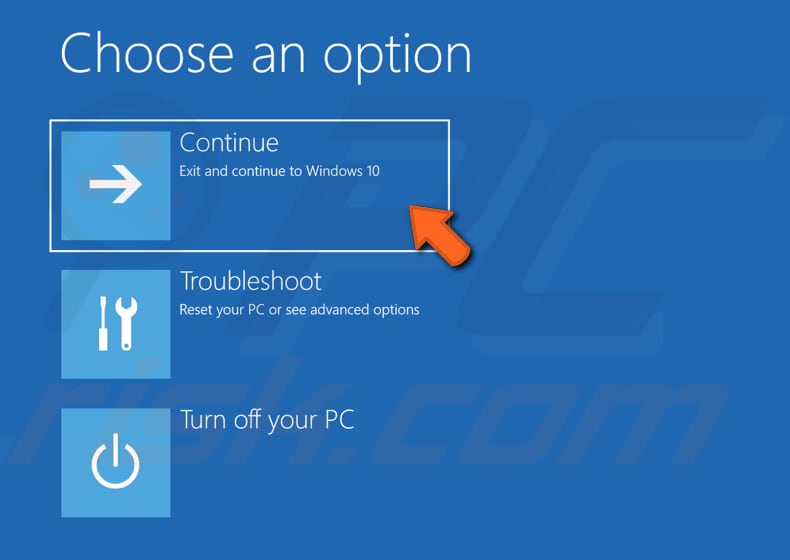
The simplest solution might be to turn off the "Automatic Startup Repair" feature. To do this, click "Troubleshoot" in the Automatic Repair menu.
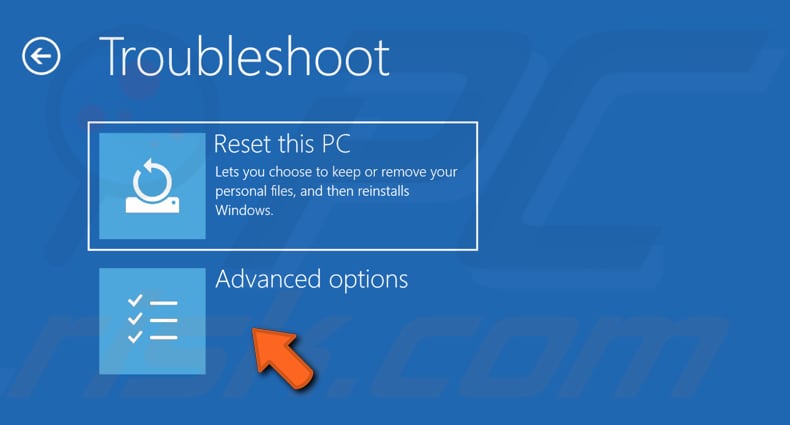
In the Troubleshoot window, click "Advanced options."
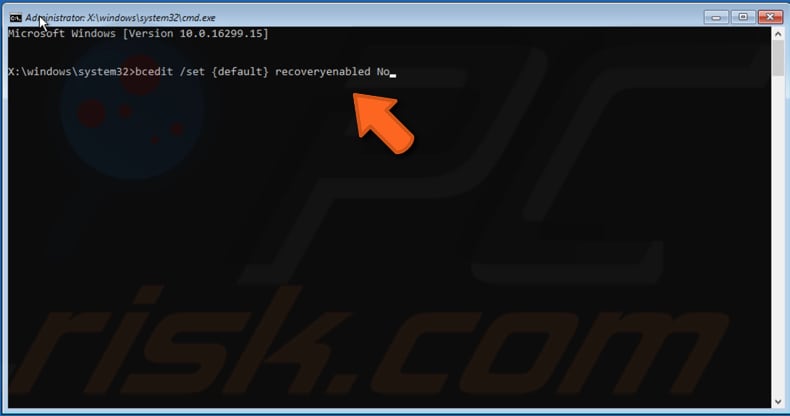
In Advanced options, click "Command Prompt."

In the Command Prompt window, type the following command: "bcdedit /set {default} recoveryenabled No" and press Enter on your keyboard to execute it. This command disables Automatic Startup Repair. You should now be able to access Windows 10 without being stuck on the blue Automatic Repair screen. Restart your computer and check if this helps.
Restore Windows Registry
A corrupted registry can cause the "Automatic repair couldn't repair your PC" problem. Windows Registry, usually referred to as 'the registry,' is a collection of databases of configuration settings in Microsoft Windows operating systems. It stores information and settings for software programs, hardware devices, user preferences, operating system configurations, etc.
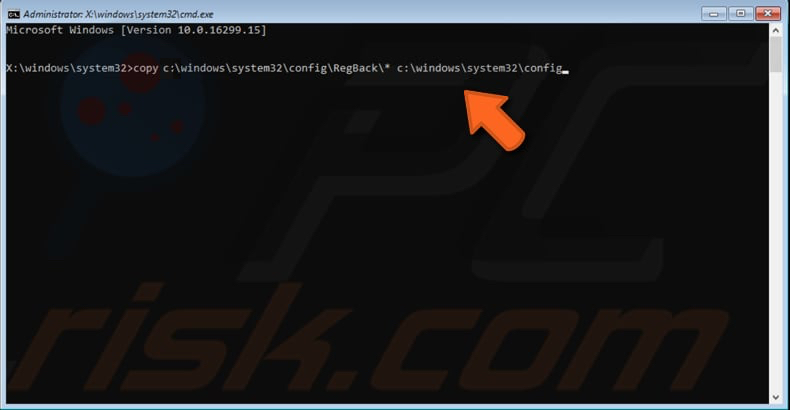
If this is the case, restore your registry from the RegBack directory using Command Prompt (as demonstrated in the first solution). Click "Troubleshoot" in the "Automatic Startup Repair" menu, and then select "Advanced options." Click "Command Prompt" to run it. When the Command Prompt window is open, type the following command: "copy c:\windows\system32\config\RegBack* c:windows\system32\config" and press Enter on your keyboard to proceed.
If Command Prompt asks you to overwrite files, type "All" and press Enter. Then, simply exit the Command Prompt window or type "exit" and press Enter. Restart your computer and check if this solution helps.
Rebuild BCD (Boot Configuration Data) and Repair MBR (Master Boot Record)
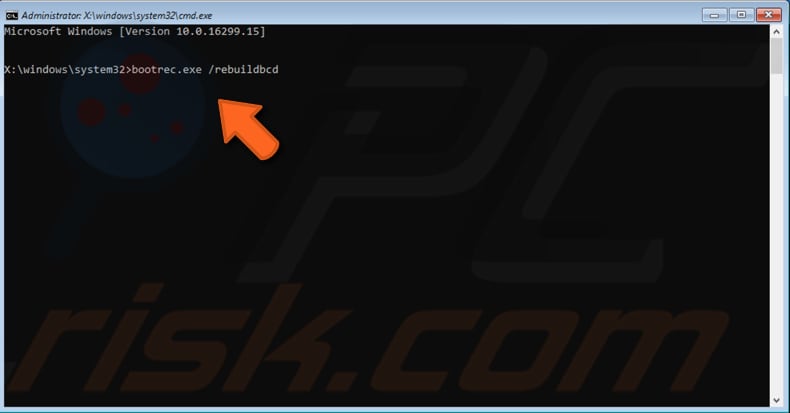
Boot Configuration Data (BCD) is a firmware-independent database for boot-time configuration data. It is used by Microsoft's new Windows Boot Manager and replaces the boot.ini used by NTLDR. To rebuild it, go to Command Prompt in Troubleshooting's "Advanced options." In the Command Prompt window, type these three commands, pressing Enter after each: "bootrec.exe /rebuildbcd"; "bootrec.exe /fixmbr", and; "bootrec.exe /fixboot". Note: you may be asked to enter your password when accessing Command Prompt.
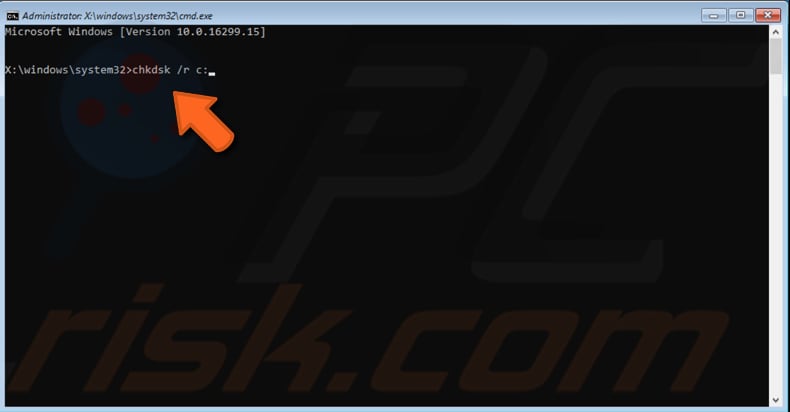
These commands will fix Boot Sector problems. Restart your computer after typing these commands to see if the problem is fixed, and you can start Windows normally. You may also want to try running Check Disk to check your disk for errors. Access Command Prompt again and type this command: "chkdsk /r c:." This will only check (and scan problems) for the C: drive. If you want to scan another drive, change the letter from "C:" to the letter of the alternative drive.
Perform DISM Scan
This scan also requires typing and executing commands in Command Prompt. You might need to perform a DISM scan to fix the "Automatic Repair couldn’t repair Your PC" problem. DISM stands for Deployment Image Servicing and Management and can repair and prepare Windows images, including the Windows Recovery Environment, Windows Setup, and Windows PE. Run DISM scans in Safe Mode since the error message we are dealing with is sometimes caused by a faulty driver or system file (which might not appear if you perform the DISM scan in normal boot mode).
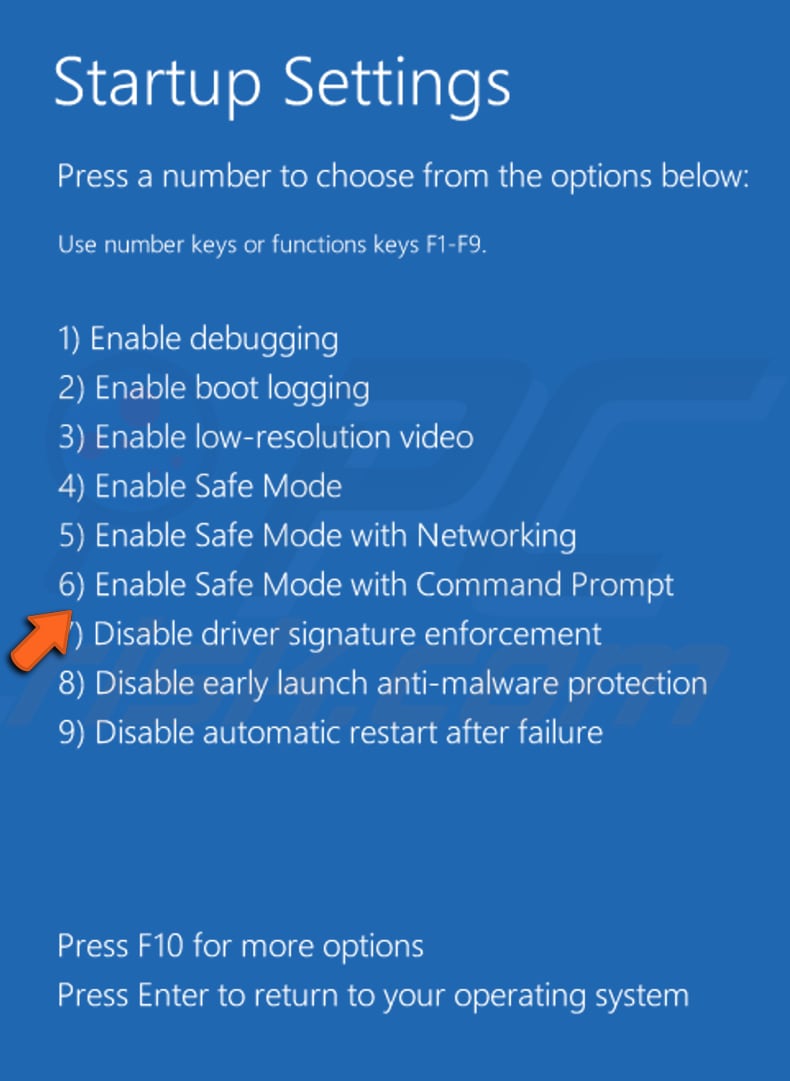
To run a DISM scan in Safe Mode, click "Troubleshoot" (as shown before) and select "Advanced options." In Advanced options, click "Startup Settings" and click "Restart." This will restart your computer and open Startup Settings once more. Choose option number "6" by clicking 6 or the F6 key on your keyboard.
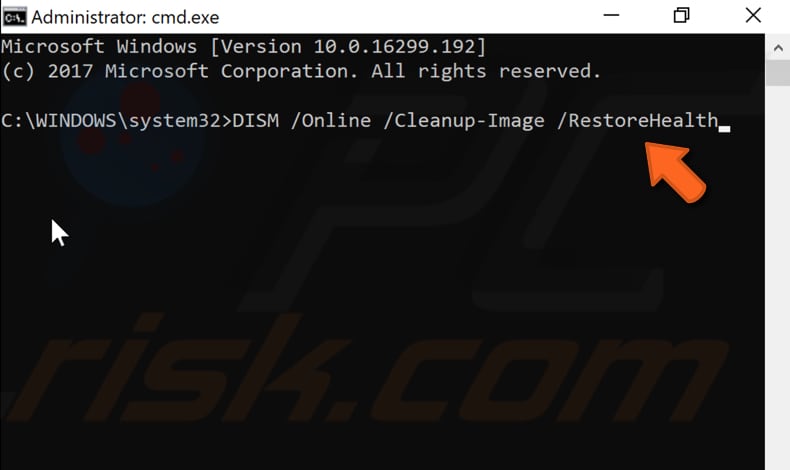
When Windows is loaded in Safe Mode, it will open Command Prompt for you. Type this command: "DISM /Online /Cleanup-Image /RestoreHealth" and press Enter to execute it. After running this scan, try to run an SCF scan by typing the "sfc/scannow" command, which will check your system for any missing or corrupted files.
Disable Early Launch Anti-Malware Protection
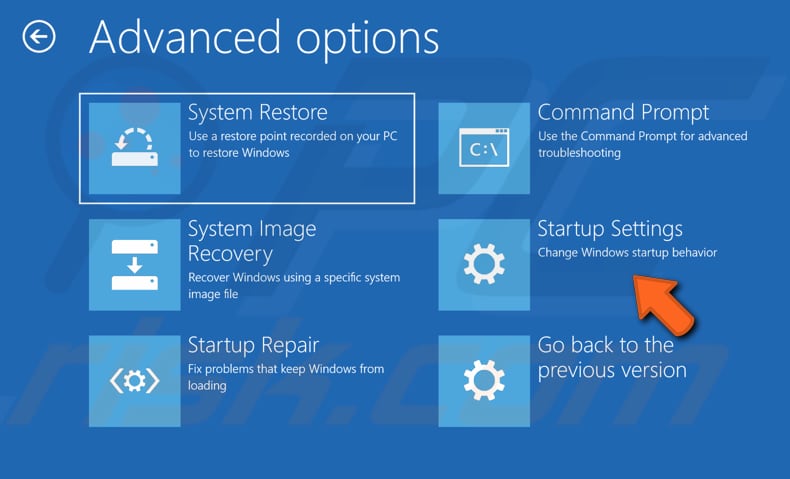
If the "Automatic Repair couldn’t repair Your PC" problem appeared after you installed an anti-malware program, the following solution should fix it. To disable early launch anti-malware protection, go to "Troubleshoot" and select "Advanced options." In the "Advanced options" menu, select "Startup Settings."
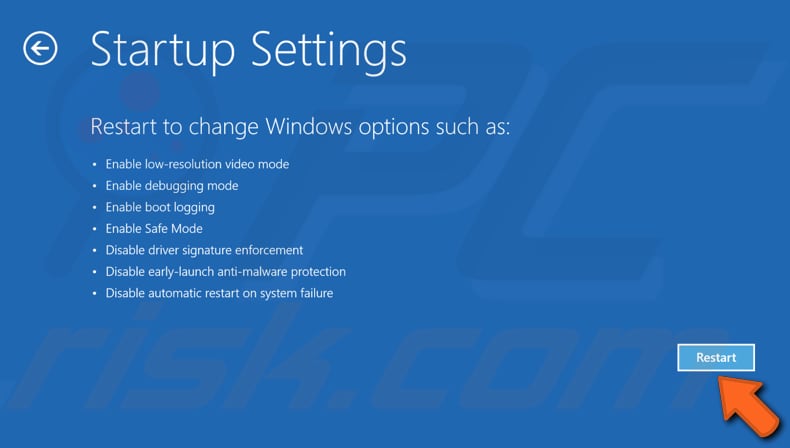
In the Startup Settings window, click "Restart" - this will restart your computer and open Startup Settings once more.
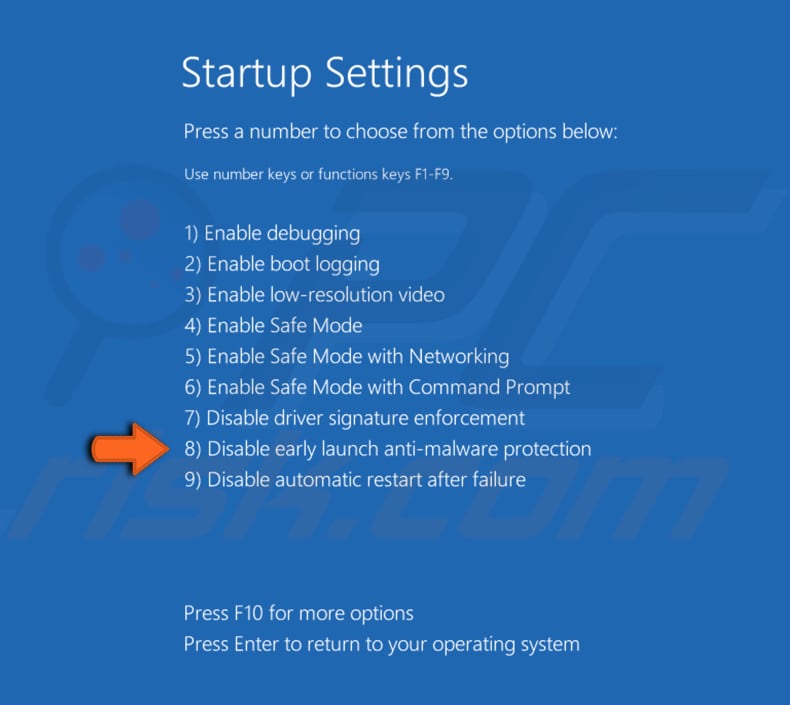
In Startup Settings, you will see a list of options. Select number 8 ("Disable early launch anti-malware protection") or use one of the function keys (in this case, the F8 key).
Check Your Hardware
Newly installed or additional hardware might cause the "Automatic Repair couldn’t repair Your PC" problem. Old hardware devices such as RAM (Random Access Memory) can also be a problem. Try disconnecting external devices from your computer (except the mouse and keyboard). If this resolves the problem, reconnect them to the computer individually to see which one is causing the problem.
If there is more than one RAM memory stick on your computer, try removing one, and start your computer. If this solution helps, you may have a faulty RAM stick, and you should consider replacing it.
If you have SSD or external HDD drives connected to your computer, try disconnecting them from your computer and check if this helps. If there are any faulty devices connected to your computer, consider replacing or repairing them.
In some cases, the “Automatic Repair couldn’t repair your PC” error can be caused by the hard drive, and the only solution is to reconnect it. Turn off your computer, unplug it from the power source, open your computer and disconnect your hard drive. Then, reconnect your hard drive, connect the power cable, and start the computer once more. In some cases, this solution has been known to fix the problem. Warning: this method might void your warranty (if it is not already outdated), so be sure before attempting it.
The “Automatic Repair couldn’t repair your PC” error is not a particularly easy problem to fix since it often requires commands to be entered via Command Prompt. Nevertheless, we hope that one of the solutions mentioned in this article helps you to fix it.

▼ Show Discussion