How to Create Windows 10 Bootable USB [5 Methods]
![]() Written by Rimvydas Iliavicius on
Written by Rimvydas Iliavicius on
How to Create a Bootable Windows 10 USB Drive
To Install or reinstall Windows 10 on a computer, you can use a bootable USB disk (USB flash drive). This tutorial shows several methods to create a bootable USB flash drive containing a Windows installation.

When you boot from a USB disk, the Windows installation is started after the computer is powered up. For Windows 11, you need more than 5 GB of free space. Therefore, an 8 GB USB drive is recommended for this purpose. Using a bootable USB flash drive, you can install a new copy of Windows, perform a clean installation, or reinstall Windows 10 or Windows 11.
Most options in this article (except Option 1) assume that you already have a Windows Disk Image (ISO file).
If you want to install Windows 11, you can get its ISO here: Download Windows 11 ISO file.
If you want to install Windows 10, you can get its ISO here: Download Windows 10 ISO file.
Video Showing How to Create a Bootable USB Drive in Windows
How to Create a Bootable Windows 10 USB Drive:
How to Create a Bootable Windows 7 USB Drive:
Table of Contents:
- Introduction
- Using Media Creation Tool
- Using Open Source Rufus Application
- Using Windows 7 USB/DVD Download Tool
- Using PowerShell
- Using Windows Assessment and Deployment Kit (WADK) To Create Windows PE Bootable USB Flash
- Video Showing How to Create a Bootable USB Flash Drive
Using Media Creation Tool
The Windows 10 Media Creation Tool option perhaps requires the least interaction with the user. On the other hand, it is not the fastest method, especially if you already have a Windows 10 or Windows 11 ISO file downloaded on your computer.
Usually, it takes around one hour to download and create a bootable USB flash drive with installation media using Media Creation Tool. If you are concerned about this duration, you may wish to consider other options in this article. Otherwise, follow the steps below to download and run Windows 10 Media Creation Tool.
Download Windows 10 Media Creation Tool from the Microsoft server by pressing the Download tool now button in the Create Windows 10 installation media paragraph.
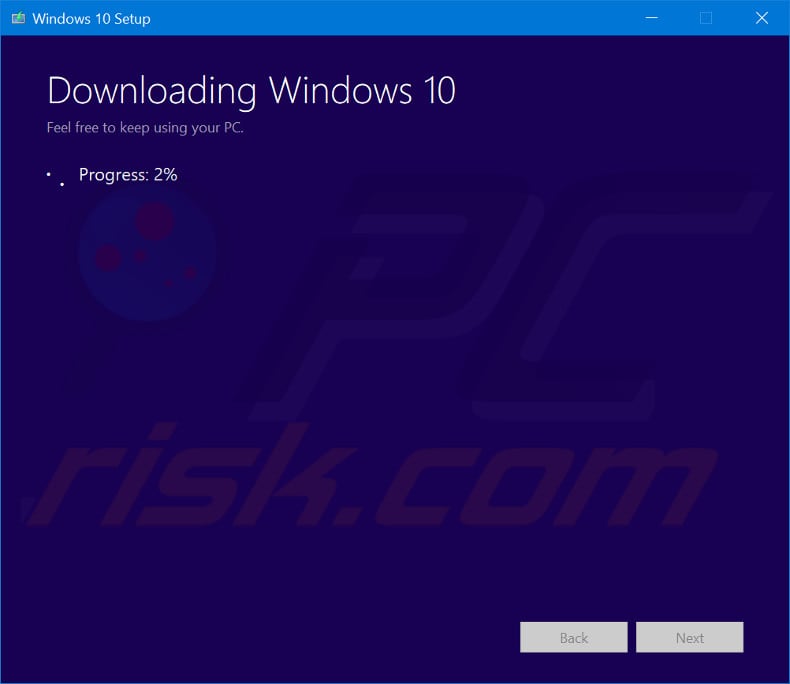
It may take up to 30 minutes to download Windows 10, depending on your Internet connection's throughput. After download, the Creating Windows 10 media process will be executed in the background for an additional 30 minutes.
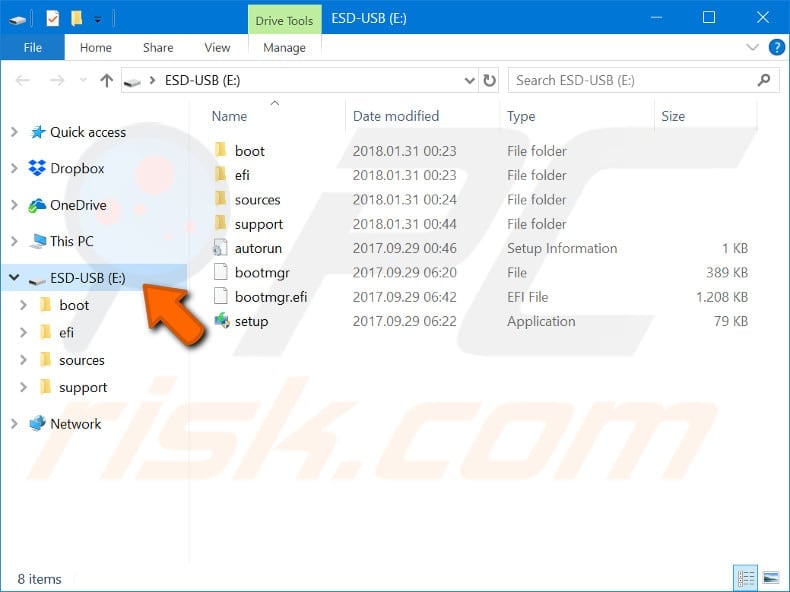
When the bootable USB is created, it will contain the folders and files shown in the screenshot below. The amount of disk space used on the bootable USB flash drive is around 5 GB.
Using Open Source Rufus Application
The Rufus application can create a bootable USB flash drive from a Windows 10 ISO file. Follow these steps:
First, obtain a Windows 10 ISO file. You can use Media Creation Tool to download a Windows 10 ISO file or download it from here.
Download the latest version of the Rufus executable file. This is an executable file that can be launched without installation.
Connect a USB flash drive with 8GB or more capacity that you wish to use as your USB flash bootable drive. In the example below, we use a 16 GB USB flash drive.
Run the Rufus application and select the settings as shown in the screenshot below:
Under Device options, select the USB flash drive you want to convert to Windows 10 bootable.
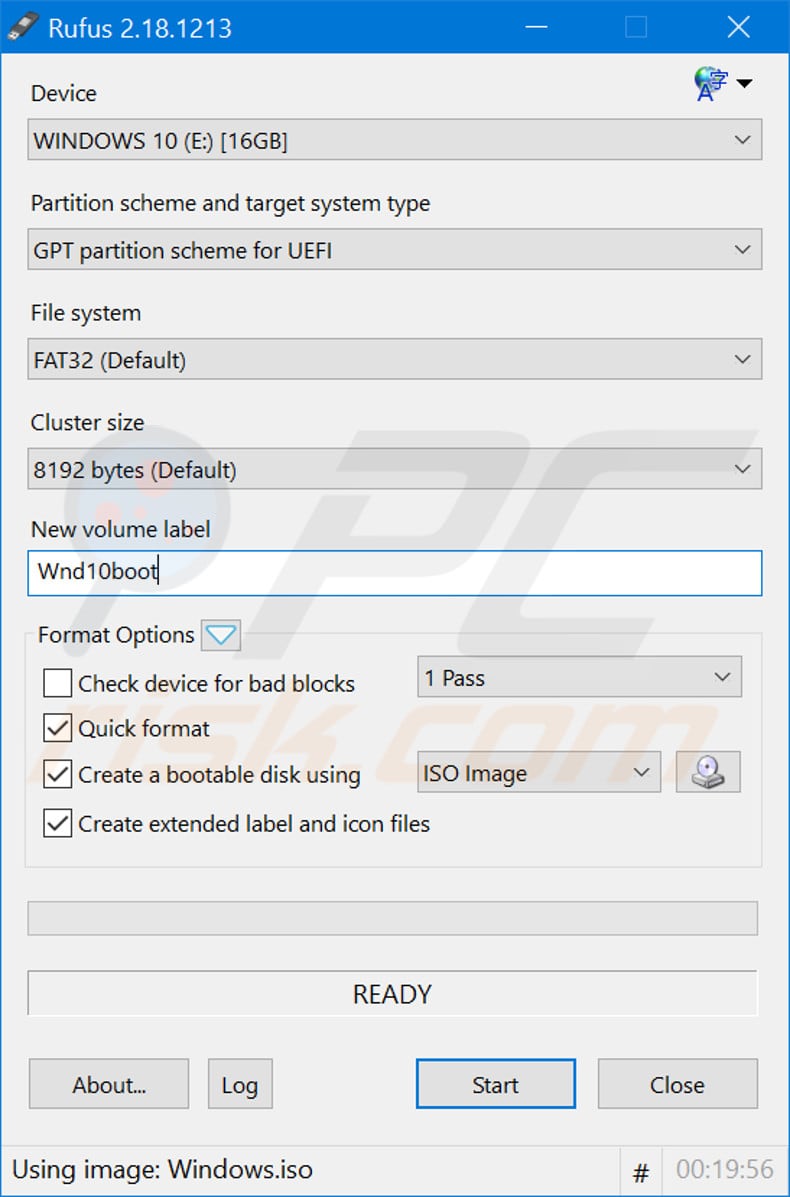
If you're going to use the bootable USB drive on the computer with UEFI or legacy BIOS under Partition scheme and target system type, select a GPT partition scheme for UEFI or MBR partition scheme for BIOS or UEFI, correspondingly.
The difference between UEFI and BIOS modes is explained in the article Boot to UEFI Mode or legacy BIOS mode.
Leave the Cluster size at its default setting. You may change the label of the USB bootable drive if you wish under New volume label. Click the disk icon in the Rufus window. In the Open dialog, point to the Windows 10 ISO file.

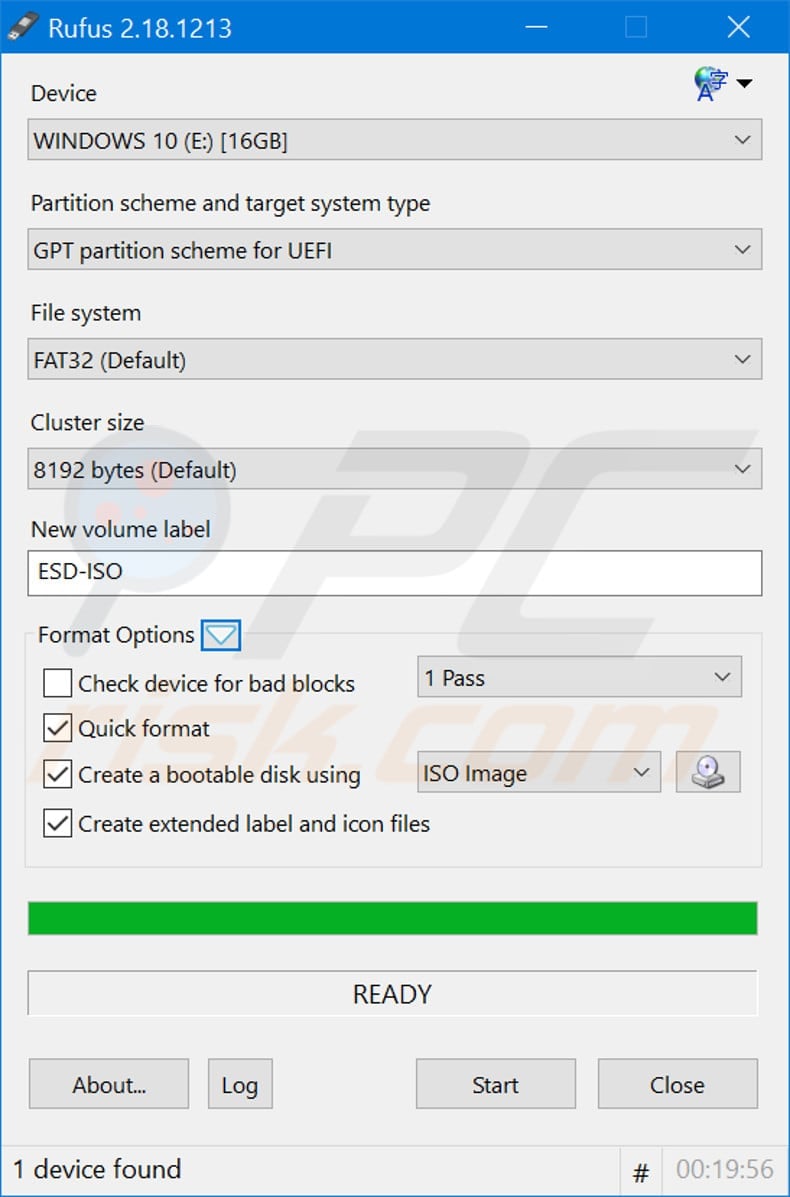
It takes Rufus about 20 minutes to a create bootable Windows 10 USB flash drive from an ISO file. At the end of its operation, the status line will display "READY". Click the Close button to exit the Rufus application.
Using Windows 7 USB/DVD Download Tool
If you run Windows 7 and need to create a bootable USB flash drive for Windows 10, you have an option to use the Windows 7 USB/DVD Download Tool.
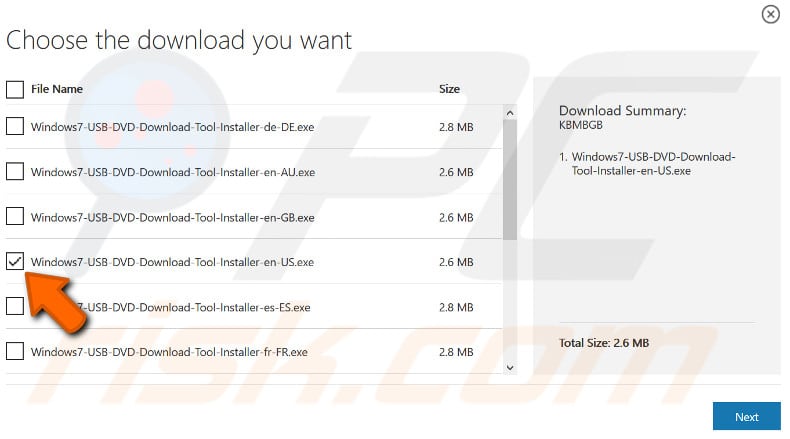
First, download the Windows 7 USB/DVD Download Tool. In the "Choose the download you want" table, mark the installer with your preferred language and click the "Next" button.
Install the Windows 7 USB/DVD Download Tool on your machine and follow the video below for guidance on how to create a bootable USB flash drive when you have a Windows 10 ISO file already downloaded on your computer.
Using PowerShell
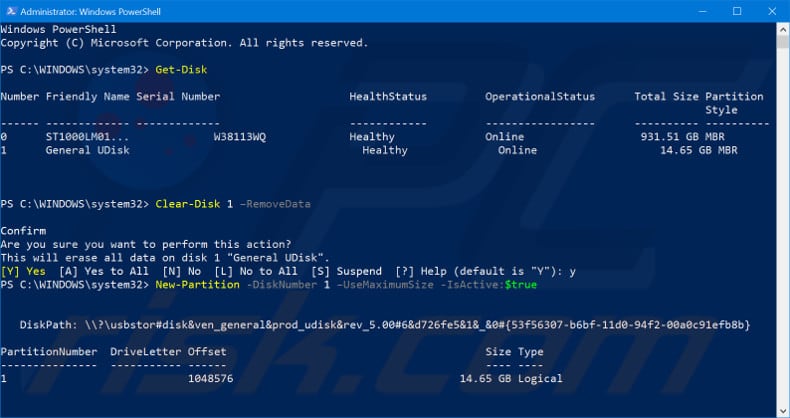
Press Start and type "power". Select the Windows PowerShell Desktop app and launch it as administrator. Plugin your USB Flash drive. In the PowerShell prompt, type the command "Get-Disk".
Find the number on your USB Flash drive. In the example screenshot below, it is Disk Number 1 called General UDisk with 14.65 GB. In your case, locate the number of your USB Flash drive. Be very careful - do not confuse the USB flash drive with the HDD on which the Windows system is installed.
In our example, the USB flash drive Disk Number is 1. Execute "Clear-Disk 1 –RemoveData" command in the PowerShell environment. Confirm "Y" to confirm that you wish to clear the USB flash drive.
After clearing the USB drive, create a new partition and set it active by executing the command: "New-Partition -DiskNumber 1 –UseMaximumSize -IsActive:$true". Up to this point, the PowerShell environment should appear as in the screenshot below.
To continue, you need to know the volume letter of the created partition. Type the command "Get-Volume". As shown in the screenshot below, the new partition will probably not yet have a letter assigned to it.
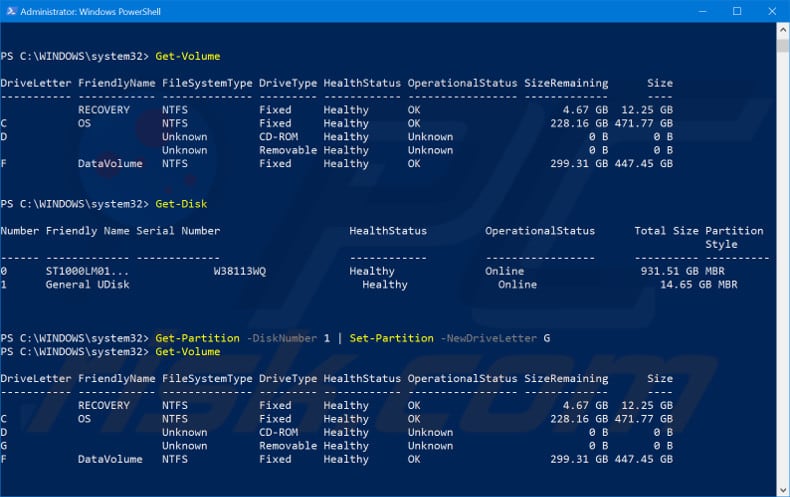
If the drive letter is not assigned to your removable USB drive, use commands to assign a letter (for example, the letter G). It is good practice to verify once again the number of disks before setting a new drive letter. Therefore, follow the sequence of two commands:
"Get-Disk" and "Get-Partition -DiskNumber 1 | Set-Partition -NewDriveLetter G"
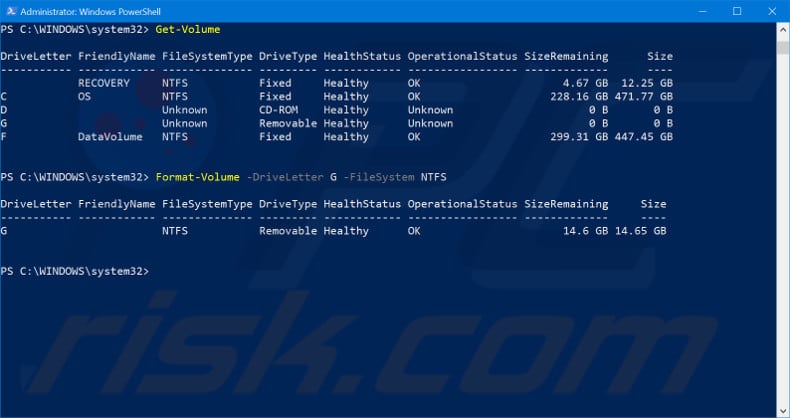
After this last command execution, do not respond to the pop-up Windows dialog offering to format the disk in drive G: Instead, continue by entering a command at the PowerShell command prompt to perform disk G: formatting:
"Format-Volume -DriveLetter G -FileSystem NTFS"
Stand by until PowerShell completes formatting. If formatting succeeds, you can exit the PowerShell environment by typing exit at the command prompt.
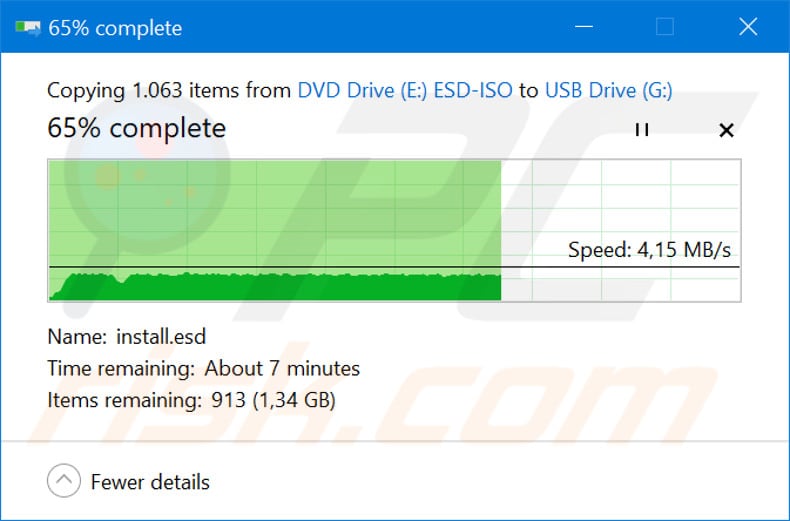
You now need to move the Windows 10 ISO disk to the newly-prepared USB flash drive G: - open Windows Explorer, go to the Windows 10 ISO file, right-click the mouse and select "Mount".
Then, copy the entire content of the mounted drive and paste it to the formatted USB flash drive G: The copying process could take around 20 minutes.
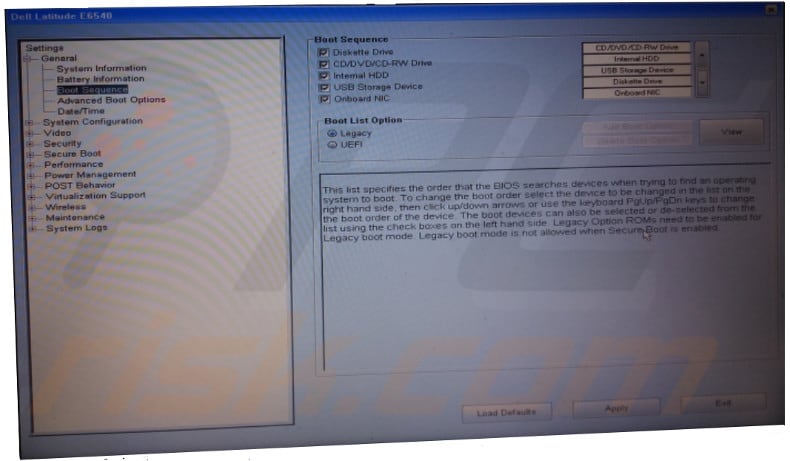
You now have a bootable USB flash drive that you can test by restarting your computer and changing the BIOS settings to boot using Legacy mode or UEFI mode. The new bootable USB flash drive should be suitable for both options.
Remember to enter BIOS set-up (press F2, F8, F10, or similar keys, depending on your computer or notebook specification) before Windows start. i.e., immediately after a Windows Restart or computer power on.
In the BIOS set-up screen, navigate to the Boot sequence menu item and choose Legacy mode or UEFI mode. If in Legacy mode, remember to configure the USB storage device to be ahead of the HDD in the boot sequence. The external appearance of the BIOS is strongly dependent on the computer manufacturer.
Using Windows Assessment and Deployment Kit (WADK) to Create Windows PE Bootable USB Flash
Windows Preinstallation Environment (WinPE) is a very small variant of the Windows system (and requires only about 700MB on your USB flash drive), which provides a command prompt.
To read more about WinPE, visit the Microsoft page Windows PE (WinPE). Among other applications, WinPE provides a lightweight environment for Windows 10 installation. Therefore, we will show how to create a bootable USB flash drive containing WinPE.
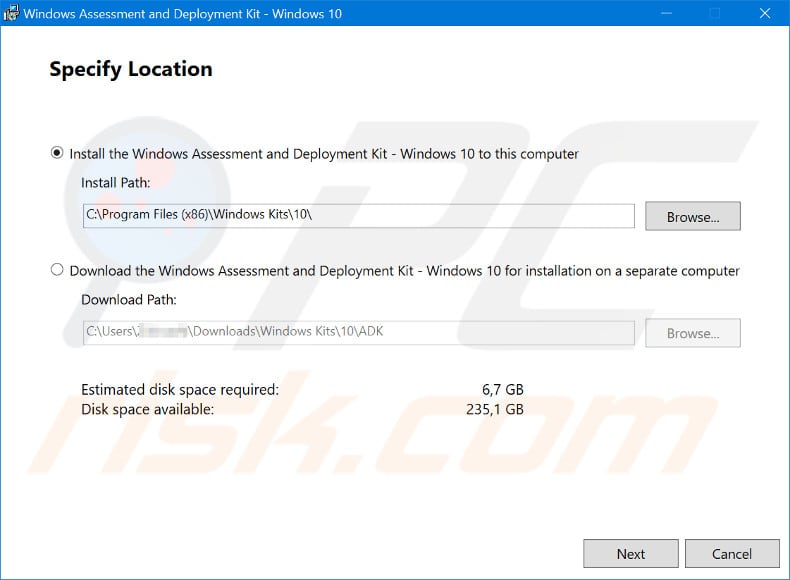
WinPE is available within Windows Assessment and Deployment Kit (WADK). Download it from the Download and install the Windows ADK web page according to your Windows 10 system version.
Start the installation by running adksetup.exe and follow the instructions below.
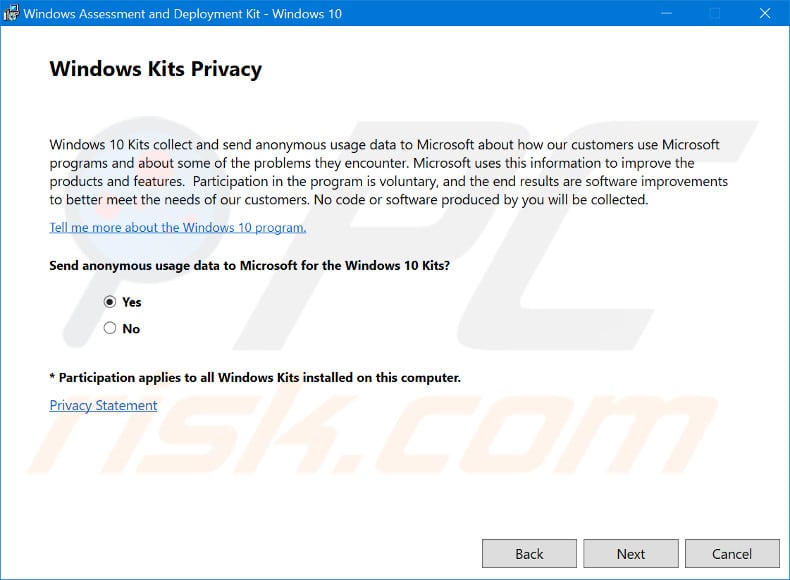
Choose whether you agree to send anonymous usage data to Microsoft (it is at your discretion and does not affect the following steps). Also, accept the license agreement.
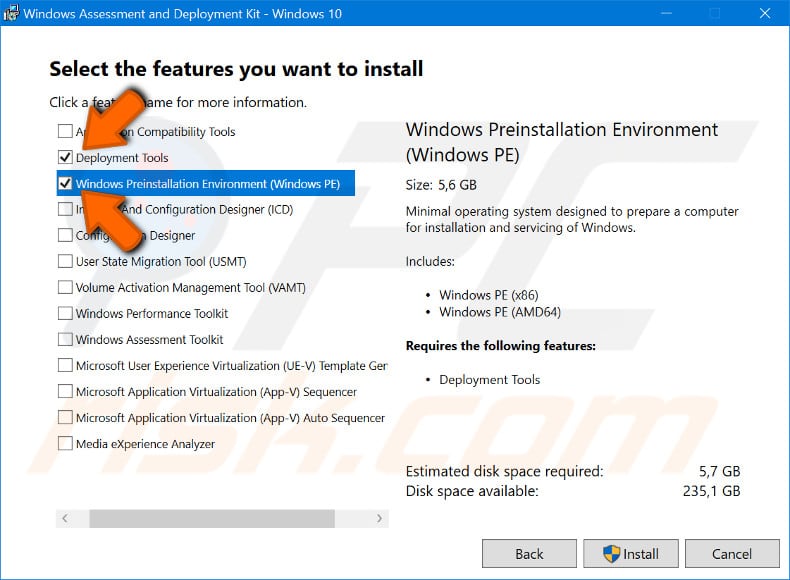
In the features selection window, mark two items: "Deployment and Imaging Tools Environment" and "Windows Preinstallation Environment". Press the Install button.
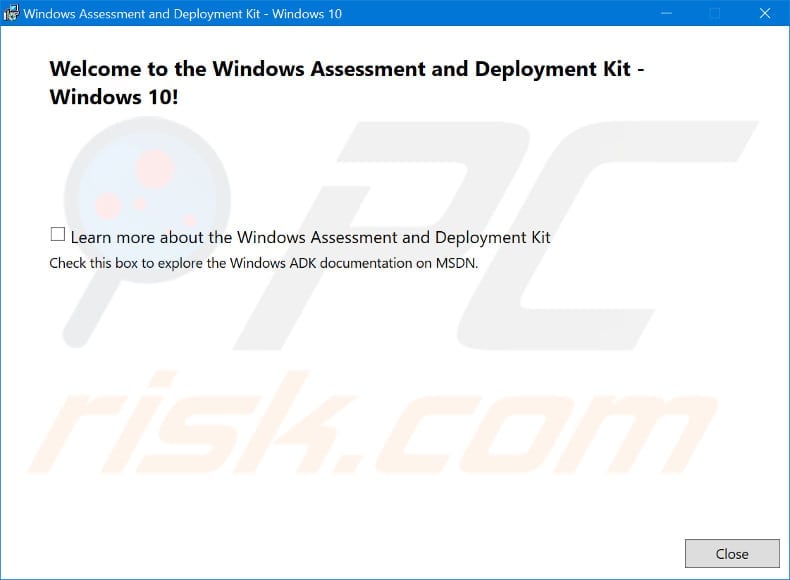
When installation has finished, close the last Welcome window by clicking the "Close" button.
You must now prepare your USB flash drive for WinPE. It is good practice to create a small separate FAT32 partition for WinPE and leave the remaining flash volume for other user data or a complete Windows 10 installation.
To do this, we can use the diskpart utility from Windows Command prompt. Remember to run Command prompt As Administrator. In the Command prompt, start diskpart by typing "diskpart" and pressing Enter. Plugin your USB flash drive and execute the command "list disk".
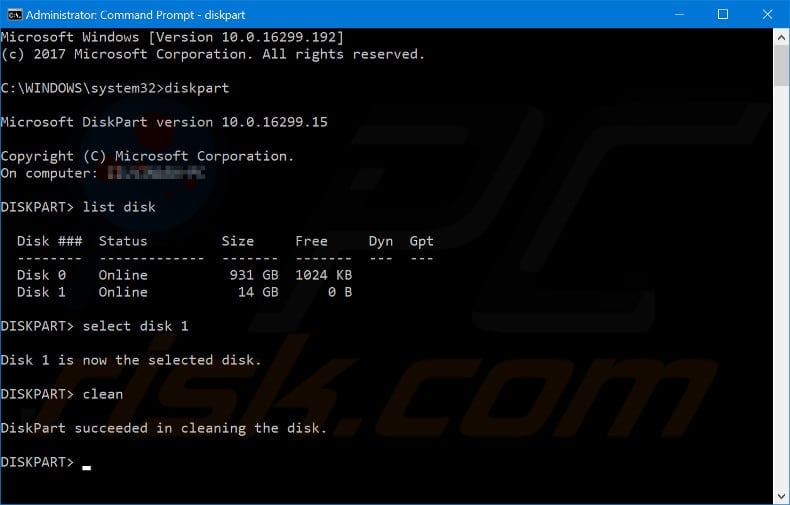
Recognize your USB flash (in this example, it is Disk 1 with 14 GB size) and execute the following two commands. Substitute # with the number of your USB flash drive. BE VERY CAREFUL not to confuse the disk number with your system hard drive number - cleaning it will completely destroy your current Windows system.
"select disk #"
"clean"
See the screenshot above to see how the window should look up to this point. Next, we will create a small FAT32 2GB partition, format it, and assign it the letter P: by executing the following commands:
"create partition primary size=2000"
"format quick fs=fat32 label="Windows PE"
"assign letter=P"
"active"
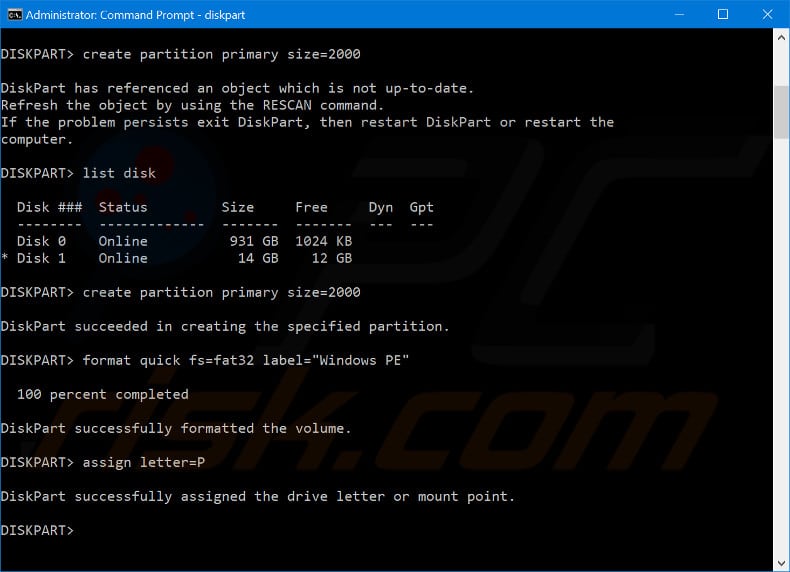
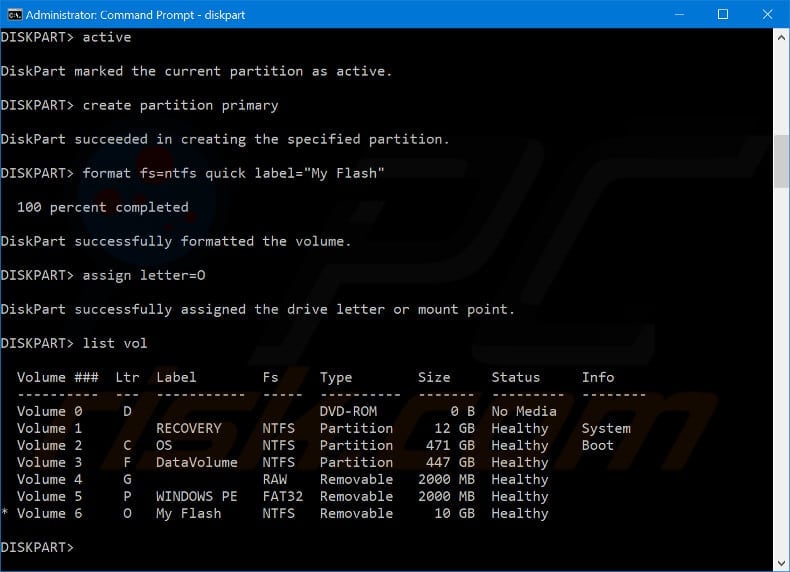
If all is as expected (check the screenshot above), we can create and format the remaining partition by executing four more commands.
"create partition primary"
"formatfs=ntfs quick label="Other files""
"assign letter=O"
"list vol"
The last command displays a list of volumes currently available on your system. In our example, Volume 5 and Volume 6 have just been created. We will use Volume 5 (letter P: ) for the bootable WinPE.
Exit the diskpart utility by typing exit and quit Command prompt using the "exit" command. Start the Deployment and Imaging Tools Environment as Administrator. At the prompt, type the command "copype amd64 C:\WinPE_amd64".
This will move Windows PE files to the specified folder of your choice, "C:\WinPE_amd64". Using Windows Explorer, copy the entire contents of the folder "C:\WinPE_amd64\media\*.*" (including all hidden and system files) to USB flash P: You can now test booting to Windows PE from the bootable USB drive.
Booting is possible in both Legacy and UEFI modes. As explained in Option 4, remember to configure the booting sequence to start from the USB storage device rather than from the HDD.

▼ Show Discussion