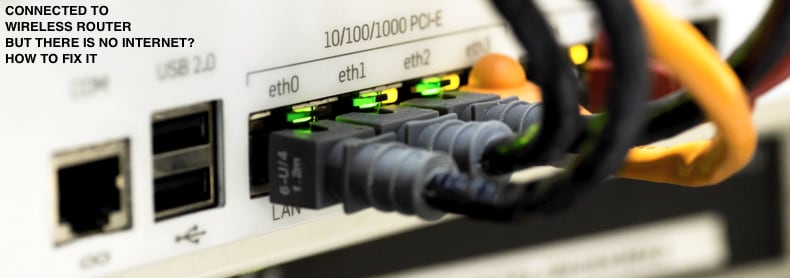
FIX: Connected to Wireless Router but There Is No Internet
![]() Written by Rimvydas Iliavicius on
Written by Rimvydas Iliavicius on
Connected to Wireless Router but There Is No Internet Access? Here Is How to Fix It
If your PC is connected to a WiFi router, but there's no Internet, read the instructions below to fix that.
If you have another computer without Internet connection problems, clearly there are issues with the original computer and not the Internet connection itself.
To fix this problem, you might need to update the network drivers, reset TCP/IP, run Windows troubleshooter, check Windows proxy settings, etc. There is no single solution to this problem since the causes vary on different computers and different networks.
In this article, we describe several possible solutions to the problem of connecting to the wireless router but not the Internet. First, we recommend that you restart the computer and router and see if this helps. If not, try the solutions below.
Video Showing How to Repair Your Internet Connection When Connected to a Wireless Router:
Table of Contents:
- Introduction
- Run Windows Troubleshooter
- Update Your Network Adapter Driver
- Reset TCP/IP
- Flush DNS
- Obtain IP and DNS Addresses Automatically
- Reset Your Router
- Reset Your Network
- Video Showing How to Repair Your Internet Connection When Connected to a Wireless Router
Run Windows Troubleshooter
Windows 10 includes several troubleshooters designed to diagnose and automatically fix various computer problems. The built-in network troubleshooter can solve, or at least address, most network-related issues.
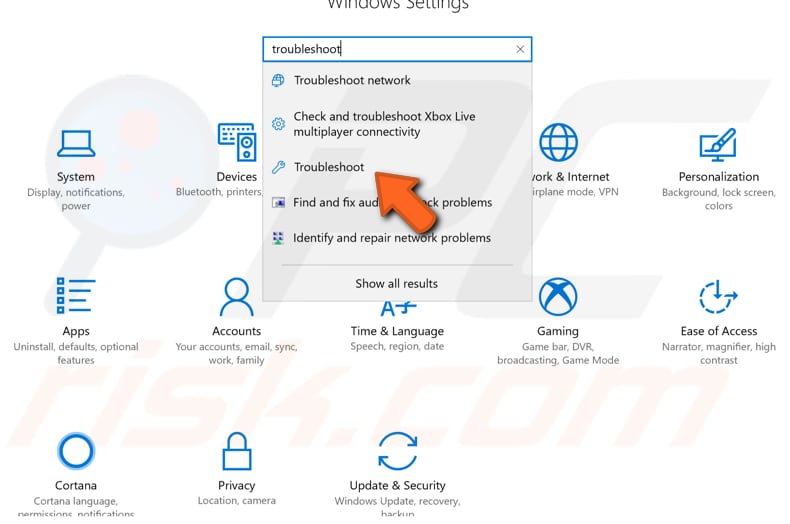
To start troubleshooting, go to Settings and type "troubleshoot", select "Troubleshoot" from the list.
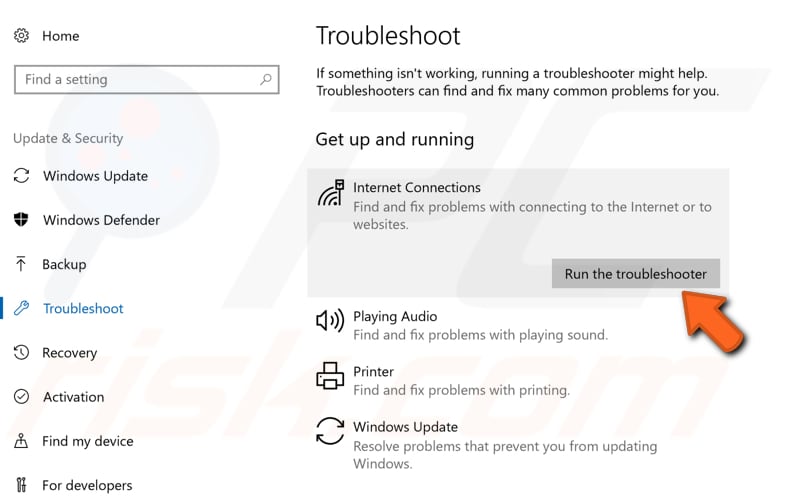
Find "Internet Connections" under "Get up and running", and select it, click "Run the troubleshooter", and follow the instructions. See if the Windows Update Troubleshooter solves the Internet connection problem.
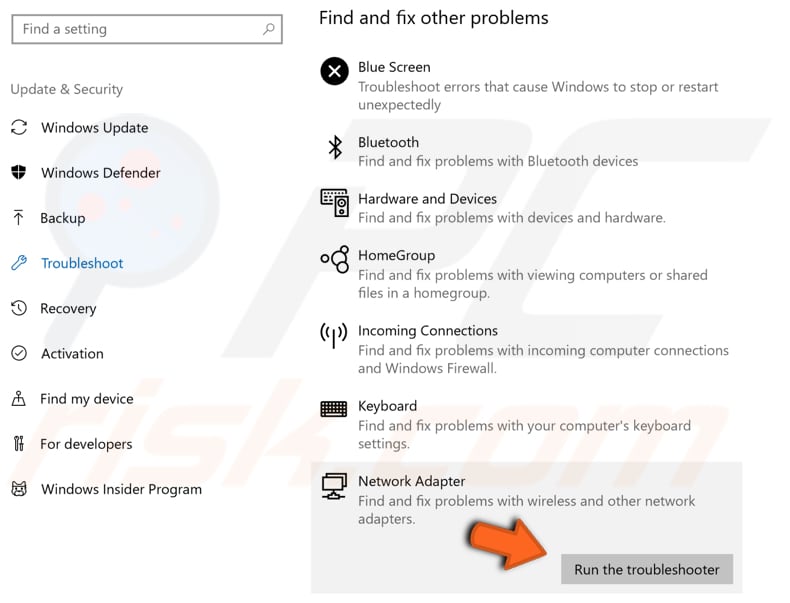
We recommend that you run the "Network Adapter" troubleshooter that detects and fixes problems with wireless and other network adapters. You can find it under "Find and fix other problems".
Update Your Network Adapter Driver
A device driver is software that provides information to the operating system and other software about how to interact with certain hardware. If the appropriate driver is not installed, the device might not function properly, if at all.
To update your network adapter driver, you will need to use Windows Device Manager and have the network adapter driver on a USB flash drive. Use a computer with a working Internet connection and download the driver from the network adapter manufacturer's website.
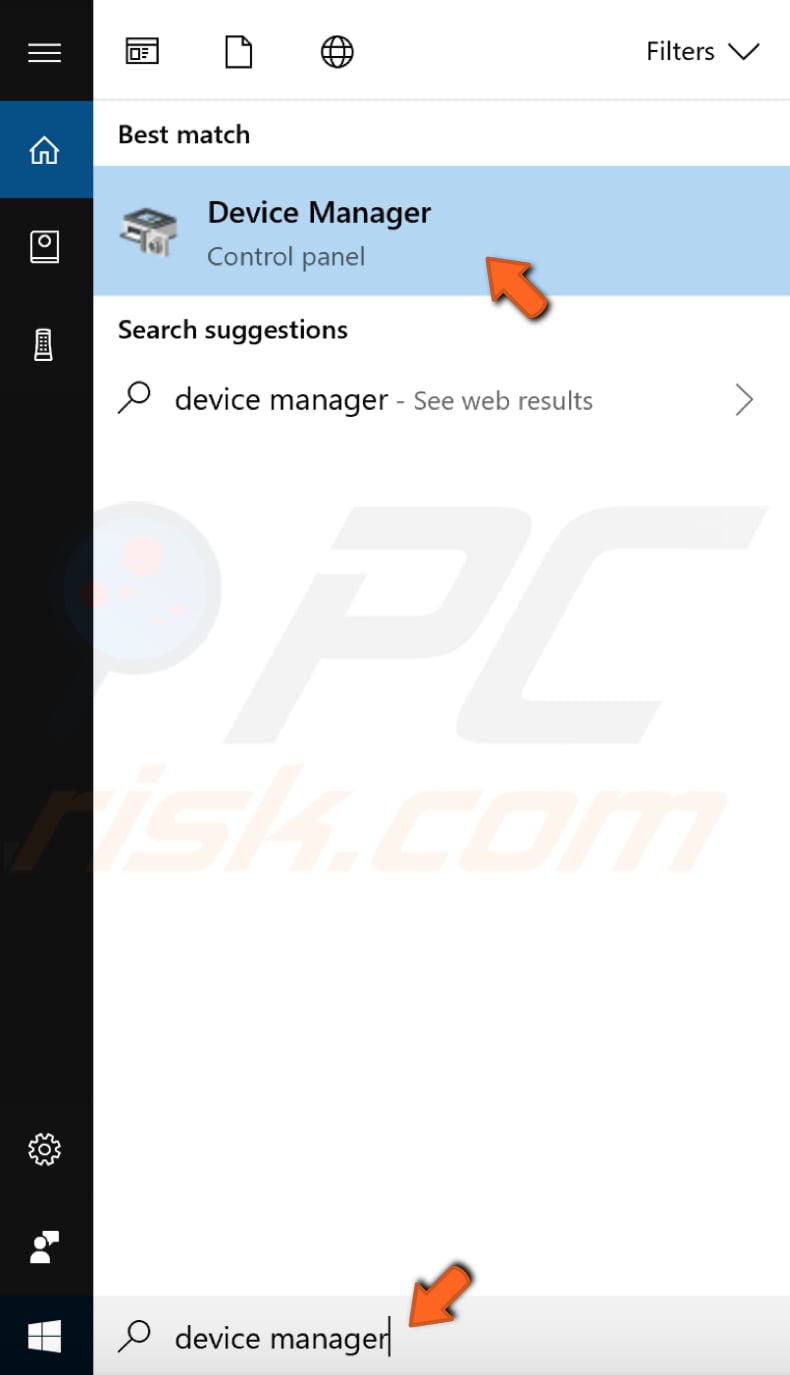
Then, connect the USB drive to the computer, type "device manager" in Search, and click the "Device Manager" result.
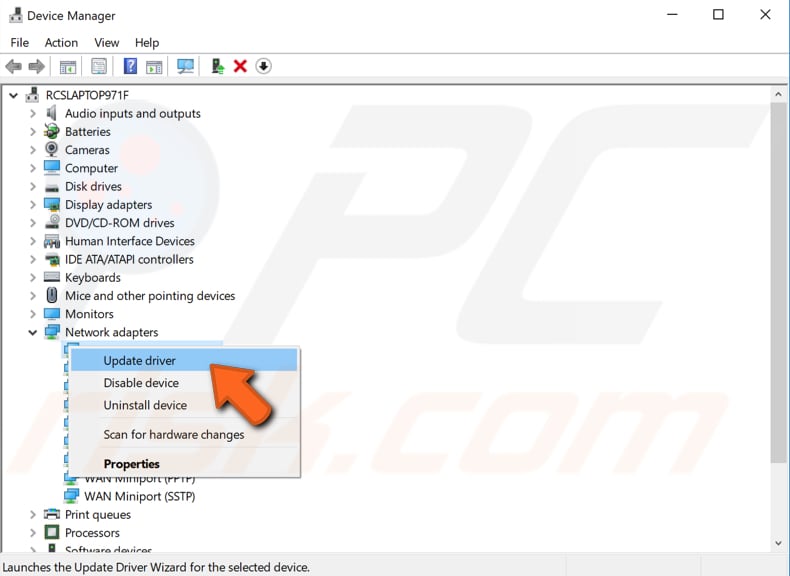
Now find the Network adapters list and expand it. Select your network adapter's driver, right-click it, and then select Update driver.
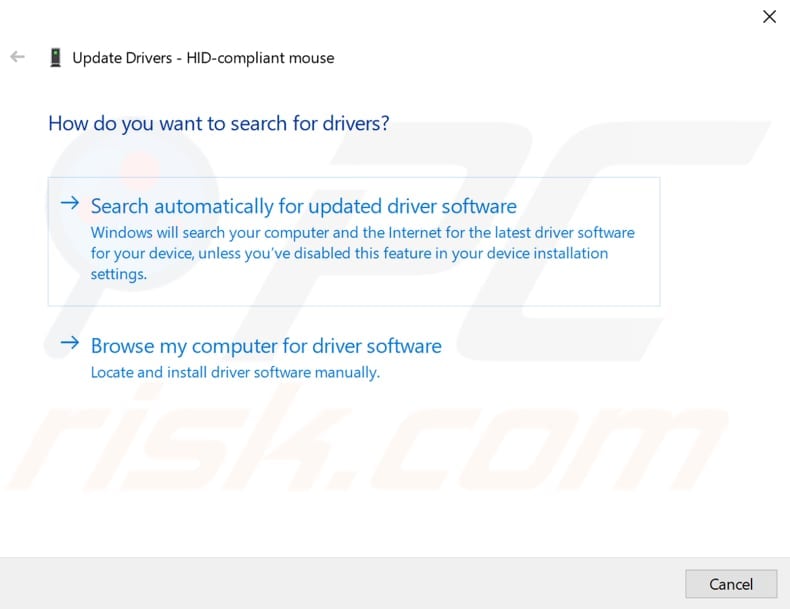
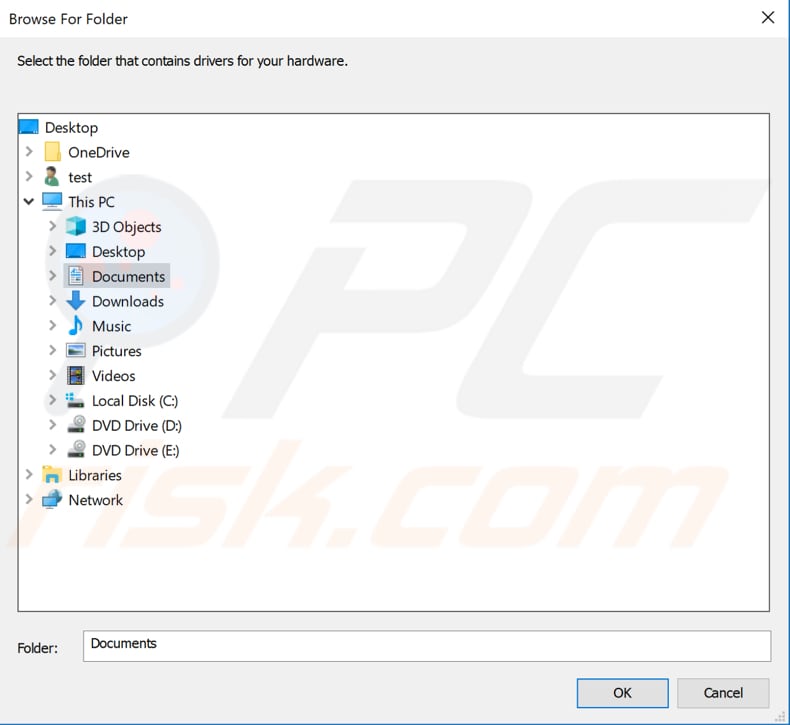
You will be asked if you want to search for updated driver software automatically or to browse your computer for driver software. Select to browse your computer for driver software.
Now click "Browse...".
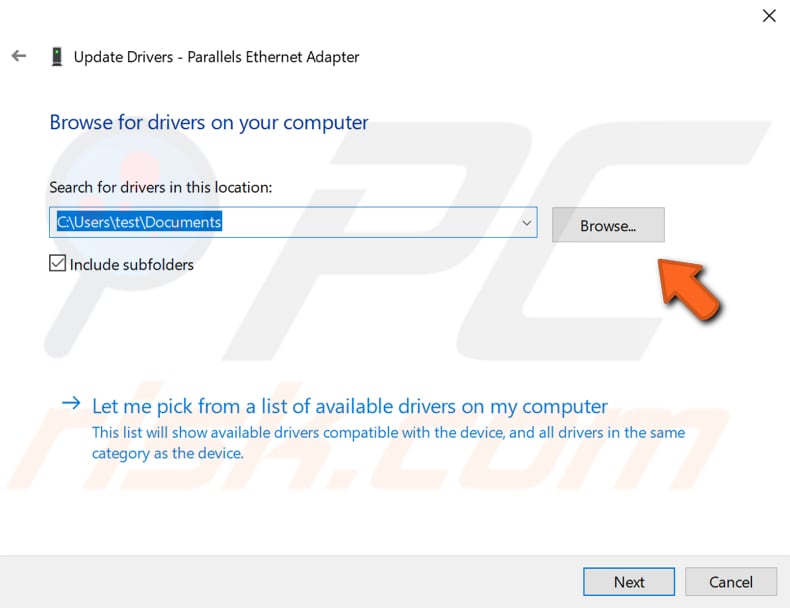
Locate the driver on the USB flash drive and click "OK". Click "Next", and Windows will start installing the driver for the network adapter.
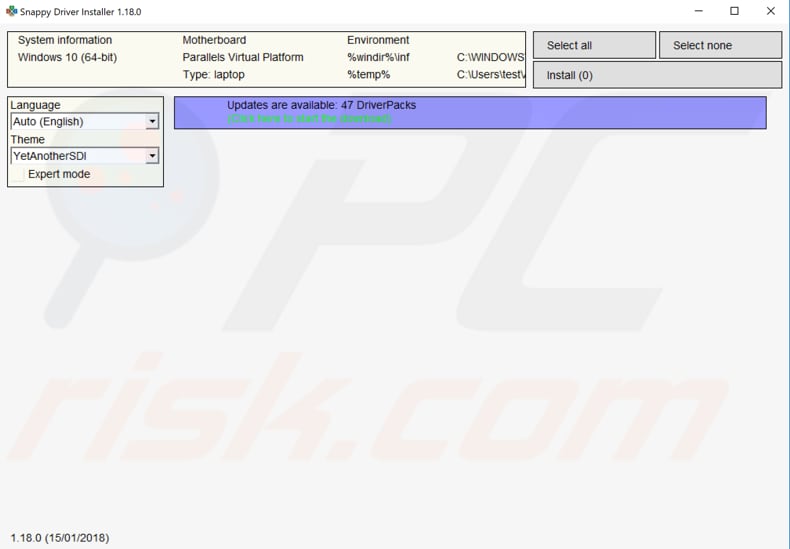
Another way to update or install new drivers for devices is to use third-party software such as Snappy Driver Installer. You will need a computer with a working Internet connection to download it.
Snappy Driver Installer (SDI) is a powerful free driver updater tool for Windows that can store its entire collection of drivers offline. Drivers are downloaded through Snappy Driver Installer in 'driverpacks', collections (packs) of drivers for various hardware such as sound devices, video cards, network adapters, etc.
You can download Snappy Driver Installer from here.
Reset TCP/IP
TCP/IP (Transmission Control Protocol/Internet Protocol) is a suite of communication protocols used to interconnect network devices on the Internet. TCP/IP specifies how data is exchanged over the Internet by providing end-to-end communications that identify how it should be broken into packets, addressed, transmitted, routed, and received at the destination.
This method includes entering and executing the "netsh" command into Command Prompt. Netsh is a command-line scripting utility that allows you to, either locally or remotely, display or modify the network configuration of a computer that is currently running.
Netsh also provides a scripting feature that allows you to run a group of commands in batch mode against a specified computer. Our command requires Command Prompt to be (elevated) opened with administrator privileges.
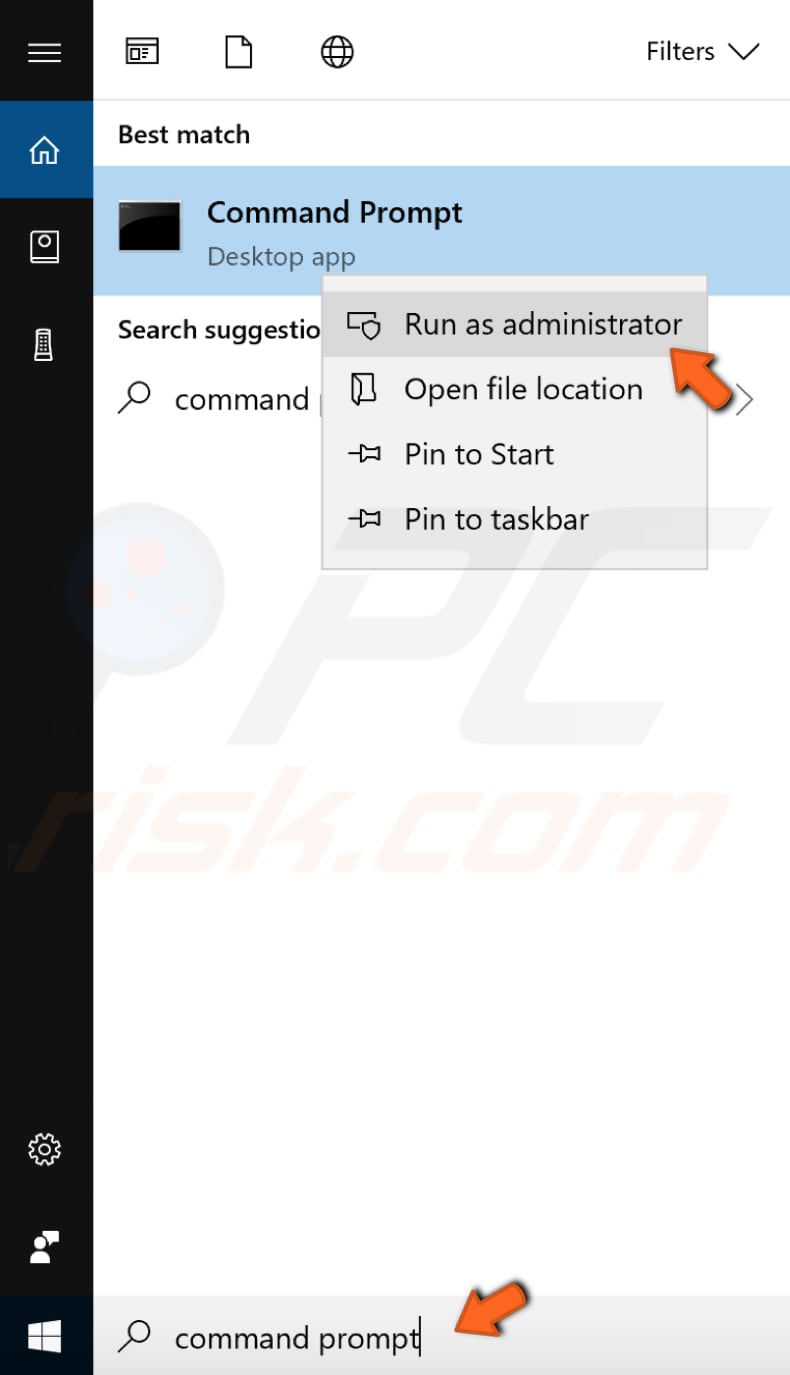
To open elevated Command Prompt, type "command prompt" in Search and right-click the "Command Prompt" result. Choose "Run as administrator" to run it with administrative privileges.
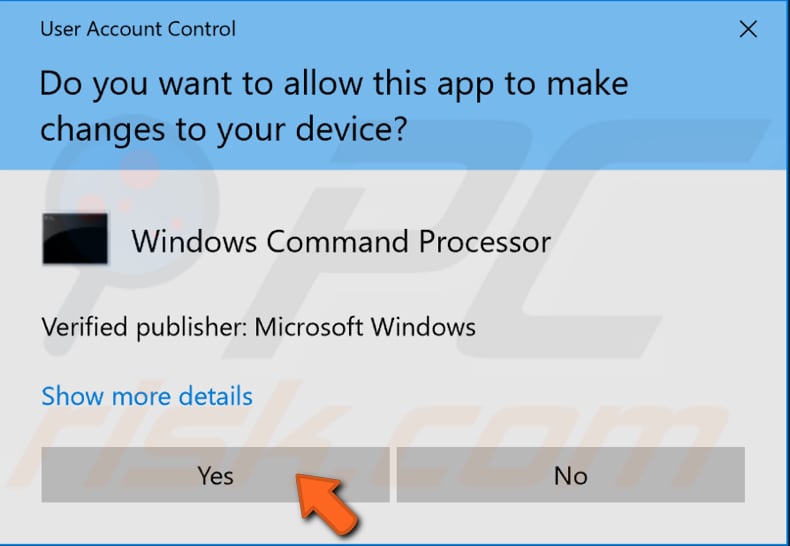
When you select "Run as administrator", a User Account Control prompt will appear requesting if you would like to allow Command Prompt to make changes to your computer. Click "Yes".
Elevated Command Prompt will appear. In the Command Prompt window, type the "netsh int ip reset" command and press Enter on your keyboard to execute it.
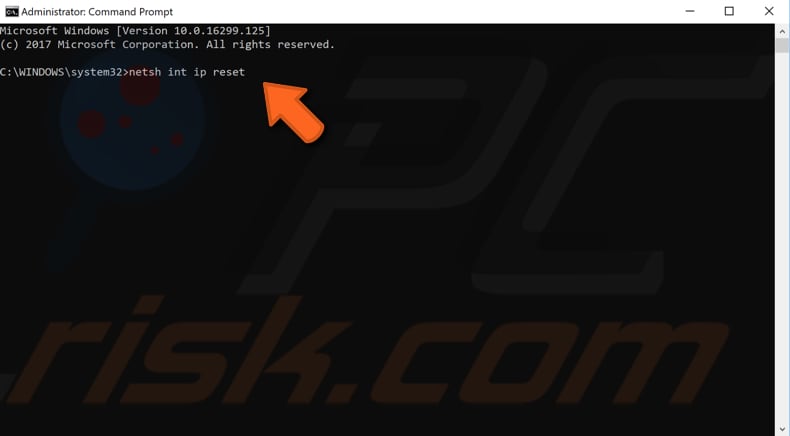
When the process has finished, exit Command Prompt and restart your computer.
Flush DNS
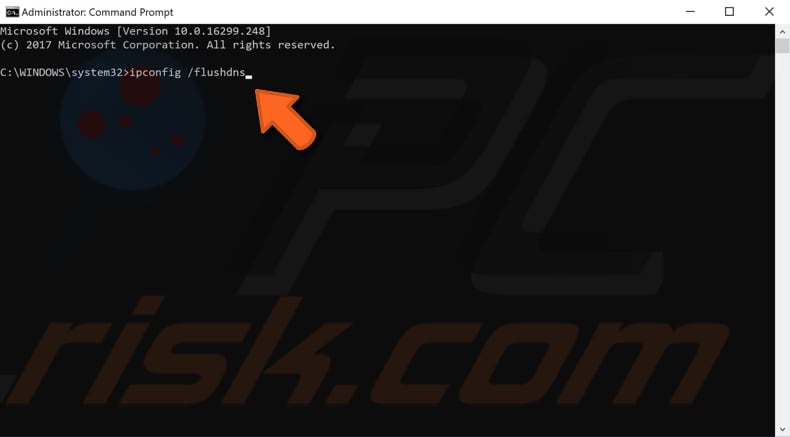
This method includes entering and executing the "ipcofig" command into Command Prompt. Ipconfig is a command-line tool that displays the current configuration of the installed IP stack on a networked computer. Using this tool, we can flush and reset the contents of the DNS client resolver cache and renew DHCP configuration. This command requires an elevated Command Prompt opened with administrator privileges.
Open Command Prompt with administrator privileges and type "ipconfig /flushdns", and then press Enter. Restart your computer and see if this solves the problem with the Internet connection.
Obtain IP And DNS Addresses Automatically
There might be a DNS or IP address conflict on your computer, in which case, you need to set the PC to obtain IP and DNS addresses manually.
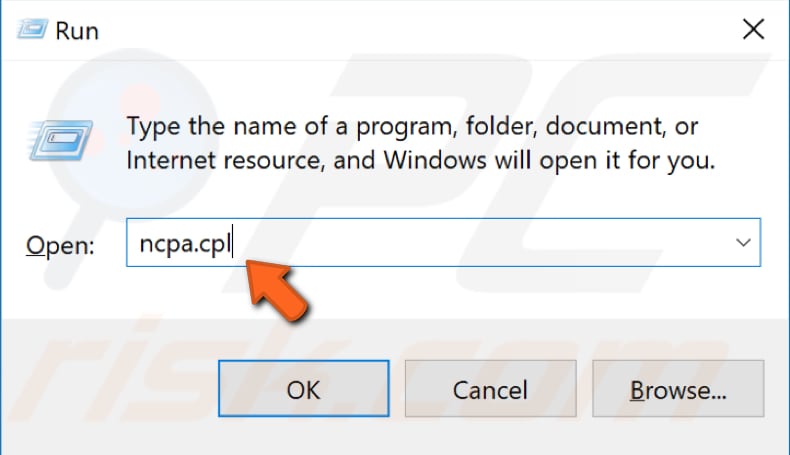
To do this, open the Run dialog box by pressing Windows key + R keys on your keyboard. Type "ncpa.cpl" and press Enter or click "OK" to open the Network Connections window.
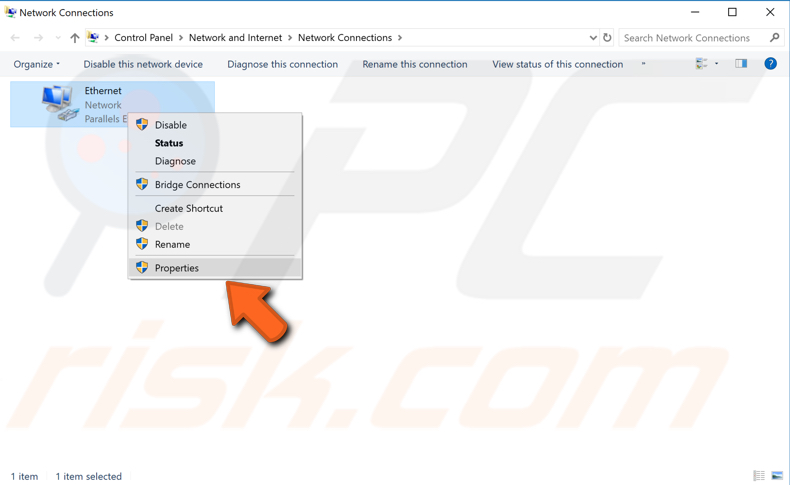
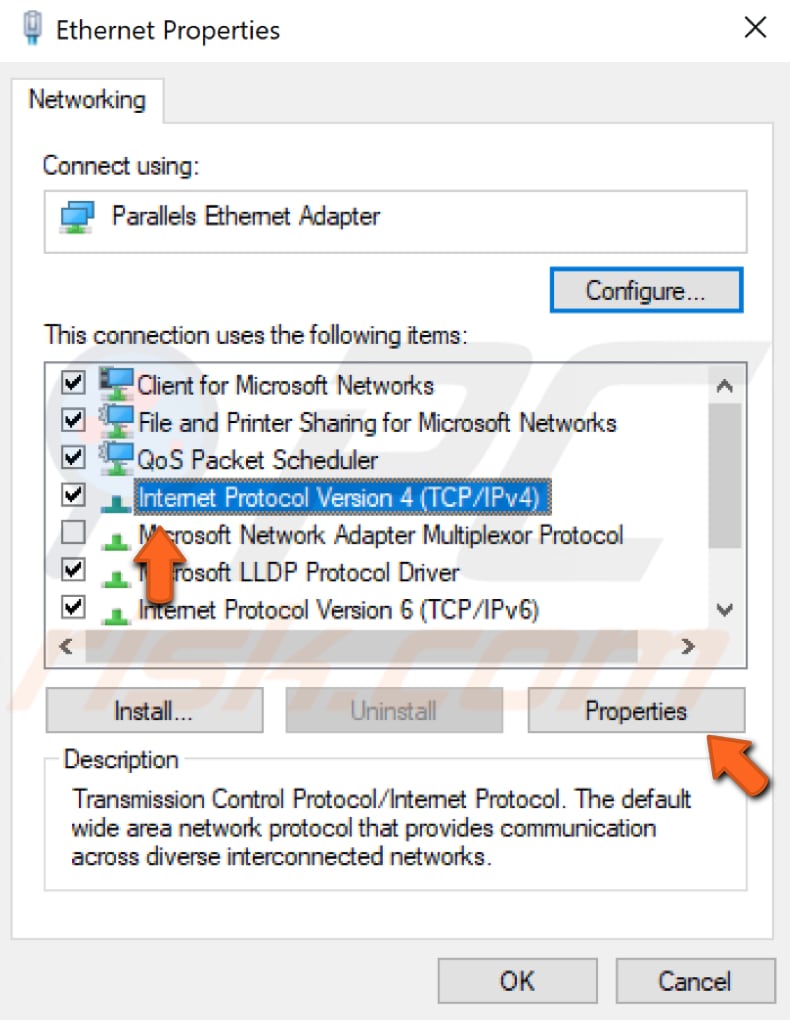
Right-click the connection and select "Properties" from the contextual menu.
Now find and select "Internet Protocol Version 4 (TCP/IPv4)" and click "Properties".
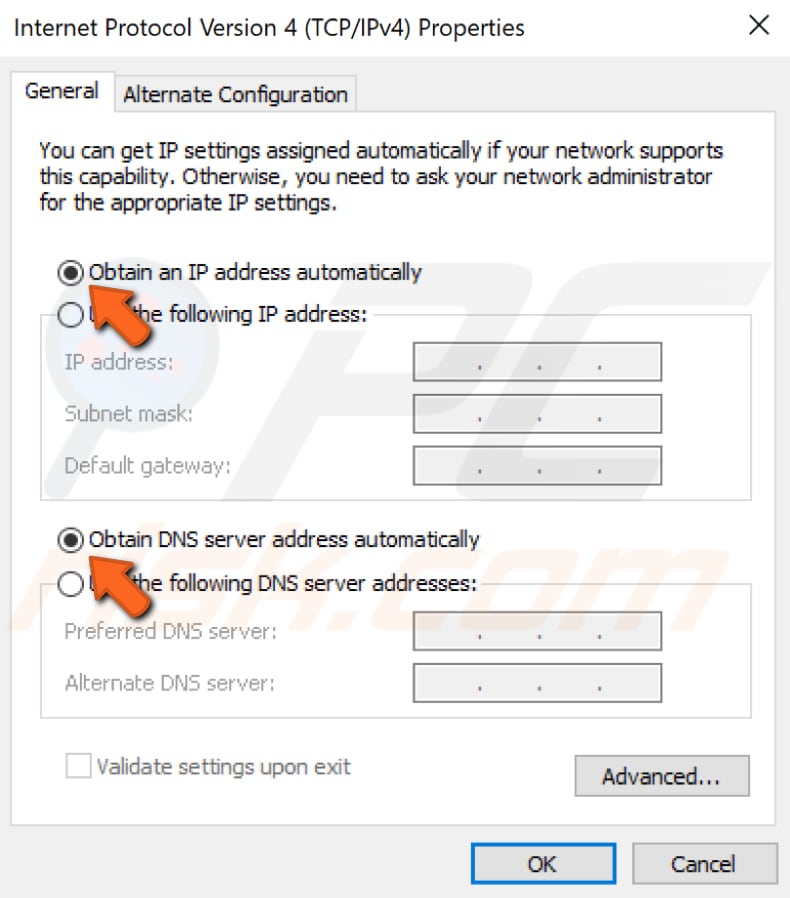
Ensure that the "Obtain and IP address automatically" and "Obtain DNS server address automatically" options are selected. Click "OK" to save the changes and see if the problem with the Internet connection is still present. Also, restart the computer.
Reset Your Router
Resetting the router usually solves all types of router-related problems - you must reset the router from its settings. The easiest way to do this is to press the physical reset button on the router.
The button often looks a little different, and might be recessed - you might need a protruding tool to press it. Press the reset button and hold it for about 10-15 seconds - the router lights should blink, and then the router will restart.
Remember to write down your password and username that you used to log in to your internet service provider's website.
Reset Your Network
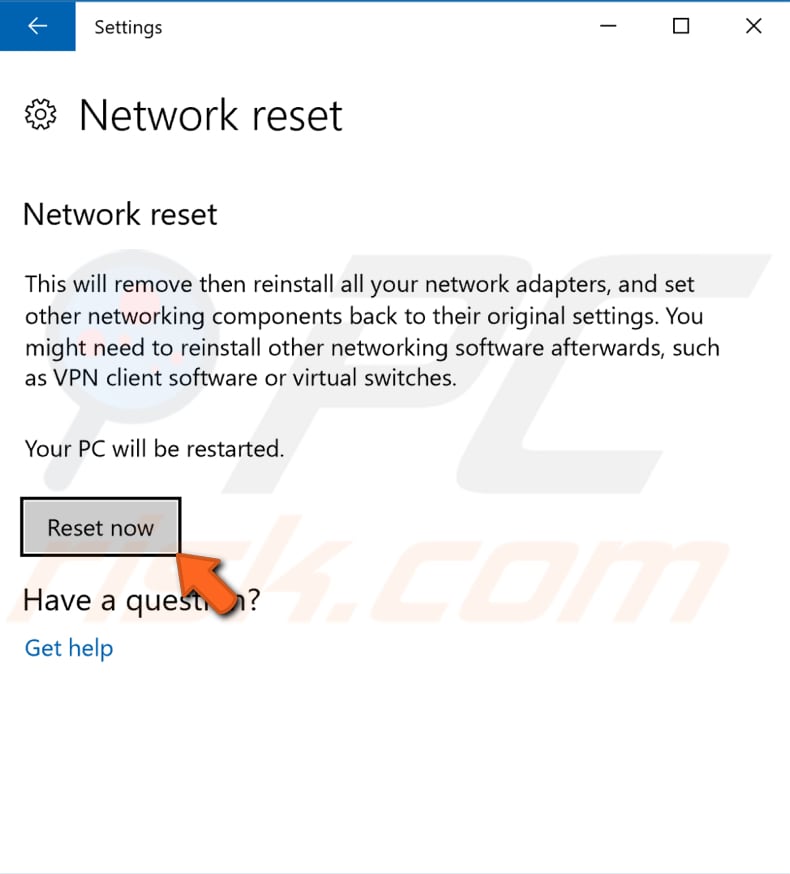
You should only reset the network as a last resort - this will disable and reinstall the network adapters, returning all networking components to their original states. After, you might need to reinstall network software such as VPN client software or virtual switches.
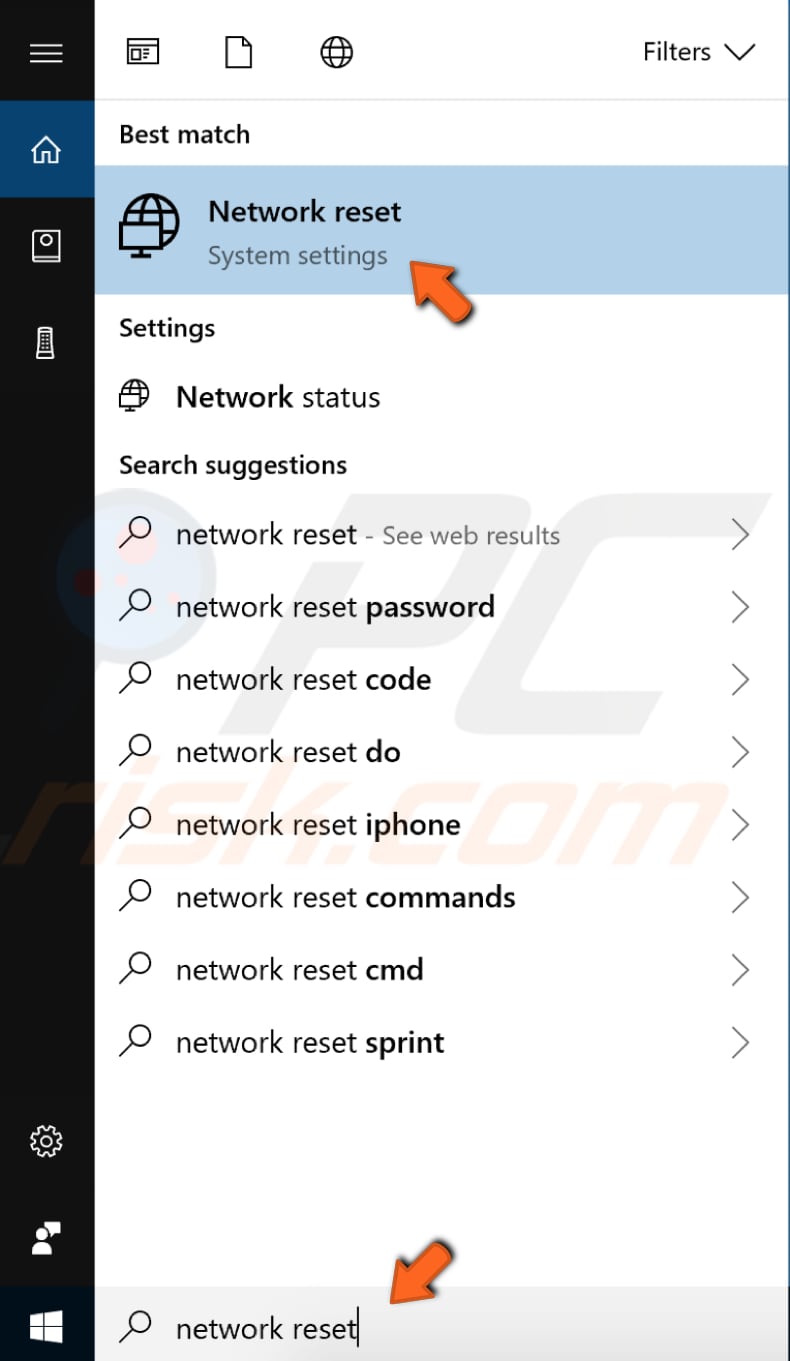
To reset the network, type "network reset" in Search and click "Network reset" result.
Click the "Reset now" button. The computer will be restarted, and the network reset to its original settings.
We hope that the methods described above help you to solve the problem with your Internet connection. If none of the above solutions work, the problem might be caused by your Internet service provider, so you may need to contact them to report the issue.

▼ Show Discussion