How to Fix WMI Provider Host High CPU Usage on Windows 10
![]() Written by Rimvydas Iliavicius on
Written by Rimvydas Iliavicius on
How to Fix WMI Provider Host High CPU Usage on Windows 10
You may have noticed WMI Provider Host high CPU usage in the background. If it does that for too long, then you have a problem. This article features several methods to help you fix this issue.

What is WMI Provider Host?
The WMI Provider Host (WmiPrvSE.exe) process is integral to Windows 10. WMI Provider Host is a Windows Host Management Process used for monitoring purposes. It allows applications on your computer to request specific information about the Windows operating system.
Windows Management Instrumentation is a feature that provides a way to request information about the state of the operating system and associated data. WMI Provider Host is a process that provides this information when requested.
Why Is WMI Provider Host Causing High CPU Usage?
Usually, WMI Provider shouldn't be active, but high CPU usage can occur, especially when an application requests data through Windows Management Instrumentation. This situation, however, should be temporary - long periods of high CPU usage indicate a problem.
As mentioned, the WmiPrvSE.exe process is part of the Windows operating system. Malware developers often use system file names as a disguise. If the WmiPrvSE.exe file does not appear in the C:/Windows/System32 folder, it is probably infected with malware and placed elsewhere on the system.
Video Tutorial on How Fix WMI Provider Host High CPU Usage
Table of Contents:
- Introduction
- Method 1. Restart Windows Management Instrumentation Service
- Method 2. Scan Your System for Malware
- Method 3. Run System Maintenance Troubleshooter
- Method 4. Locate the Process That Is Causing the Problem
- Video Tutorial on How Fix WMI Provider Host High CPU Usage
Method 1. Restart Windows Management Instrumentation Service
To restart the WMI service, use Windows Services. Windows Services (services.msc) manage how Windows services run on the system.
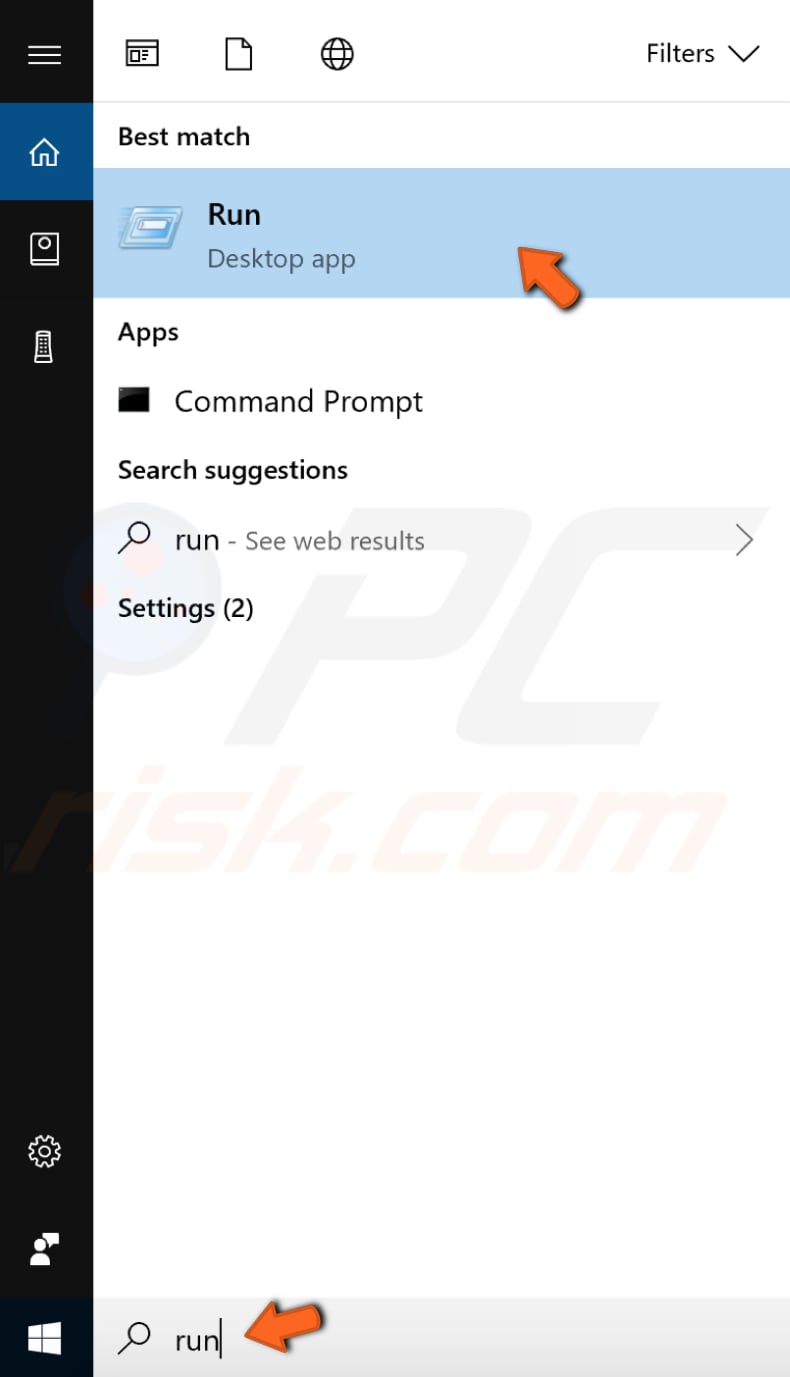
To open Windows Services, type "run" in Search and click the "Run" result.
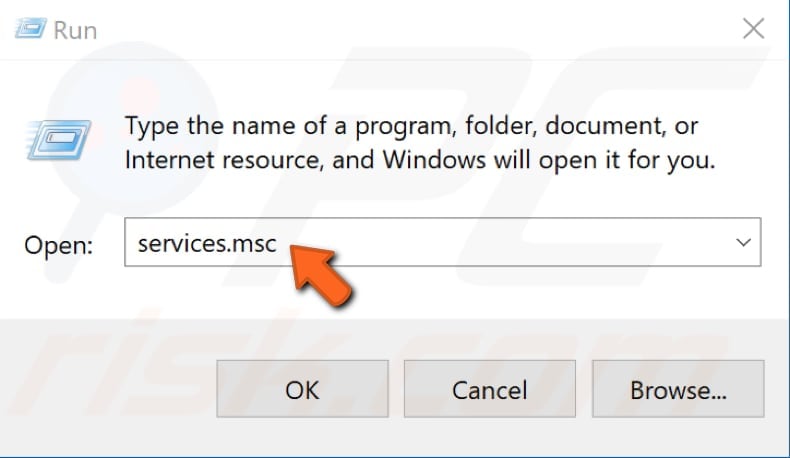
In the Run dialog box, type "services.msc" and click "OK" to open Windows Services.
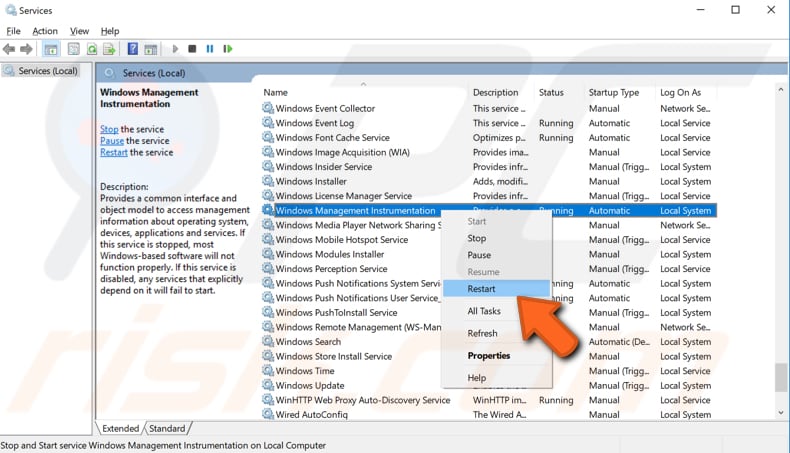
Now, scroll down through the services list and find the "Windows Management Instrumentation" service. Right-click it and select "Restart" from the contextual menu to restart this service.
To restart other services associated with the WMI service, use Command Prompt. To restart these services, you must run Command Prompt with administrator privileges.
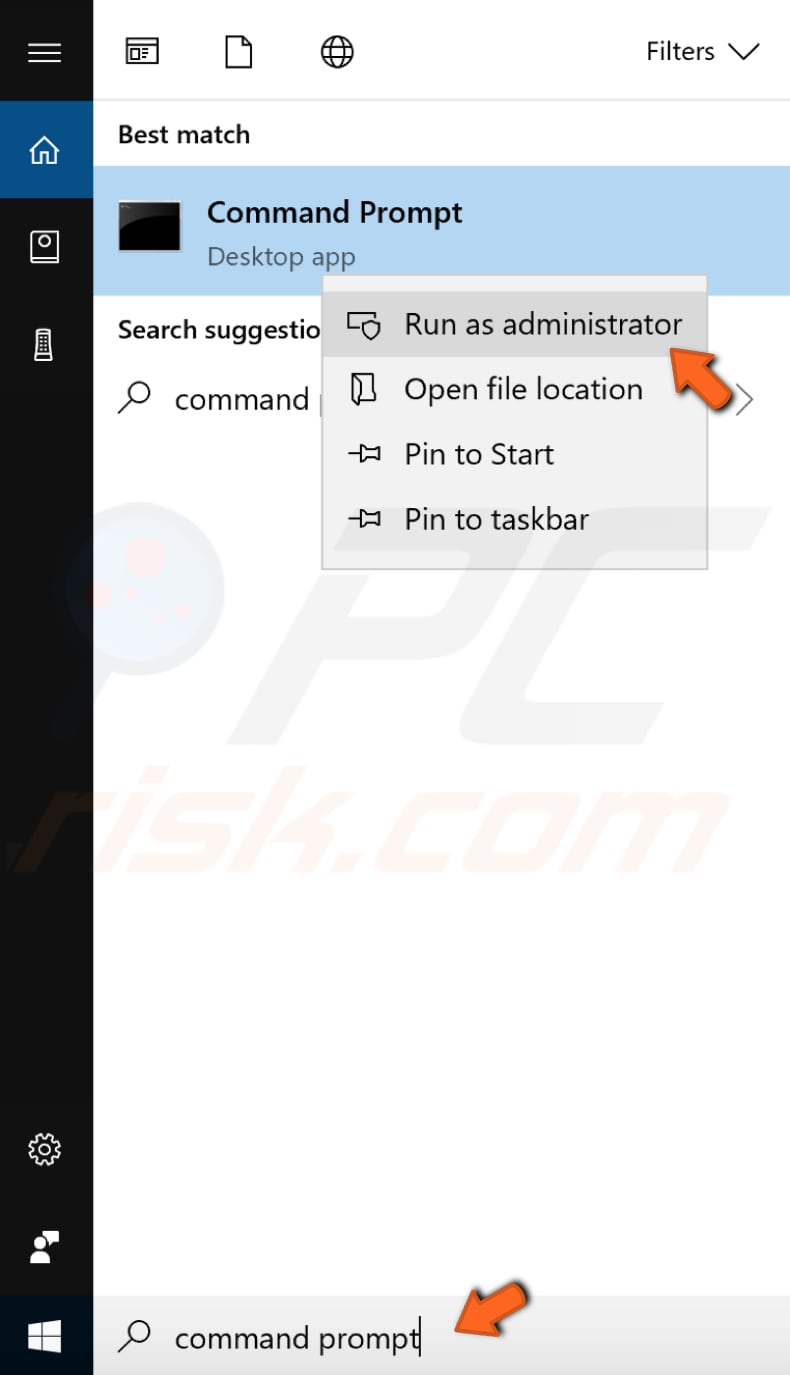
To do so, type "command prompt" in Search and right-click the "Command Prompt" result, and select the "Run as administrator" option from the contextual menu.
In the Command Prompt window, type the following commands and press Enter on the keyboard after each one:
net stop iphlpsvc
net stop wscsvc
net stop Winmgmt
net start Winmgmt
net start wscsvc
net start iphlpsvc
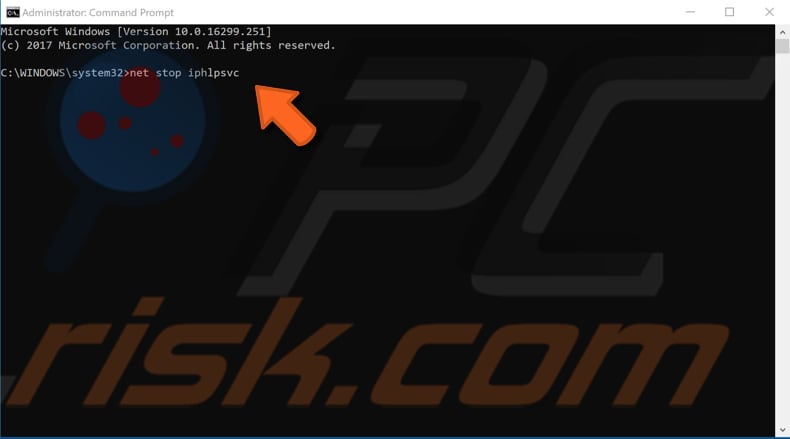
Once you have restarted all of these services, restart the computer and see if this solves WMI Provider Host high CPU usage.
Method 2. Scan Your System for Malware
If the WMI Provider Host process uses too many CPU resources due to files infected by malware on the computer (or WmiPrvSE.exe is a malicious file), run antivirus software to fix it. This example shows how to run an antivirus scan using built-in Windows Defender software.
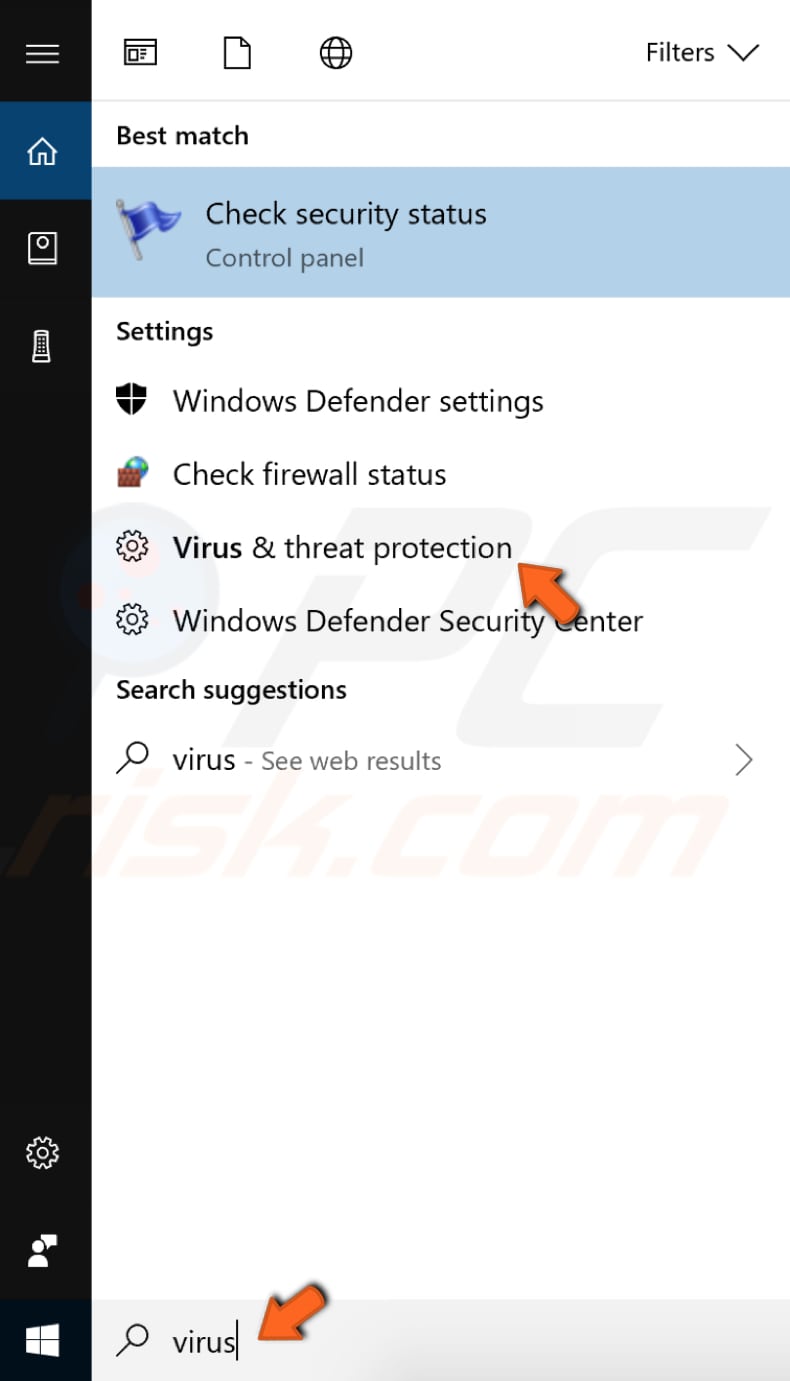
To scan your system using Windows Defender, type "virus" in Search and click the "Virus & threat protection result".
Then, click "Advanced scan".

Select "Full scan" and click "Scan now". This will start scanning your system for malware and other viruses. See if Windows Defender finds any viruses relating to WmiPrvSE.exe and delete them. Restart the computer to check if this solves WMI Provider Host high CPU usage.

If you wish, you can choose another virus and malware scanner from our Top anti-malware list. The list consists of well-known top spyware removers and will help you choose the right software for your computer's protection. Find the list by clicking this link.
Method 3. Run System Maintenance Troubleshooter
System Maintenance Troubleshooter is a Windows tool that automatically fixes any detected problems relating to maintenance tasks. It fixes broken shortcuts, disk volume errors, unused desktop icons, etc.
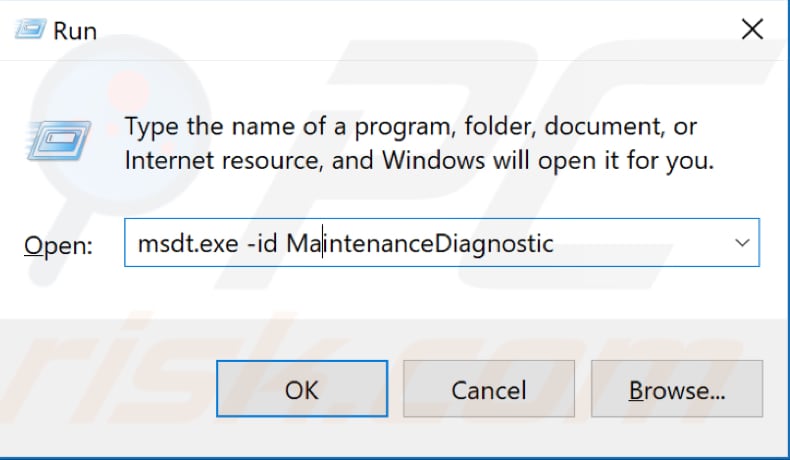
To run the System Maintenance Troubleshooter, type "run" in Search (as previously described) and type "msdt.exe -id MaintenanceDiagnostic", and then press Enter to run it.
Before you start troubleshooting maintenance problems, remember that you will need to use your administrator account to run System Maintenance Troubleshooter.
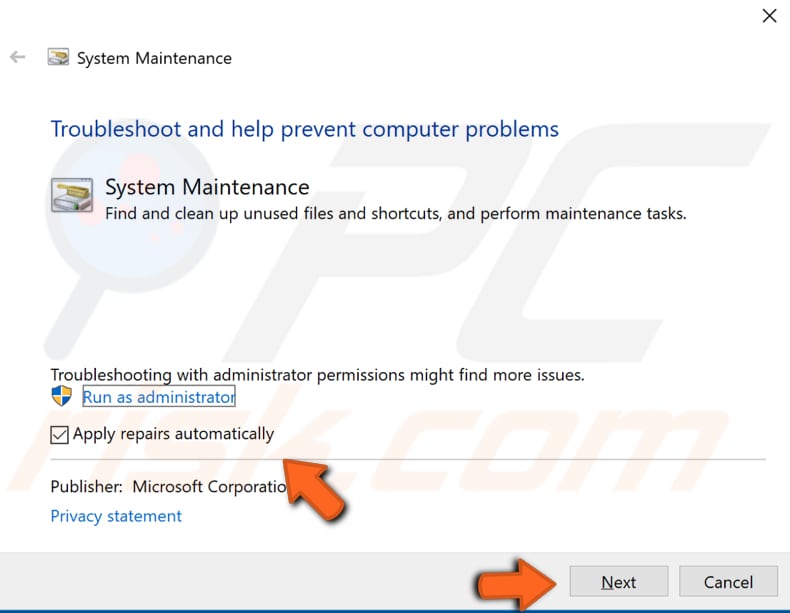
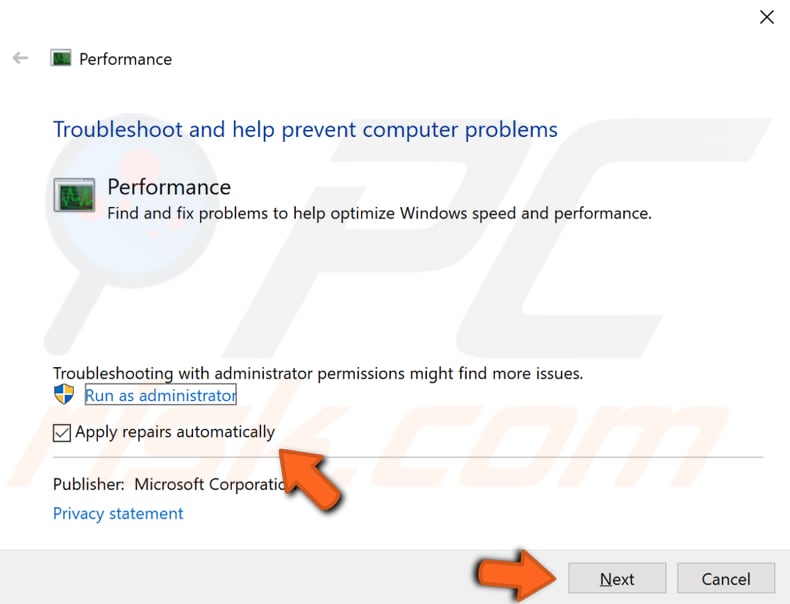
Find "Advanced" and click it. Ensure the "Apply repairs automatically" checkbox is marked and click "Run as administrator". Follow the instructions.
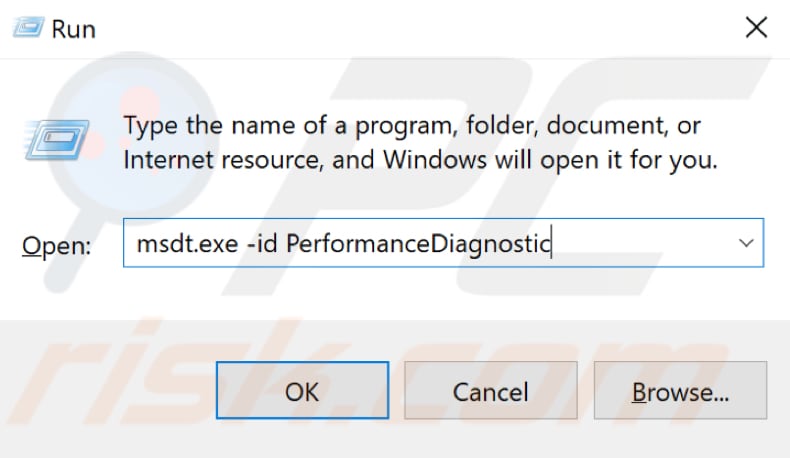
You can also try to run the System Performance Troubleshooter. This automatically finds and fixes problems and checks issues that might slow down your computer.
Open the Run dialog box by typing "run" in Search. Type "msdt.exe -id PerformanceDiagnostic", and press Enter on the keyboard to run it.
Find "Advanced" and click it. Ensure the "Apply repairs automatically" checkbox is marked and click "Run as administrator". Follow the instructions. See if this solves WMI Provider Host high CPU usage.
Method 4. Locate the Process That Is Causing the Problem
To locate the process causing WMI Provider Host high CPU usage, use Windows Event Viewer. Event viewer is a component of Microsoft Windows that allows administrators and regular users to view event logs on their computers. It uses event IDs to define uniquely identifiable events a Windows computer might encounter.
Event Viewer displays a log of application and system information messages, including warnings and errors (these are displayed even if your system is running correctly).
This feature is helpful if you are troubleshooting a specific problem and need more information about the cause. You can look for events in different categories such as "Application", "System", "Security" and "Setup".
In the Application event log, you can find events relating to Windows system components, such as drivers and built-in interface elements. The System event log provides event logs relating to programs installed on the Windows operating system. The Security event log also provides events relating to security, such as login attempts and resource access. You will need to clear the logs of these four categories.
To access Event Viewer on Windows 10, press the Windows key + R on your keyboard or type "run" in Search and select the "Run" result. In the Run dialog box, type "eventvwr" and press Enter or click "OK".

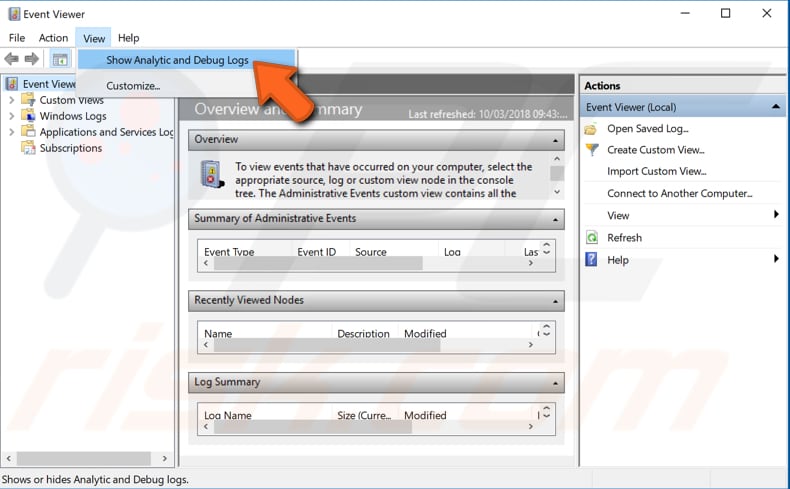
Once Event Viewer is open, find and click "View" and select "Show Analytic and Debug logs".
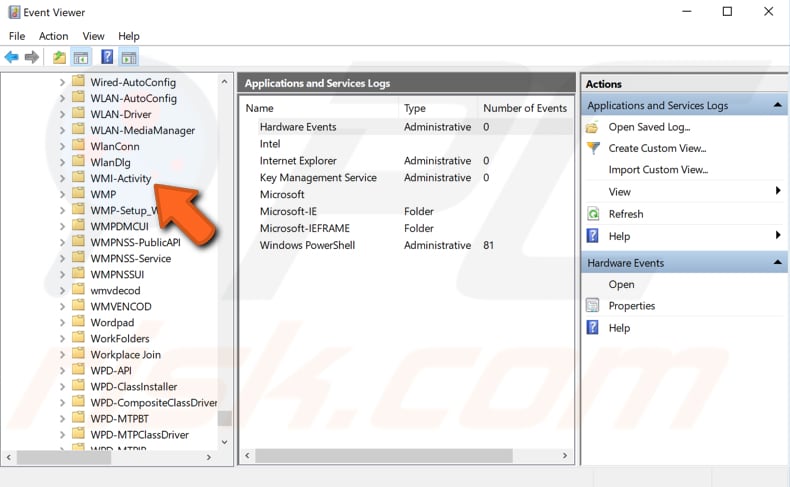
Click the arrow near the "Applications and Services Logs" on the left pane to expand this section. Then expand Microsoft, and then Windows. Find "WMI-Activity".
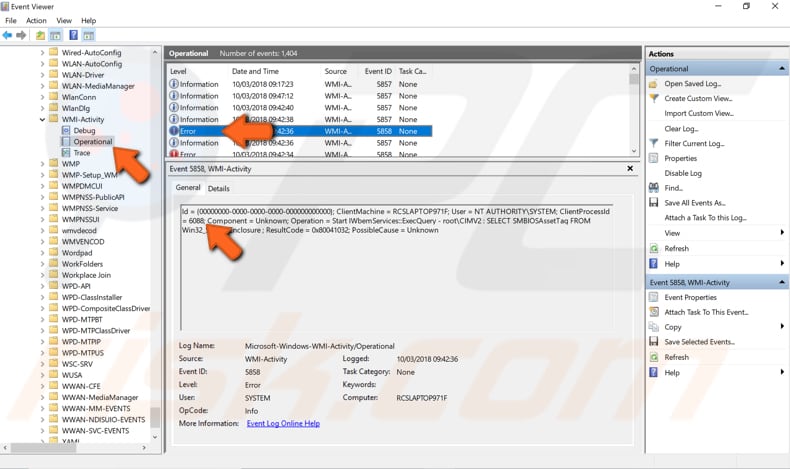
Once you have found WMI-Activity, double-click it to see its contents. Then, click "Operational" to see its contents. If clicking it does not work, try double-clicking. You will see a list of events - look for the one named "Error" and select it.
You will see the associated information below - look for "ClientProcessId" and take note of the number appearing after the "=". In our example, it is 6088.
To go further, you must use Task Manager. Press Ctrl + Shift + Esc or right-click the Start button and select Task Manager from the contextual menu. Once Task Manager is open, go to the "Services" tab and look for the service that has the same "PID" (Process ID) as the number you noted when using Event Viewer (above). In our example, it was 6088.

That service (the program installed on your computer) might be why the WMI Provider Host uses too much CPU power. If you do not need this program, we recommend you uninstall it. Once uninstalled, the WMI Provider Host process should cease using CPU resources.
We hope this article helped you understand the WMI Provider Host and why it is running in the background, and that the solution/s above prevent excessive CPU usage.
If you have used other methods to solve this problem, please share them by commenting in the comments section below.

▼ Show Discussion