Keyboard Not Working: 9 Ways to Fix It
![]() Written by Rimvydas Iliavicius on
Written by Rimvydas Iliavicius on
How to Fix Keyboard Not Working on Windows 10
A keyboard is essential to using a computer. A non-working keyboard severely impacts your computing experience. If your keyboard stopped working, read this guide to fix it.

Since the mouse and keyboard are essential parts of every computer, not being able to use these devices can make the computing experience difficult.
Many users have reported that their keyboards stopped working after upgrading their operating systems to Windows 10, and especially after installing the KB4074588 update (released in February 2018).
In this guide, we describe several solutions to this problem. The guide includes methods for those with password-protected accounts and cannot log in to Windows (since they cannot use the keyboard).
Note: Before you begin, we recommend checking the USB port/keyboard (if you are using a wired keyboard). Unplug the keyboard and plug it into another USB port to see if the problem persists. Also, check if the USB port itself is working properly. Unplug the keyboard, plug a mouse or other device into the same port, and see if it works.
Video Showing How to Fix Keyboard Not Working on Windows 10
Table of Contents:
- Introduction
- How to Log Into Windows Using an On-Screen Keyboard
- How to Enable On-Screen Keyboard in Windows
- Run Windows Troubleshooter
- Disable Filter Keys
- Reinstall Keyboard Drivers
- Update Your Keyboard Driver
- Update Your Windows
- Disable Fast Startup
- Restore Your System Using Restore Points
- Video Showing How to Fix Keyboard Not Working on Windows 10
How to Log Into Windows Using an On-Screen Keyboard
As we mentioned in our introduction, you first need to log in to Windows to fix the keyboard. If your Windows account (local or Microsoft) is not password protected, proceed to the next step.
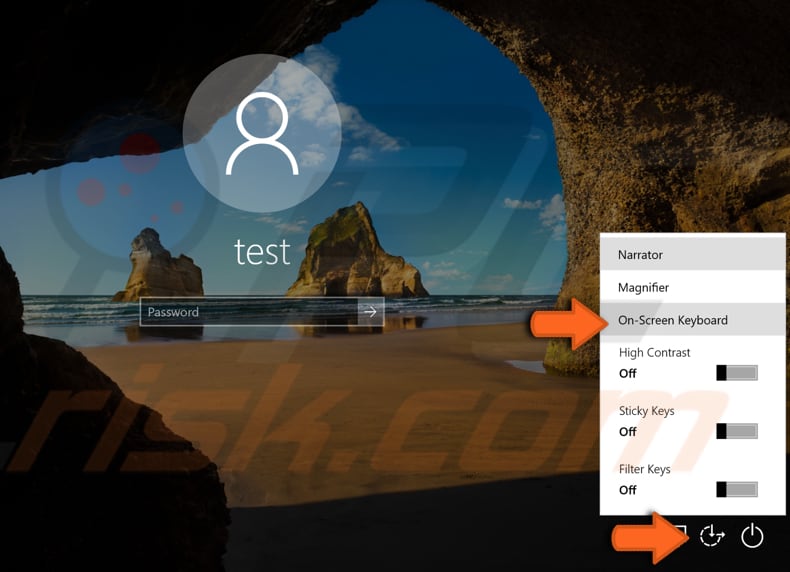
A virtual keyboard is a software component that allows you to type without having a physical keyboard. However, you need a working mouse to use it. To launch a virtual keyboard on the Windows log-in screen, click the "Ease of access" icon and select the "On-Screen Keyboard" option from the contextual menu.
An on-Screen Keyboard will appear. Click the password box under your account name and type your password. Click the virtual "Enter" button to log in.
How to Enable On-Screen Keyboard in Windows
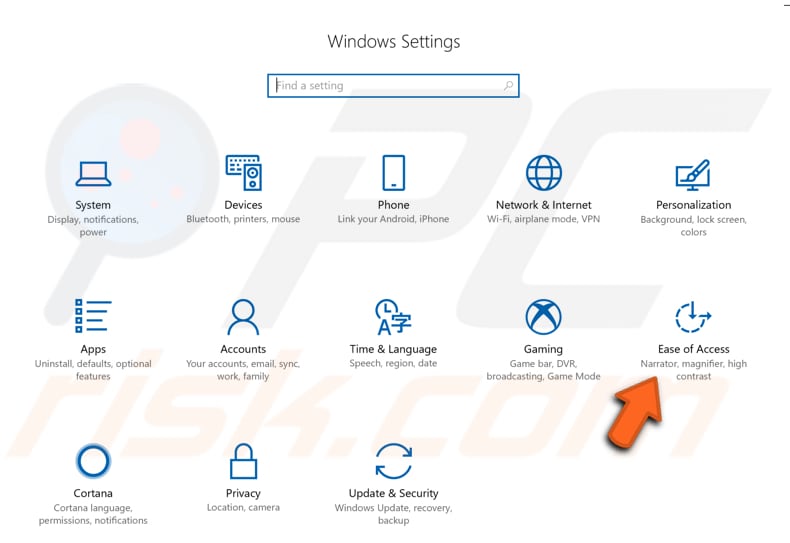
When logged into Windows, the On-Screen keyboard will probably disappear. To re-enable it, using the mouse or a trackpad, go to Settings and click "Ease of Access".
Select the "Keyboard" section on the left pane and toggle the switch to the "On" position under "On-Screen Keyboard". The On-Screen keyboard will re-appear. Now proceed to the next steps and use the On-Screen keyboard to perform particular actions that include typing.
Do not exit the On-Screen keyboard. Minimize it when not in use.

Run Windows Troubleshooter
First, simply run the Windows troubleshooter. Windows includes several troubleshooters designed to quickly diagnose and automatically resolve various computer problems.
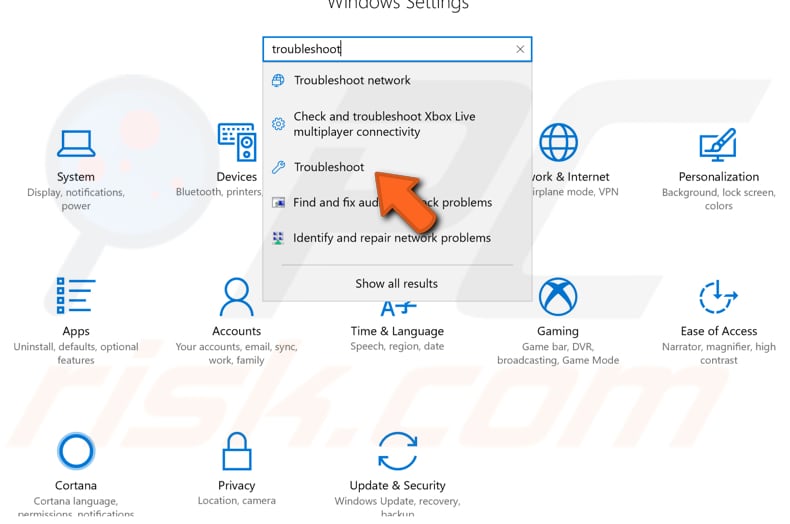
To start troubleshooting, go to Settings and type "troubleshoot" using the On-Screen keyboard. Select "Troubleshoot" from the list.
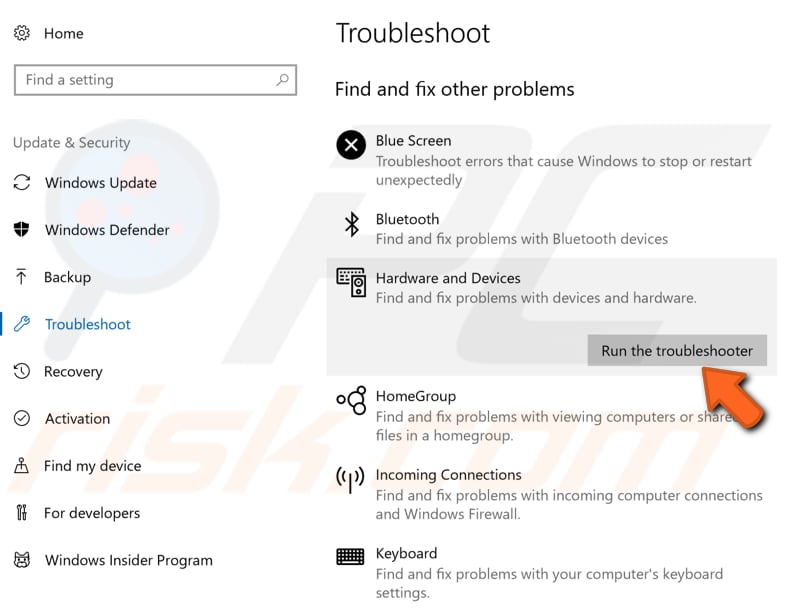
Find "Hardware and Devices" under "Find and fix other problems", select it and click "Run the troubleshooter". The troubleshooting process will start. Follow the instructions and see if it finds and fixes problems with installed devices on the operating system, including the keyboard.
Restart the computer and see if this solves the keyboard problem.
Disable Filter Keys
Filter Keys is an Accessibility option that you can use to control the keyboard repeat rate and ignore repeated keys. On some keyboards, this feature is also related to (and can affect) the entire keyboard.
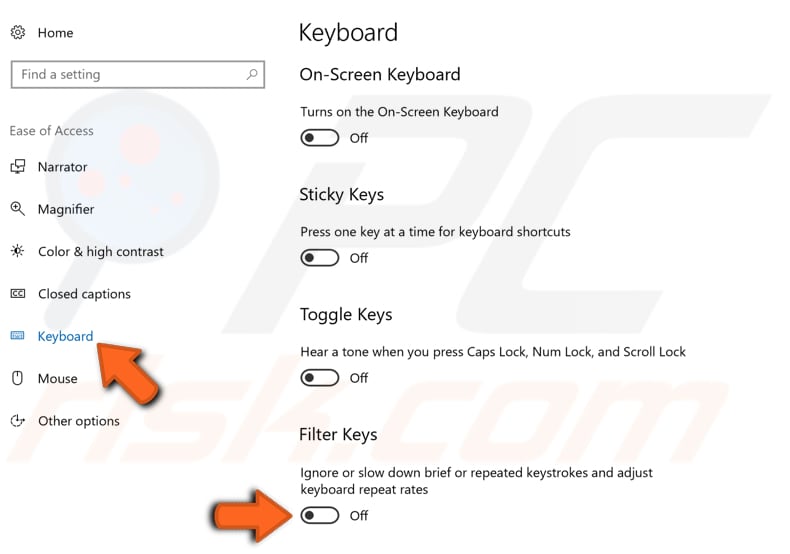
To disable Filter Keys, go to Settings and select "Ease of Access". Go to the "Keyboard" section on the left pane and find the "Filter Keys" feature. Ensure this feature is disabled. If it is not, toggle the switch to the "Off" position.
Restart the computer and see if you still have problems with the keyboard.
Reinstall Keyboard Drivers
Outdated, incompatible, or corrupted drivers might also cause problems with keyboards. If the appropriate driver is not installed, the device might not function properly, if at all.
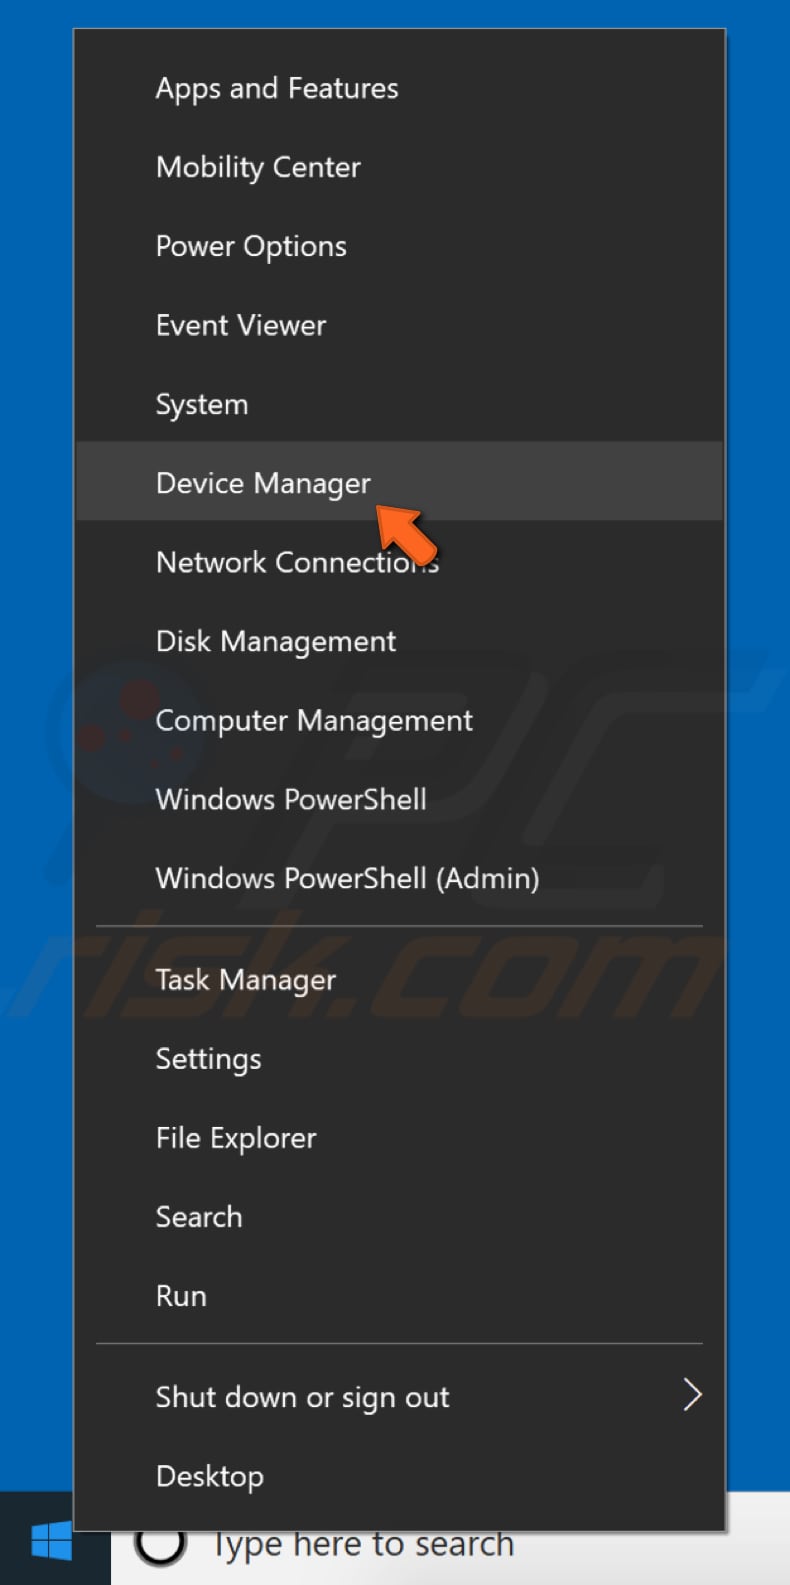
Try to uninstall and then reinstall the keyboard driver. To do this, open Device Manager by right-clicking the Start button and selecting the "Device Manager" result from the contextual menu.
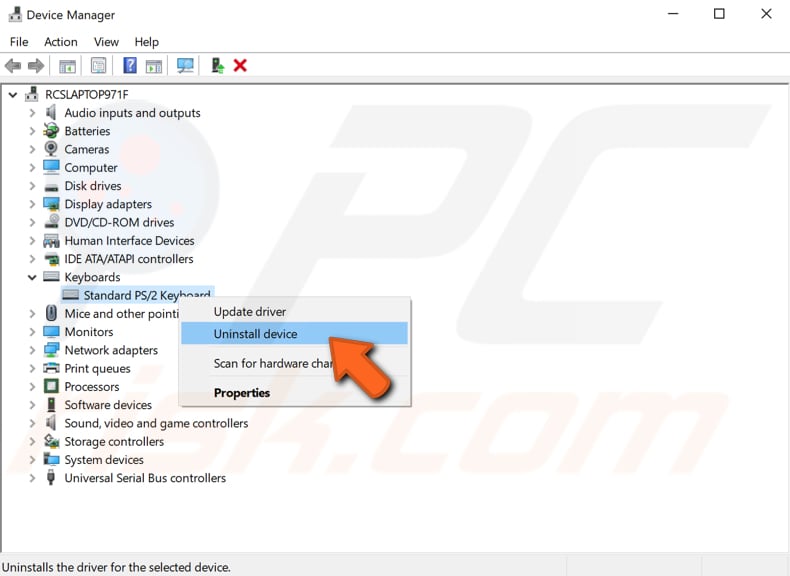
In Device Manager, find "Keyboards", expand it, right-click the keyboard driver, and select "Uninstall" from the drop-down menu to uninstall it. In the popped-up window, click "Uninstall".
Restart the computer. Windows will automatically install the missing keyboard drivers. Check if this fixes the keyboard problem.
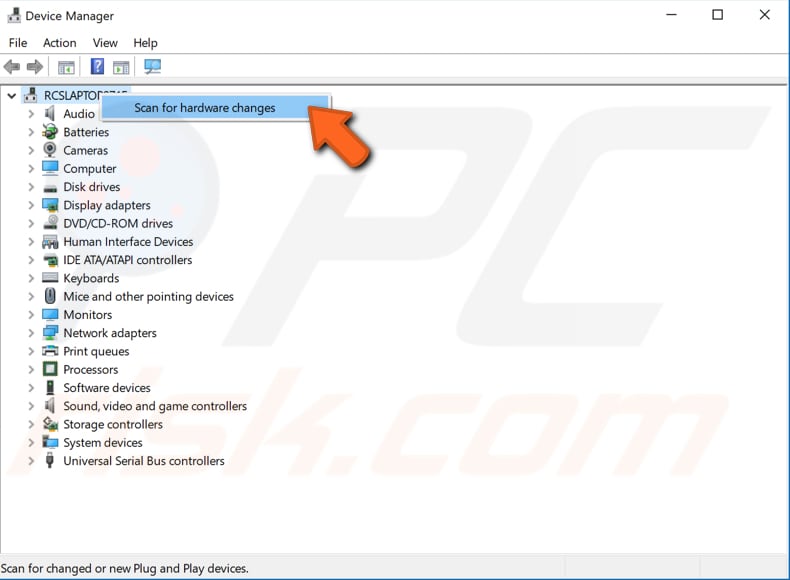
If Windows will not install the missing keyboard driver, return to Device Manager, right-click the computer name, and select "Scan for hardware changes". This should detect missing drivers and install them.
Update Your Keyboard Driver
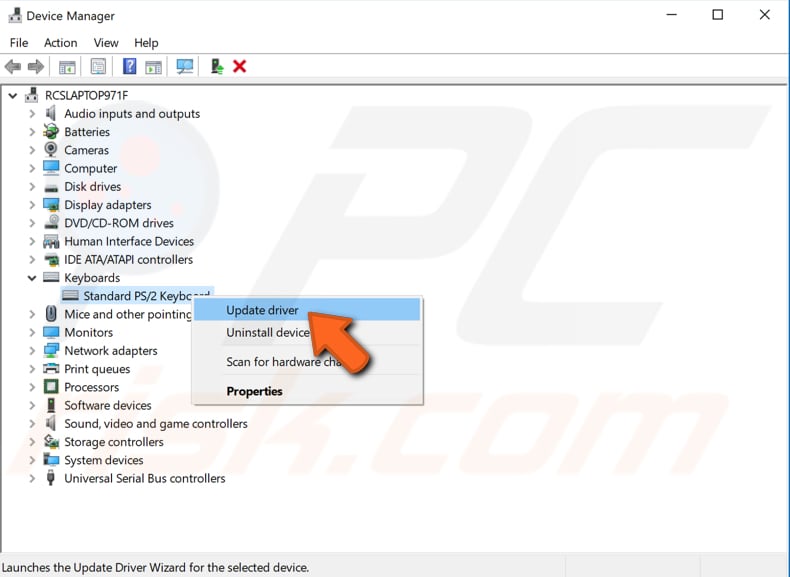
To update a keyboard driver, return to Device Manager, find "Keyboards", expand it, right-click the keyboard device, and select "Update driver" from the drop-down menu to update it.
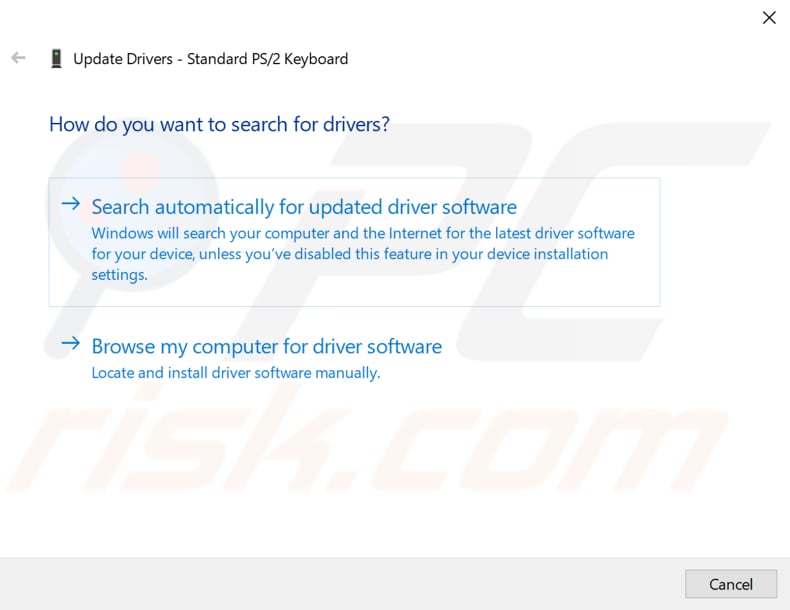
You will be asked if you want to search for updated driver software automatically or to browse your computer for driver software. If you select the first option, Windows will search your computer and the Internet for the latest driver software for your device.
If you select the second option, you must locate and install the drivers manually. Using this option requires having previously downloaded drivers on your computer or USB flash drive.
Follow the instructions and update the keyboard drivers. Restart the computer and see if this solves the problem with the keyboard.
Another way to update or install new drivers for devices is by using third-party software such as Snappy Driver Installer. You can download Snappy Driver Installer from here.

Update Windows
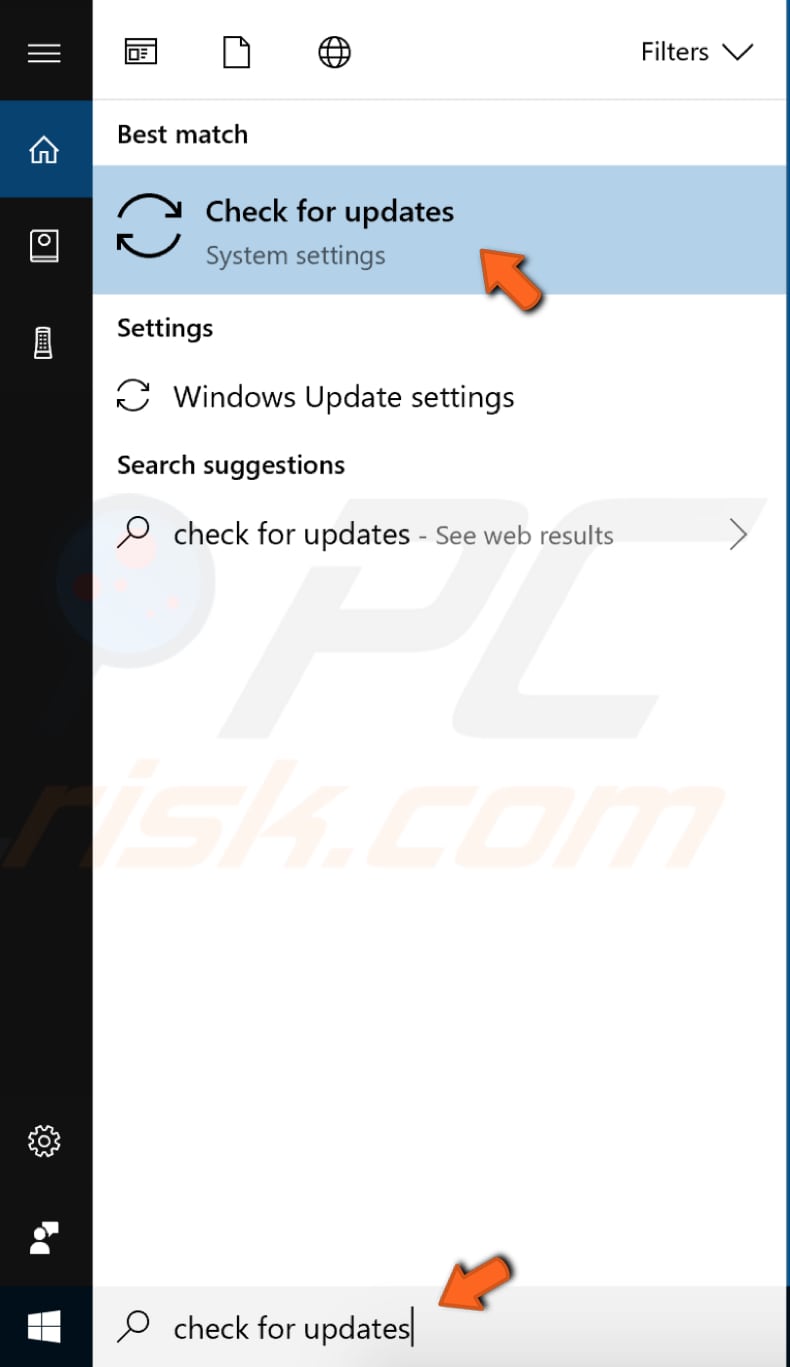
Try to update your current version of Windows. Checking for updates for the entire Windows operating system is usually a good idea and might help solve this problem. To check for Windows Updates, type "check for updates" in Search using the On-Screen keyboard and click the "Check for updates" result.
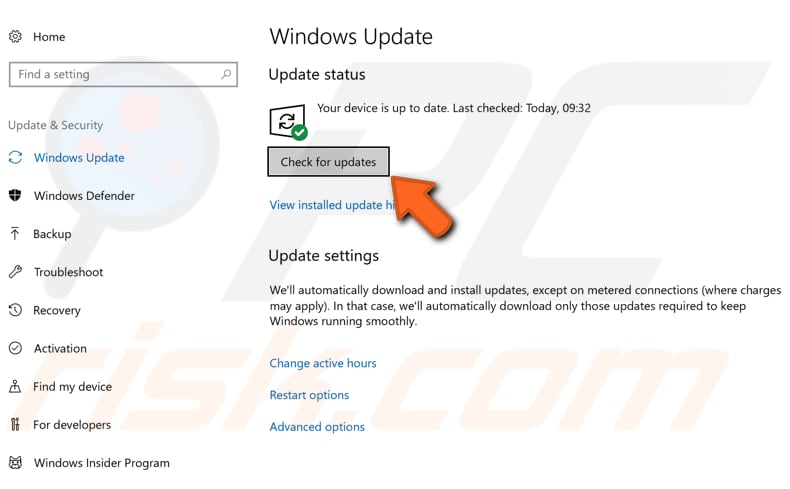
You should be automatically directed to the Windows Update section. Click "Check for updates". Windows will start checking for updates. If there are updates available, install them and check for updates again (just to ensure that you have the latest updates on your operating system).
After the updates are installed, see if you still have problems with the keyboard.
Disable Fast Startup
Fast startup is a feature on Windows 10 (and also Windows 8) that provides a shorter boot time when starting up the computer. It is a valuable feature and one that most people use without knowing.
However, some people disable it immediately when they receive a new computer with the Windows operating system. With the fast startup feature enabled, shutting down the computer might seem like you are completely shutting it down, but this is not entirely true since it moves into a state between hibernation and shutdown.
Leaving fast startup enabled should not harm the computer since it is a Windows feature, but this could be why the keyboard is not working.
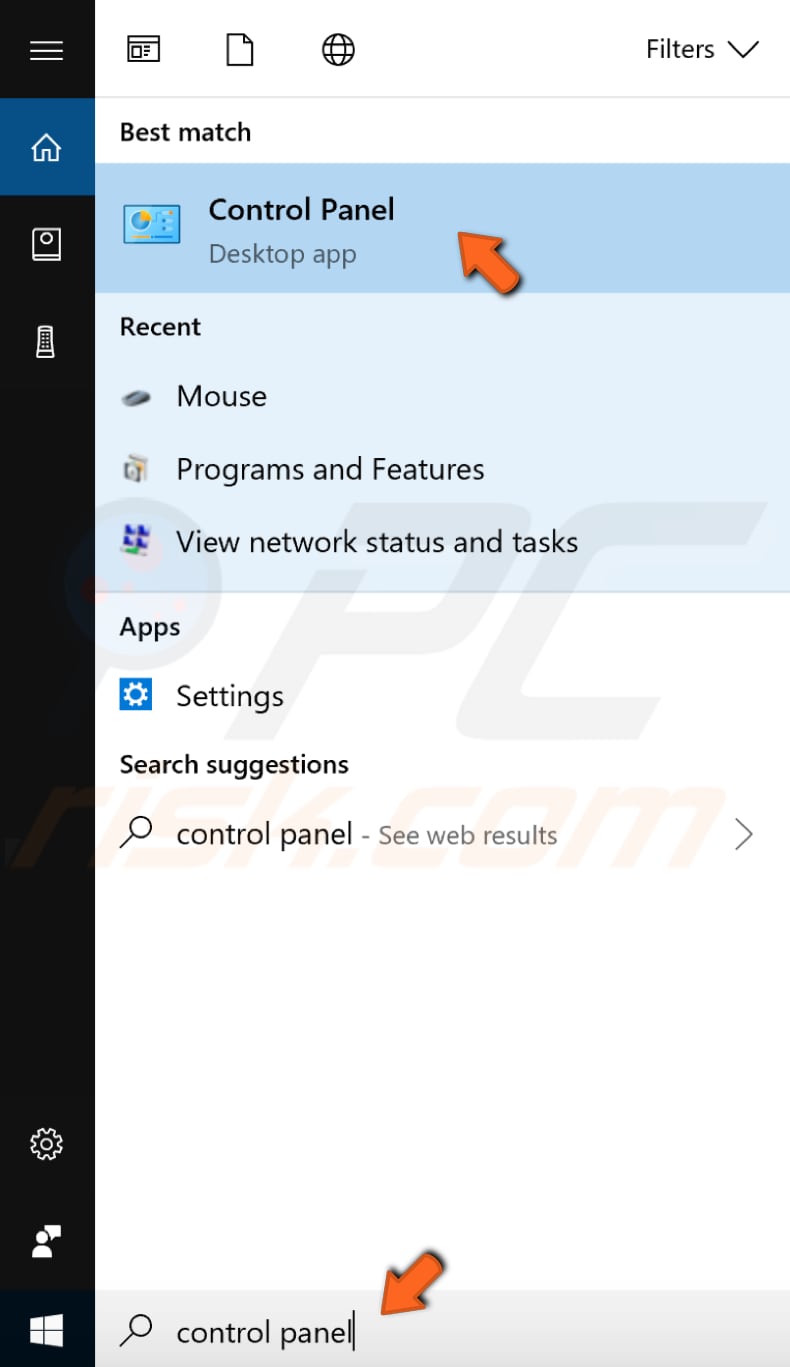
To fix the problem, you could disable this feature to see if it helps. To disable this feature, go to Search and type "control panel" using the On-Screen keyboard and click the "Control Panel" result to open it.
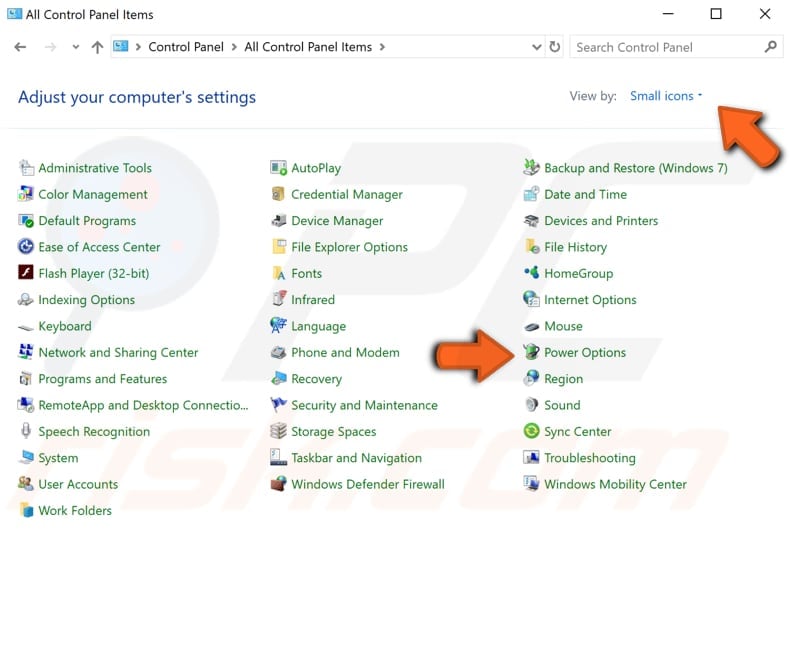
In Control Panel, set "View by:" to "Small icons", find "Power options", and click it.
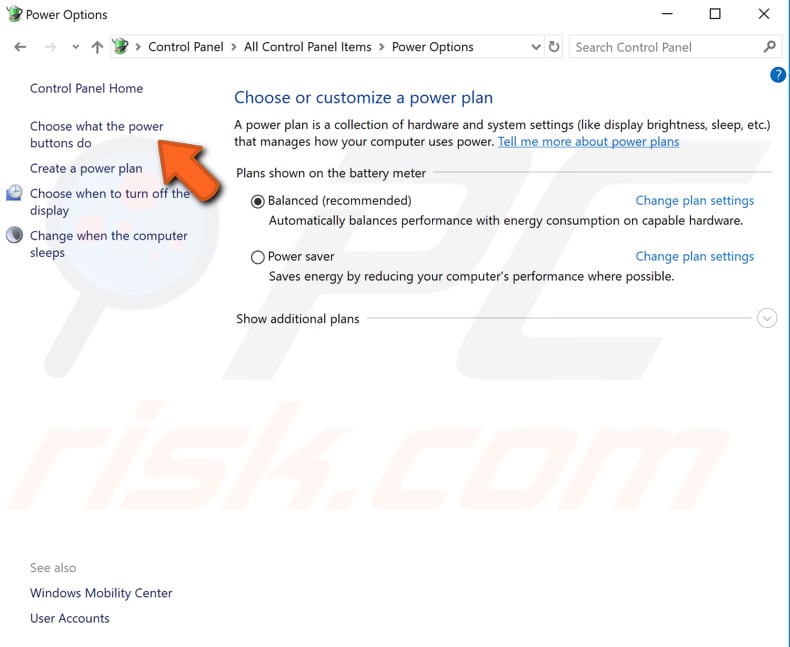
In the Power Options window, click "Choose what the power button does".
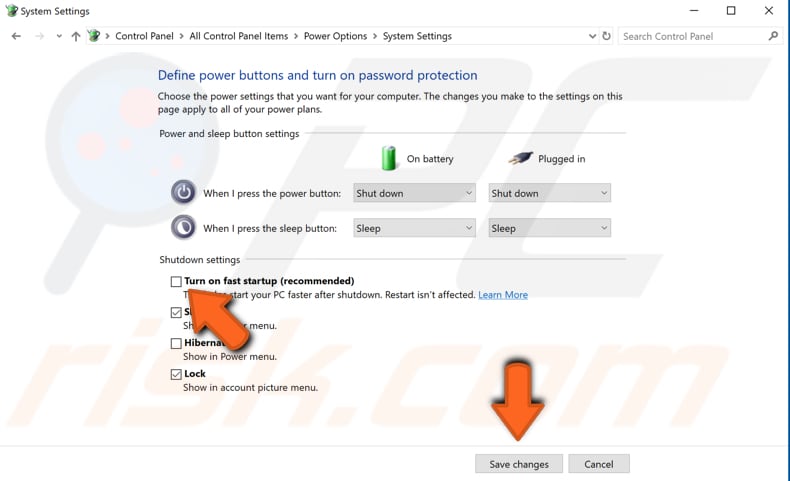
Click "Change settings that are currently unavailable" and then uncheck the "Turn on fast startup (recommended)" option if it is enabled. Click "Save changes" to save the changes made and restart the computer. See if this fixes the keyboard problem.
Restore Your System Using Restore Points
The System Restore tool creates restore points. A restore point is a collection of essential system files stored by System Restore on a given date and time. System Restore reverts everything to a saved restore point, but first, you must have one recorded.
If a restore point does not exist on the computer, System Restore has nothing to revert to. To use this tool, you must have previously created restore points. With a created restore point, this feature will bring your system back to the previous working state, without affecting your files and data.
If you have any system restore points created before you started experiencing issues with your keyboard, you might be able to fix the problem by performing a System Restore.
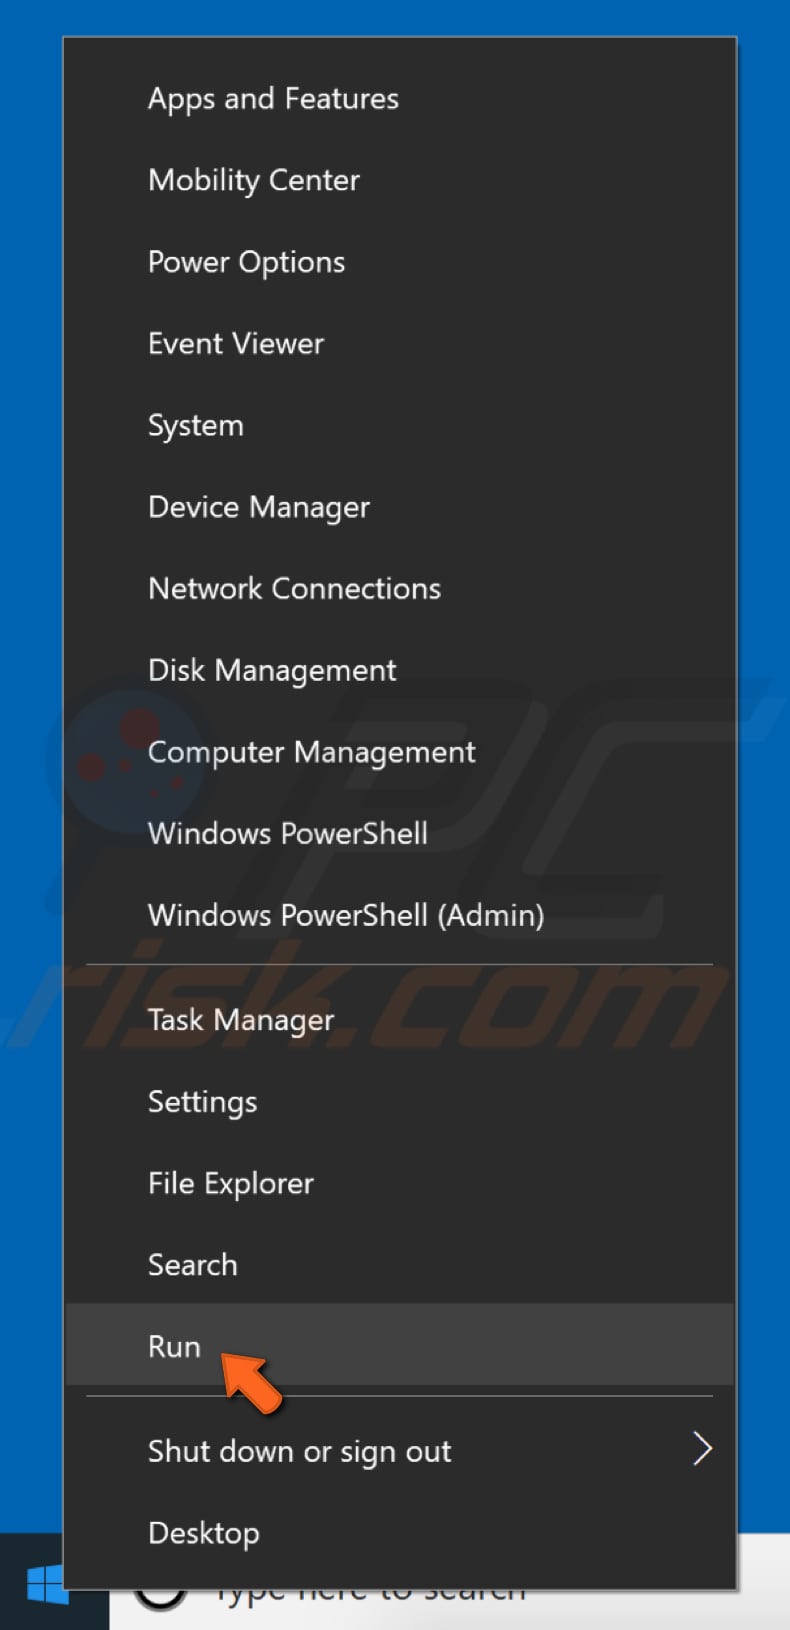
To restore your system, launch Run. To start it, right-click the Start button and select "Run" from the contextual menu.
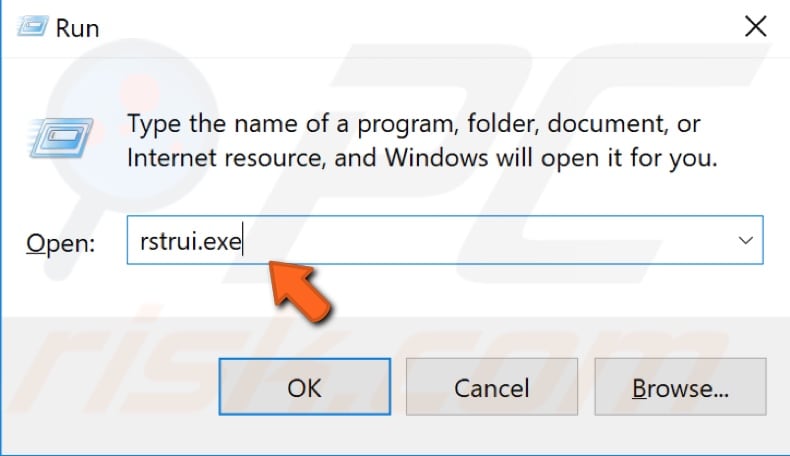
In the Run dialog box, type "rstrui.exe" using the On-Screen keyboard and click "OK".
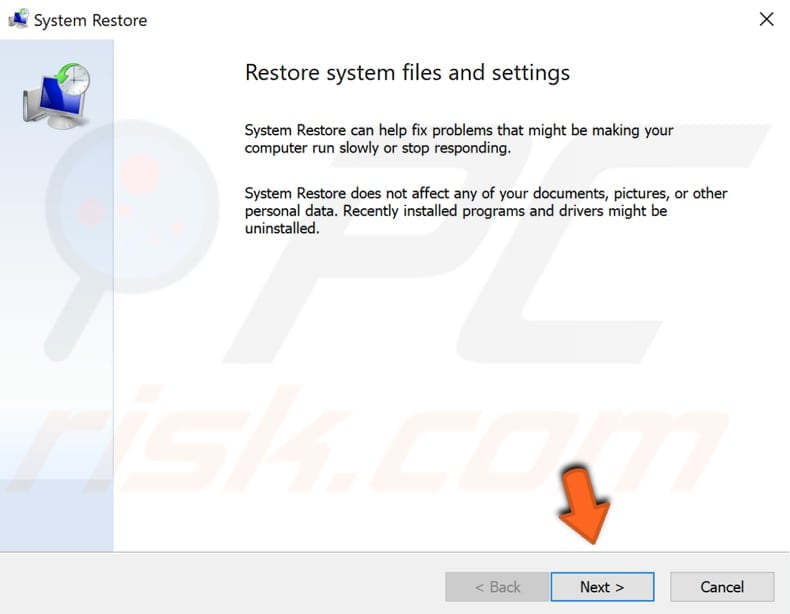
In the System Restore window, click "Next".
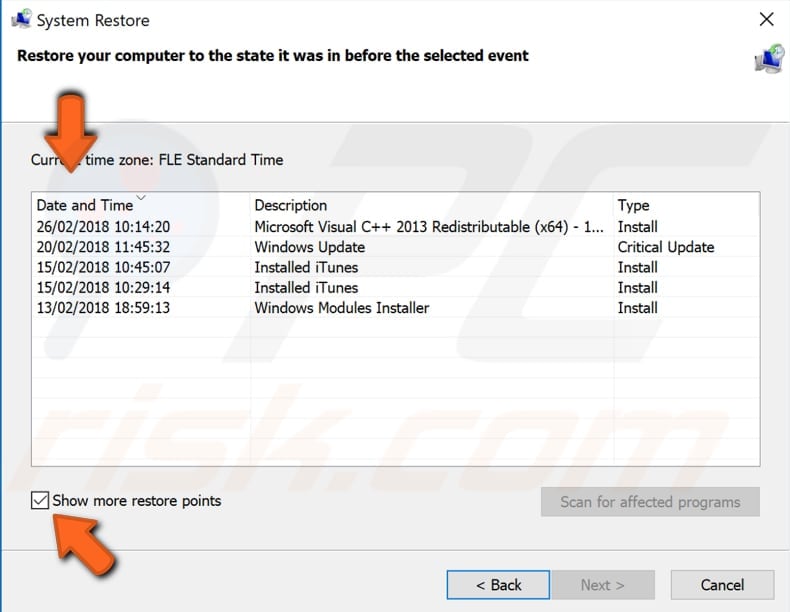
If there are restore points created, you will see a list of them. Mark the "Show more restore points" checkbox. This should display more restore points. Select the most appropriate restore point (depending on time created, etc.) and click "Next".
Do not select a Restore Point when the problems with your keyboard were already present.
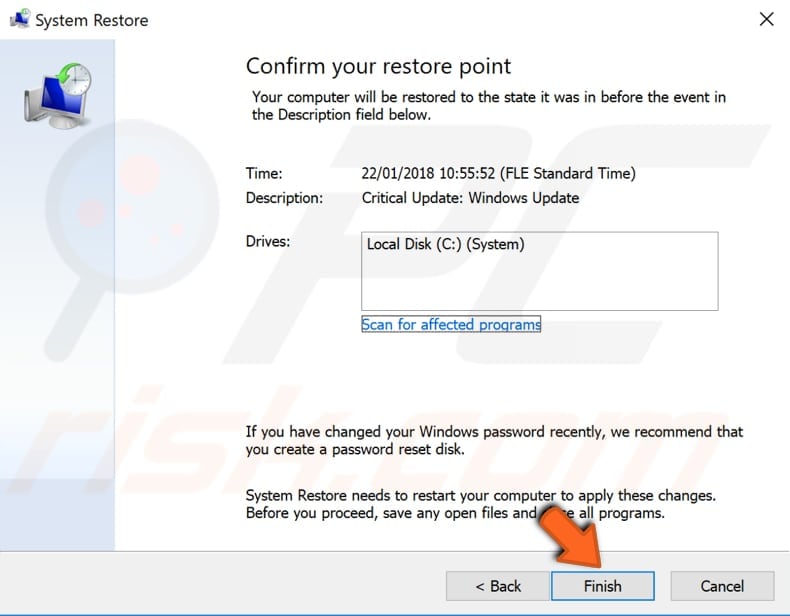
Confirm the restore point. Your computer will be restored to the state before the event detailed in the "Description" field. If you are happy with your choice, click "Finish" and begin the system restore process.
We hope that this guide was helpful and you were able to solve the keyboard problem. If you know of other solutions not mentioned in our guide, please share them with us by leaving a comment in the section below.

▼ Show Discussion