How to Set Up an Alarm Clock on Mac?
![]() Written by Karolina Peistariene on
Written by Karolina Peistariene on
How to Set a Recurring Alarm Clock on a Mac Computer?
Minor features such as alarm clocks can be included by default in Mac's operating system and are popular with many users. If you have not yet used this feature, it can be challenging to set up. Many users refer to the Mac App Store to download an alarm clock, unaware of the built-in one.

The Calendar application allows you to set up the alarm clock and offers other functions such as alarms for birthdays, meeting reminders, or one-time alarms for special events. In addition, this software provides a snooze feature, which repeats the warning, delayed by 15 minutes.
Since Apple products communicate via iCloud, all event reminders and alarms will be shown on any Mac OS or iOS device. In this article, we provide information on available Calendar app functions.
Video showing How to Set an Alarm Clock on Mac?
Table of Contents:
- Introduction
- Set up a one-time alert
- Set up events and birthday alerts
- Settle automatic launch of your Mac
- Use Automator to make your Mac act as an alarm clock
- Video showing How to Set an Alarm Clock on Mac?
Set up a one-time alert
We will begin with the basics. First, set up a one-time alert with text and audio messages.
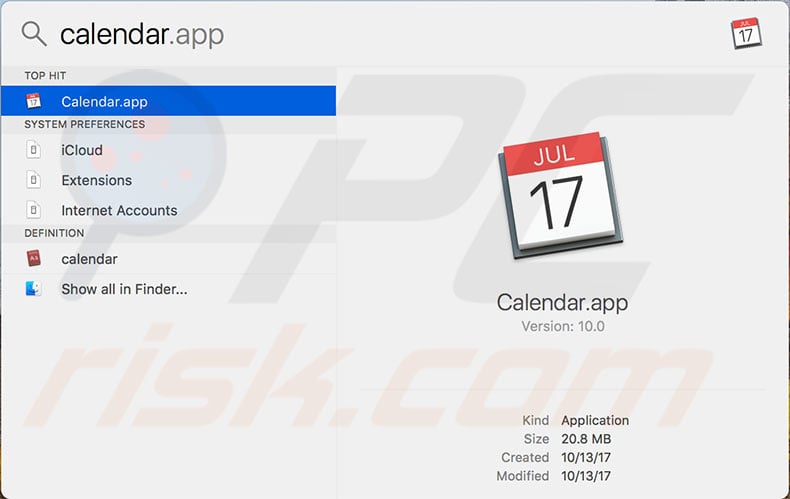
1. Launch the Calendar app, which you can find in your Dock or Launchpad. Alternatively, invoke Spotlight by pressing Command and Spacebar, and then type calendar.
2. Once the software has launched, double-click the day you wish to set the alarm.
3. Set the name of the alarm by typing it in the New event text area.
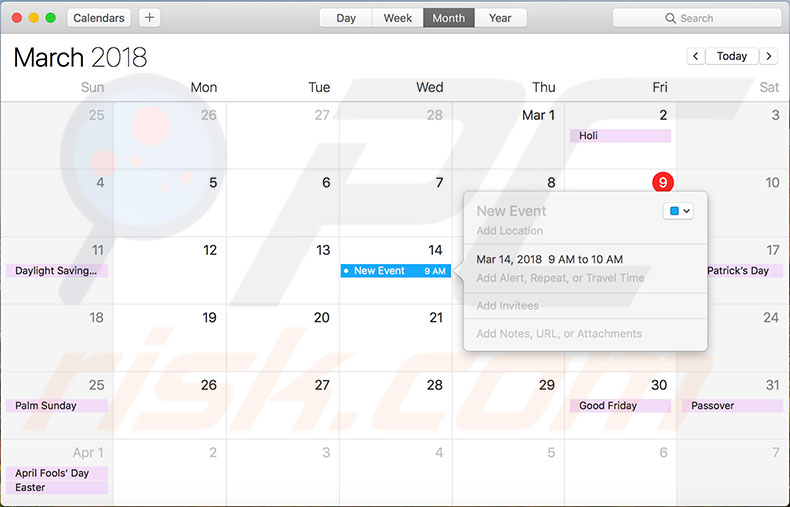
4. Next, set up the date and time when the alert should start - to manage the details, simply click on them and choose from the list.
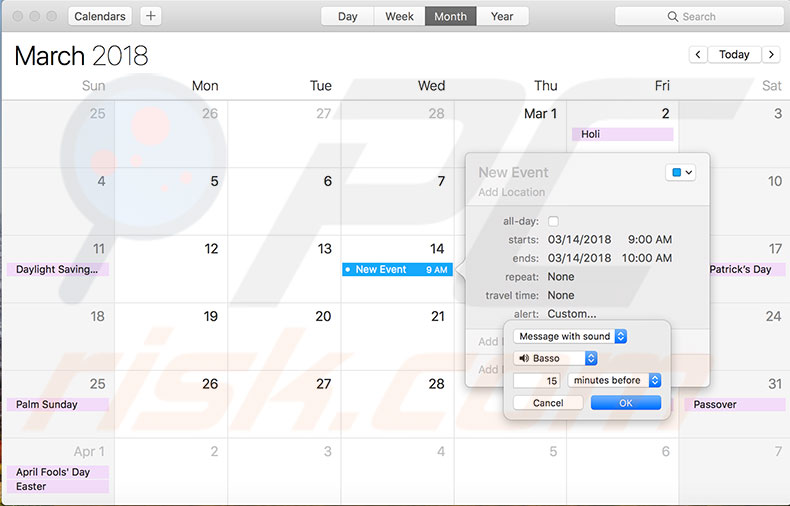
5. Then click Alert and select Custom from the drop-down menu.
6. In the first drop-down menu, choose the Message With the Sound option, select the sound from the list of the available sounds in the second drop-down menu. Alternatively, choose Open File and choose your desired audio file from the hard drive, which will play when the alarm goes off.
7. Finally, set the time you require the audio file or sound to play by clicking on the last drop-down menu. There are a number of options, some of which will require you to enter the number of minutes.
Set up events and birthday alerts
The Calendar offers an event (such as a birthday or important meeting) reminder, which will display a message about the forthcoming event.
1. To set up the alert, open the Calendar application.
2. Click on Calendar from the menu at the top of the screen, and choose Preferences.
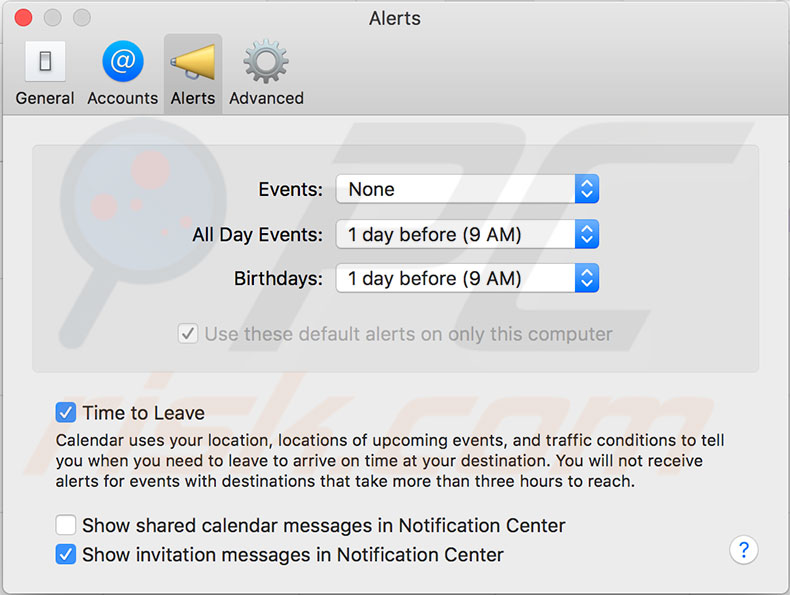
3. In the new window, select the Alerts tab, click on Events, and select the type of alert from the list. For example, at the time of the event or from five minutes to two days before the event.
Another feature, All Day Events, offers several types of alerts.
1. Click the drop-down menu.
2. Select options such as On the day of the event or a maximum of one week before the event.
The last feature, birthdays alerts, allows you to choose the same types of alerts as simple events. However, birthdays are separated from other events and might contain a different type of alert.
Settle automatic launch of your Mac
You now know Calendar functions, but of course, they will not work if the Mac is turned off. To avoid this situation, set the Mac to start or wake automatically before you want it to behave like an alarm clock.
1. To do this, open System Preferences and choose Energy Saver.
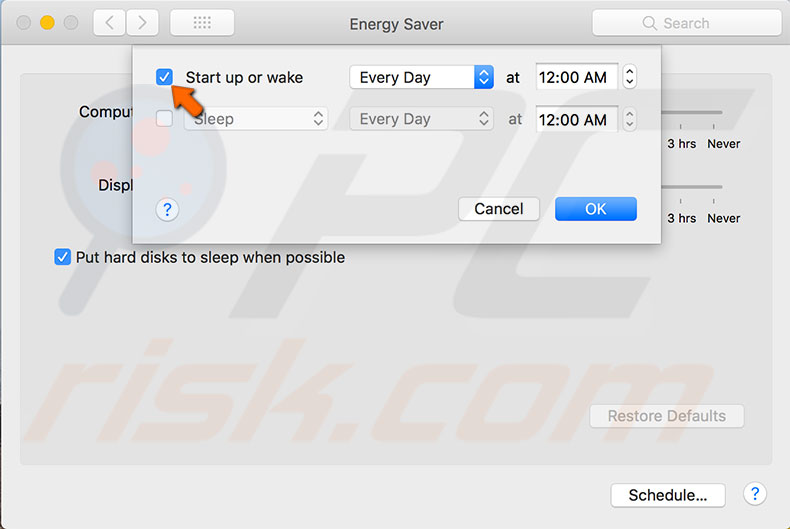
2. Click on Schedule.
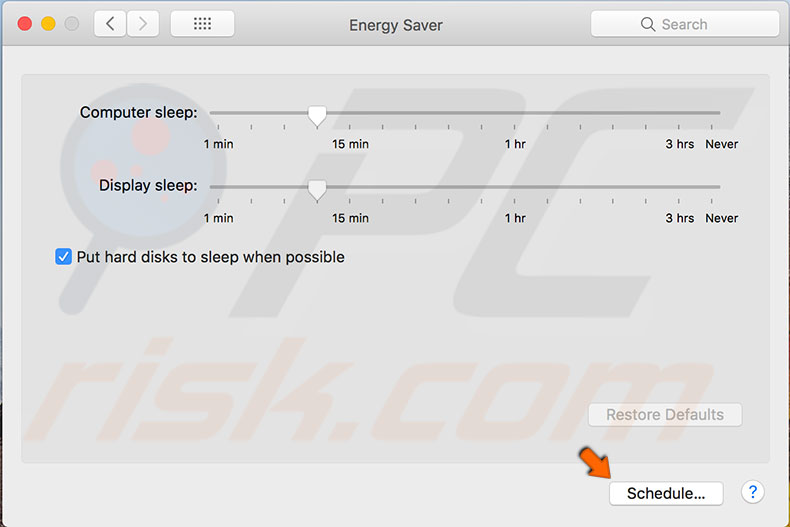
3. Enable the Startup or wake checkbox and select the days you wish the Mac to automatically turn on from the drop-down menu.
There are a number of options such as weekdays, weekends, and every day. You can also choose a particular day of the week. However, you cannot select several separated days such as Monday, Wednesday, and Friday. Despite this, you do not have to worry about receiving an alarm every day since this step only defines times when your computer starts automatically.
Note: although most recent Macs run on SSDs, they still require some time to completely load, so do not set the automatic turn on at the exact time you need an alarm. For example, if you need to wake up at 8:50 AM, set the time to turn the Mac on to 8:40 AM.
Your Mac will now start automatically but require you to enter a password to stop the alarm sound.
1. To avoid this frustrating situation, go to Users & Groups preferences under System Preferences.
2. Click the Login Options beneath the list of users.
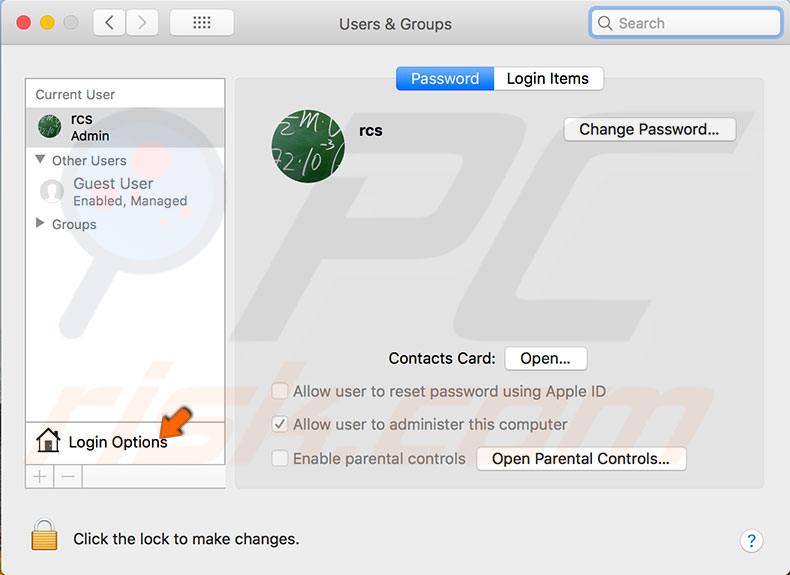
3. To make changes, you must authenticate by clicking the lock icon in the window's bottom-left corner and entering the password.
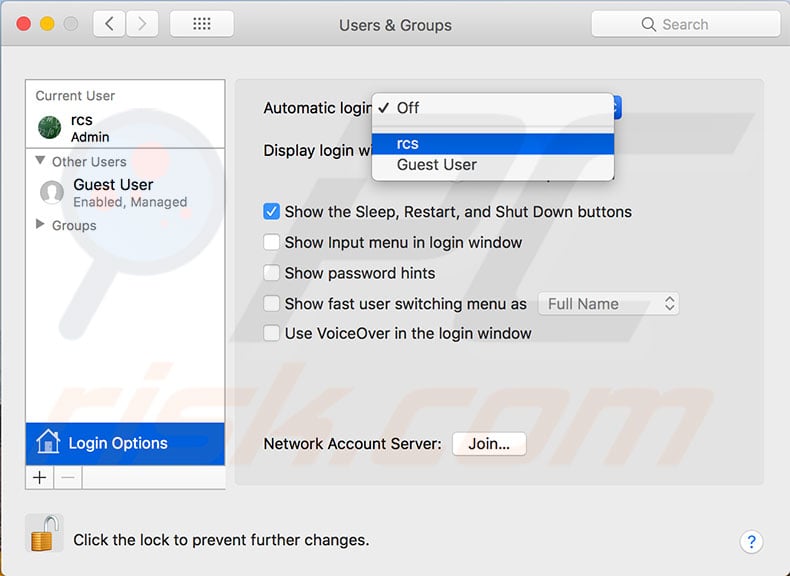
4. Select your account from the drop-down menu beside Automatic login and enter the account password to confirm your action.
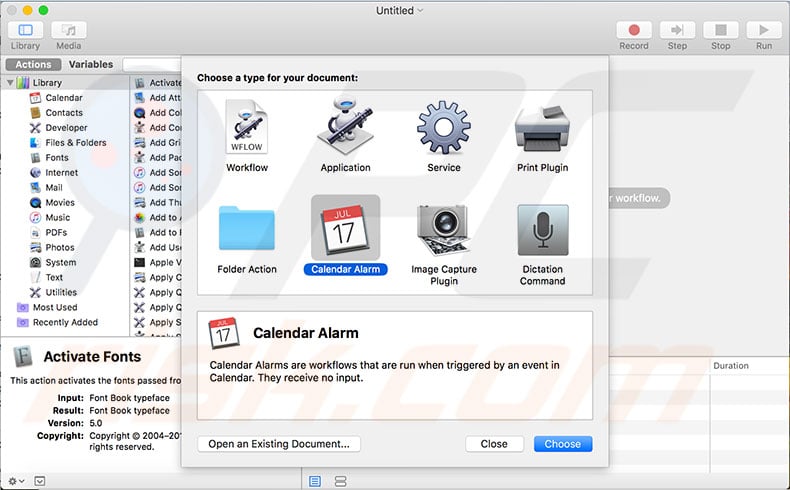
Use Automator to make your Mac act as an alarm clock
Automator is a useful tool that allows you to create workflows for basic actions without any programming experience. Simply select the desired actions from the built-in builder.
1. Launch the software by using Spotlight or through Finder by going to the Applications folder.
2. Once the tool has launched, click New Document and select Calendar Alarm as your document type. This particular workflow is triggered by an event in the Calendar.
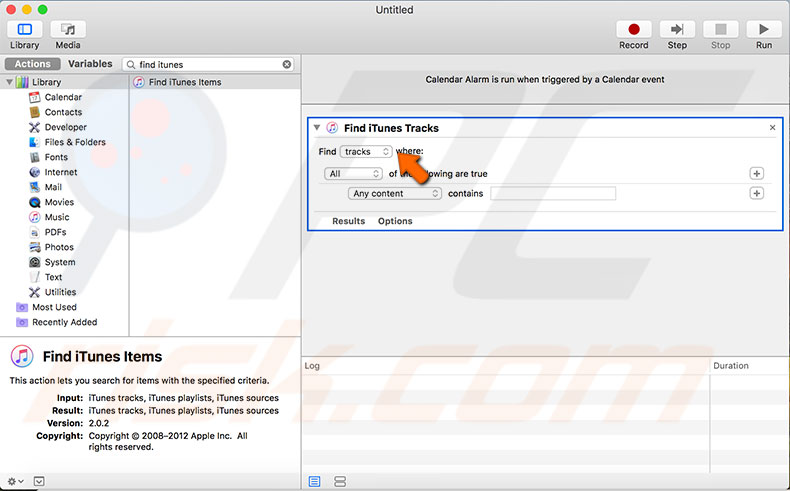
When you are familiar with the features of Calendar, expand them by using the Automator's workflow. In the left sidebar, all actions that Automator can perform are listed. In this case, we just need a few. The first action we will use is Find iTunes Items - to find it is more accessible through items in the list than using the search field.
1. Once you see action, simply drag it to the main workflow panel. For more detailed demonstration purposes, we will poorly edit the action - command the Automator to find playlists rather than tracks by changing the option in the drop-down menu.
2. Next, type in the name or part of it into the text field and try out the workflow by clicking Run.
3. Click the Results to check the action's output.
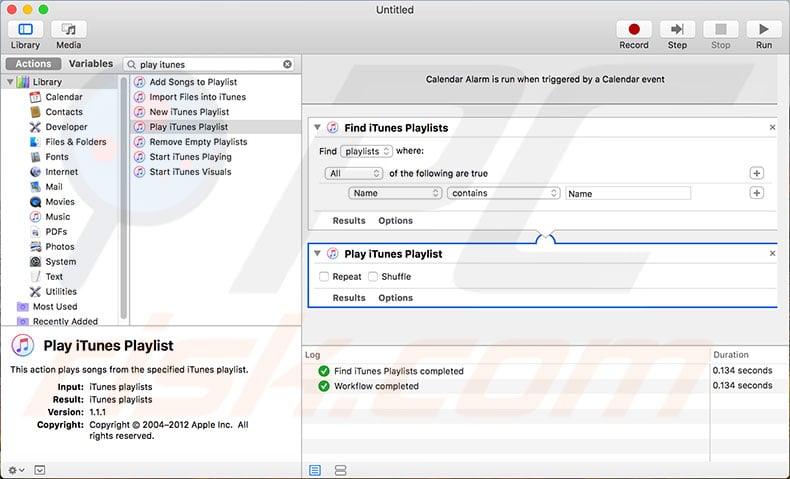
4. This workflow will not play any music at this point. To finish the workflow, add one more action called Play iTunes Playlist. To add this action, simply drag it to the main workflow panel.
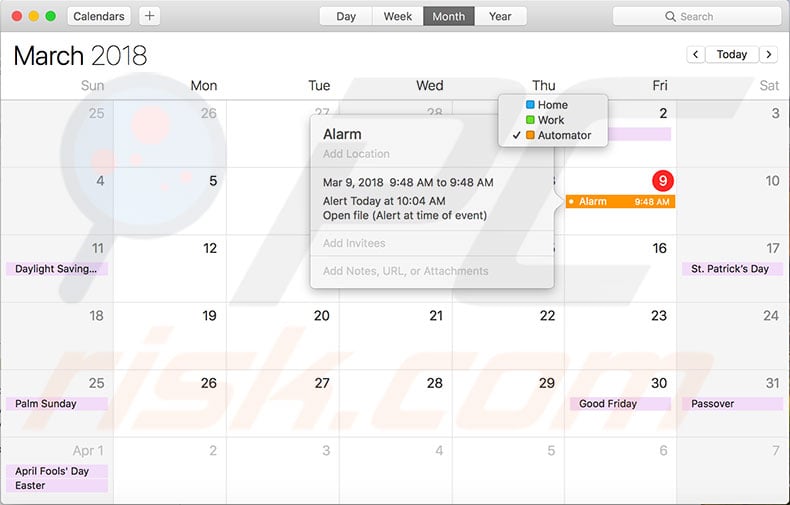
5. Once you have created the workflow, click File in the menu at the top of the screen and select Save, or use the Command and S shortcut.
6. Once you have saved the workflow, the Calendar app will be launched automatically, and the event created. The event will have default one-time event preferences, so update them to your desired options using the above methods.

▼ Show Discussion