How to Upgrade Your MacBook With an SSD Drive?
![]() Written by Karolina Peistariene on
Written by Karolina Peistariene on
How to Upgrade Your MacBook by Replacing Your Hard Disk Drive With the New SSD Drive?
A lot of people are questioning how to improve the performance of their MacBook computers. The good news is that Apple allows two types of upgrades without damaging your warranty. It's RAM (Random Access Memory) upgrade and hard disk drive replacement.
If your Mac freezes while multitasking (running several applications at one time), this may be caused by a lack of RAM on your system. On the other hand, if it's working slowly, but you can still complete your tasks, that means your hard drive is slow to perform read/write processes.
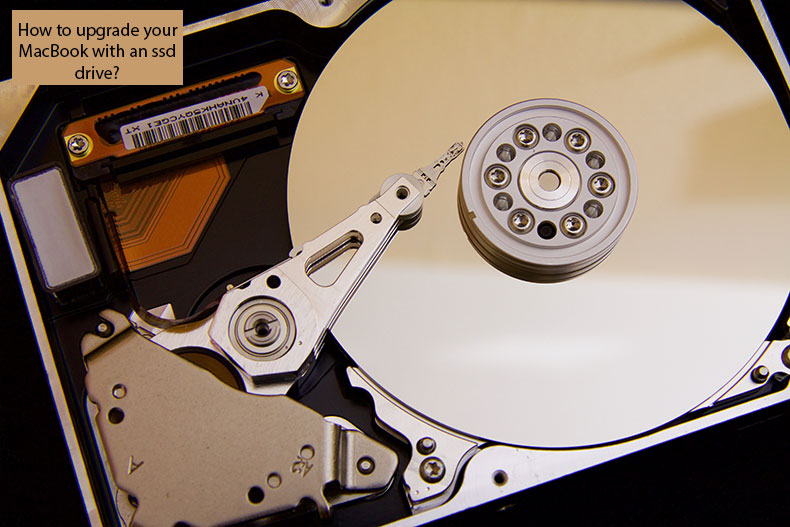
The option for you would replace an old hard drive which probably is an old HDD (hard disk drive), the storage device that uses magnetic storage. Nowadays, computers come with an SSD (solid-state drive) hard disk. They are much faster if compared with conventional hard disk drives.
Table of Contents:
- Introduction
- How to choose the correct SSD for your Mac?
- Required tools to replace the hard drive of your MacBook
- Prepare SSD for installation
- Install the SSD into your MacBook
How to choose the correct SSD for your Mac?
First of all, you should know some specifications to choose properly. We recommend using SSD hard drives only on MacBooks, released in 2009 or later with a 3.0Gbps to 6.0Gbps interface speed, More importantly, we recommend choosing a 6.0Gbps hard disk.
Now you have to decide on is the capacity of your new hard drive. The cheapest SSDs come with 120-128GB. You probably consider that is quite much space, but we recommend checking your existing hard drive, how much space you already have used. While a hard drive is used only for the operating system and several practical applications, 120GB is more than enough. I
If you own an iTunes music library and photo or video library, the hard drive's free space will run out quickly. Remember that applications such as photo, music, and video editing will work faster while running on an SSD drive. Although, you may use an external hard drive to store your media content and some files that you're not using casually.
Another very important specification would be read and write speed, the higher is better. When you'll be decideding the required capacity and choosing between manufacturers and models, we recommend comparing their speed in these particular processes.
Required tools to replace the hard drive of your MacBook
Before you begin any works, ensure all you have all the necessary tools. Check the list below:
- New chosen SSD.
- Enclosure for the external drive.
- #00 and T6 size screwdriver.
- Drive cloning software.
Prepare SSD for installation
There are two methods to workaround. One method would be to connect the new SSD through the enclosure and clone your start-up drive. The second would be to install the new SSD into your MacBook, connect your old start-up drive through the enclosure, boot it, and then perform a cloning process.
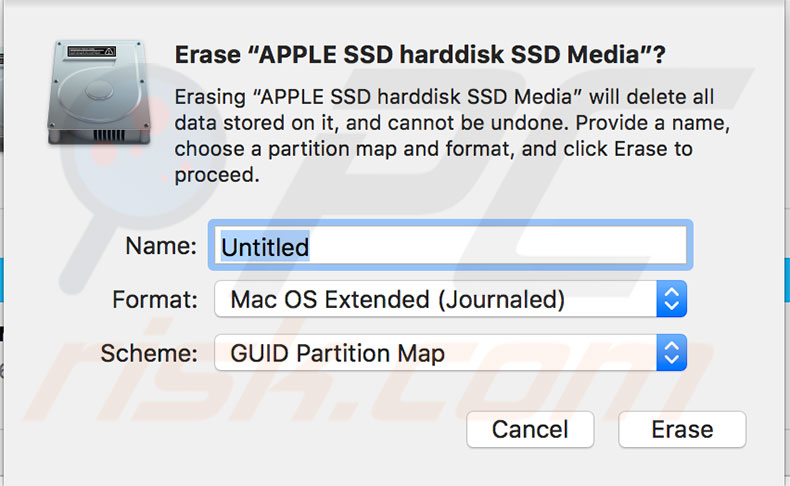
1. To begin with, connect your new SSD through the enclosure and launch the Disk Utility application on your MacBook.
2. Select the new hard drive and choose to erase it.
3. Set the format as Mac OS Extended (Journaled).
4. Once the formatting process finishes, use your cloning software. We can suggest using Carbon Copy Cloner, which offers you 30 days as a free trial.
5. After the cloning process, restart your MacBook.
6. After the start-up chime, hold down the Option key.
7. In the opened menu, select the new SSD as the start-up drive.
If your computer boots properly, it means the cloning process was successful. Alternatively, you may choose to install the ssd into your MacBook and then connect your start-up drive through the enclosure, format your new SSD, and clone the old start-up disk.
Install the SSD into your MacBook
1. To install SSD into your MacBook, flip over the computer, locate 10 screw holes, use the #00 screwdriver to remove all of them. Bear in mind to store your screws in a box or something similar, so you can be sure they won't be lost.
2. Remove the bottom of your MacBook. It should come off quickly, without any force. If you cant take it off, look up. Maybe you have missed some screws.
3. Look for a hard drive in the corner. It will be held by a plastic bracket. Remove the screws to release the holder and lift off the hard drive.
4. Unplug the SATA connector, remove the plastic tape carefully, and mounting screws located at the sides of the hard drive using a T6 screwdriver.
5. Add the mounting screws and plastic tape on your new SSD hard drive, plug in the SATA connector, and put it into the rubber holders.
6. Tight up the plastic bracket, then reattach the back case of your MacBook.
7. Finally, boot your computer. If you stored a cloned copy of your start-up disk into SSD before installation, hold down the Option key immediately after startup chime, select SSD as your start-up hard drive. Otherwise, connect your old start-up drive through the enclosure and follow the steps listed above.
8. When your MacBook booted, open the System Preferences and select a Startup disk to finish the upgrade.
9. Choose your new SSD as default.


▼ Show Discussion